Professional parametric cabinet design for SketchUp 2024
ML Cabinets is a professional SketchUp 2024 extension for designing
and placing fully parametric modular cabinets directly inside any 3D
model — from kitchen cabinetry and dressing room wardrobes to TV
units, bathroom vanities, office storage, and retail fixtures.
Every cabinet is built as a live Dynamic Component: resize it, and
every panel, shelf, and interior zone updates in under a second.
From a single dialog you control type, dimensions, construction
details, interior layout, materials, and hardware — then click
Create, position the wireframe preview exactly
where you want it, and click to place.
Design
Nine-tab configuration panel with live 3D preview for complete
cabinet control.
Edit
In-place modification, bulk editing, and style picker for rapid
iteration.
Library
Save and reuse cabinets, doors, handles, profiles, appliances,
and materials.
Schedule
Auto-generated project schedule with pricing, exports, and
client info.
Getting Started
The ML Cabinets Toolbar
When SketchUp loads ML Cabinets, a dedicated toolbar appears
automatically with one-click access to every tool in the extension.
The toolbar provides these buttons, from left to right:
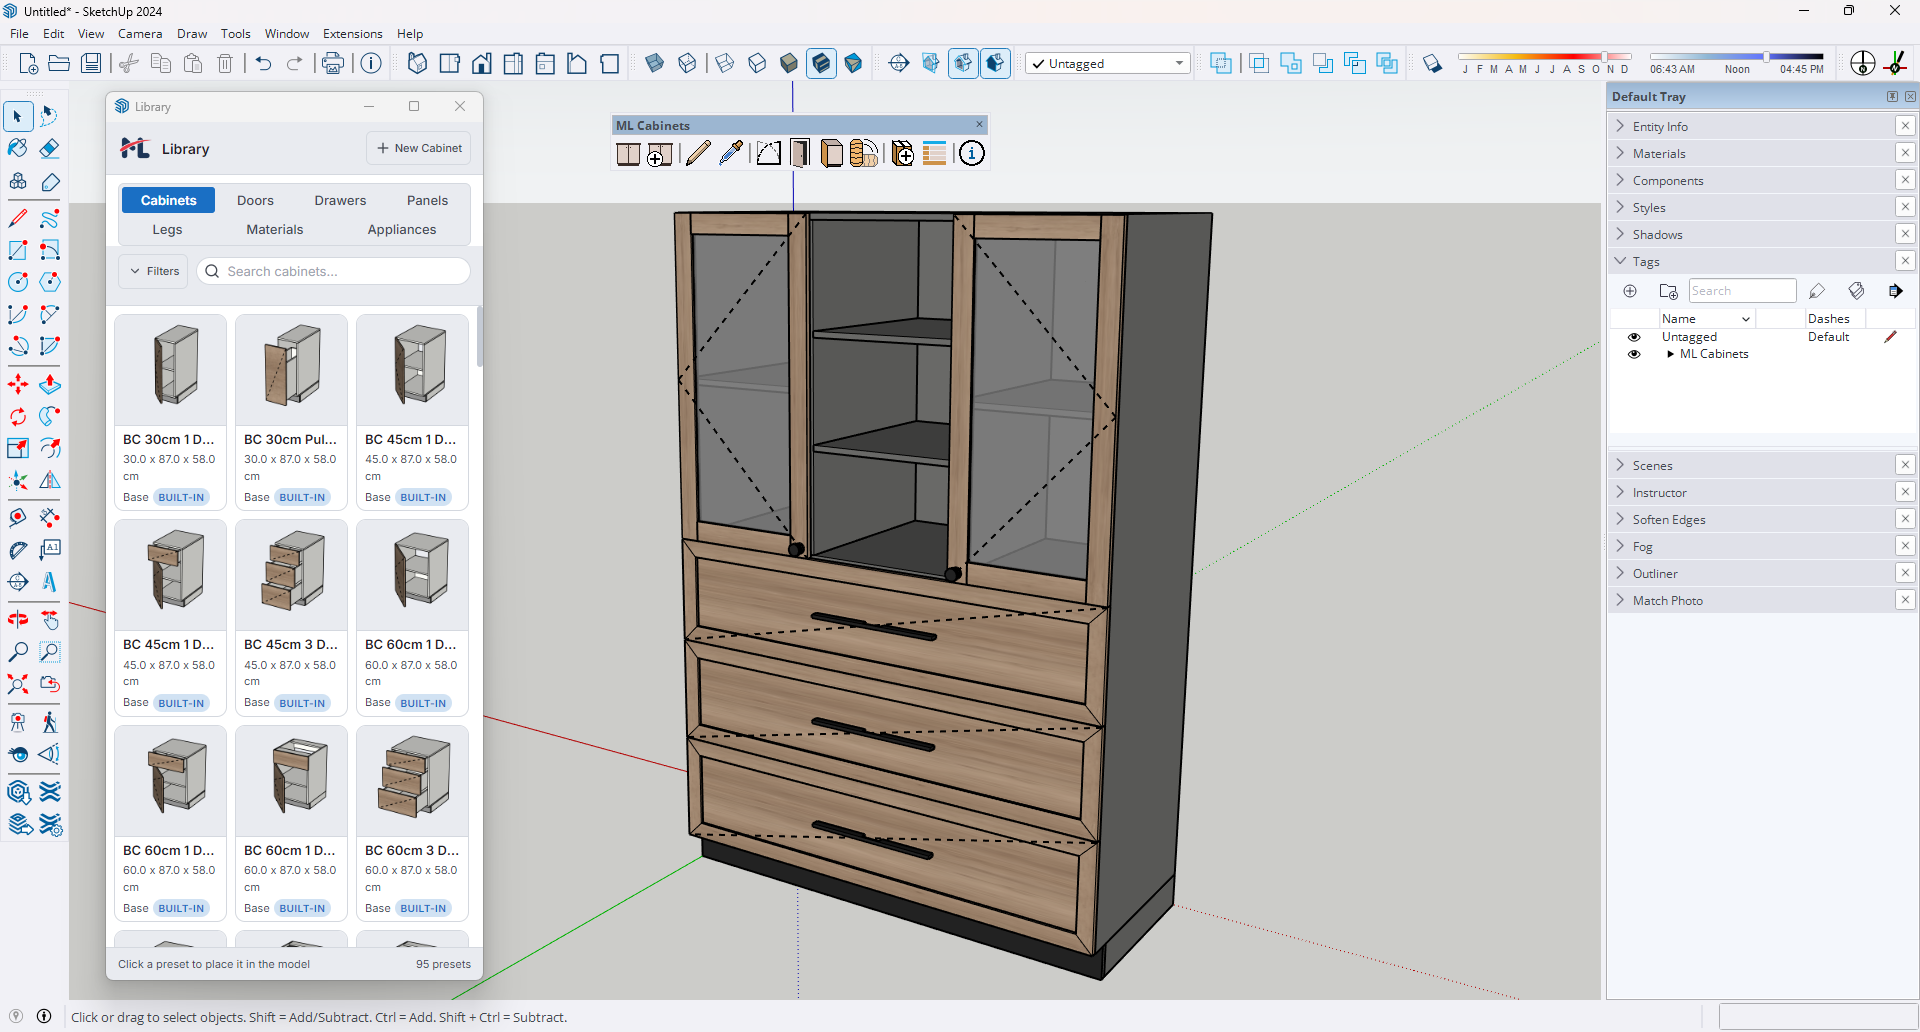
Library
Browse saved cabinet presets and place them directly in the
model.
New Cabinet
Open the full configuration dialog to design a cabinet from
scratch.
End Panel
Click an exposed cabinet side to add a decorative end panel.
Edit Cabinet
Reopen a placed cabinet's configuration for in-place
modification.
Style Picker
Copy a cabinet's style and paste it onto other cabinets — like
Format Painter.
Swap Door Opening
Flip a door's hinge direction with a single click.
Swap Grain Direction
Toggle material grain direction on doors, drawers, panels, and
blind face panels.
Open / Close
Animate doors and drawers open or closed for presentations.
Prepare for Manufacturing
Bake selected cabinet assemblies into manufacturing-ready
solid parts.
Add to Library
Save the selected component as a reusable preset.
Schedule Manager
View and export a schedule of all cabinets in the model.
Settings
Set currency and company defaults for the extension and optionally the current project.
About ML Cabinets
View extension information and open the User Manual.
Tip: Toolbar commands are available from
Extensions ML Cabinets in the menu bar. Relevant
cabinet actions also appear in the right-click context menu.
Your First Cabinet — Quick Start
Click New Cabinet
on the toolbar.
Choose a Cabinet Type from the dropdown on the
General tab (e.g., Base Cabinet).
Adjust dimensions, materials, and interior layout across the nine
tabs.
Watch the Live 3D Preview update as you make
changes.
Click Create Cabinet — a wireframe preview
follows your cursor.
Click anywhere in the viewport to place the cabinet.
Upgrading and Protecting Your Library
Customer-created assets are stored outside the extension folder on Windows and macOS, so replacing ML Cabinets does not remove the personal library. Built-in assets remain part of the extension. Keep a separate backup of your personal library.
If you are upgrading from a version older than 3.2.2, preserve the old library before replacing the extension:
Download the Library Migration helper from the ML Cabinets 3.2 Gumroad listing. Install the helper RBZ through SketchUp's Extension Manager while the old ML Cabinets installation is still present.
Run Extensions > Preserve ML Cabinets Library Before Updating. It copies indexed user-created assets to permanent storage and retains the original files and references.
Confirm successful preservation and the reported asset count. If preservation is incomplete, or no assets are found when you expected some, keep the old installation and resolve the problem before updating.
Install the new ML Cabinets RBZ, restart SketchUp and check your user presets. Avoid saving new assets in the old version after migration. You can uninstall the helper afterward.
Users on 3.2.2 or later already use permanent storage and do not need to repeat the pre-update migration. If the old extension was replaced and assets were deleted, restore an old library backup first; the helper cannot recreate missing files.
New Cabinet Dialog
The New Cabinet dialog is the main design station in ML Cabinets. It
is where the cabinet is defined before placement: its overall size,
how the carcass is built, how the inside is divided, what the fronts
look like, what hardware is used, and which materials finish the
result.
Open it from the ML Cabinets toolbar, work across the nine tabs —
General, Construction,
Configuration, Doors,
Drawers, Panels,
Materials, Edge Banding, Cost Estimate — review the result in the live 3D
preview, then click Create Cabinet to move into the
placement stage. When editing an existing cabinet, the same dialog
opens in edit mode and the final button becomes
Apply.
How The Dialog Is Organised
The dialog is arranged as a practical design workflow rather than
a long form. The left sidebar is used to move between the nine
tabs, the centre area shows the active tab, and the right side is
reserved for the live 3D preview.
Area
What It Does
Sidebar
Holds the nine tab buttons and the collapse or expand
control for focusing on the work area.
Main Work Area
Shows the active tab and its fields, selectors, tables, and
preset pickers.
3D Preview
Updates while you work so you can check proportions,
openings, profiles, materials, and handle placement before
the cabinet is created.
Footer
Holds Restore Defaults,
Make Default, and the final
Create Cabinet or Apply
button.
The most reliable working order is to shape the cabinet body first
in General and Construction,
then build the opening layout in Configuration,
then style the cabinet in Doors,
Drawers, Panels, and
Materials.
Cabinet Types & Presets
The dialog starts with seven cabinet archetypes. Each one loads a
sensible starting point instead of a blank shell, including size,
toe kick behaviour, construction choices, and a starter internal
configuration.
Type
Default Width
Default Height
Default Depth
Typical Use
Base Cabinet
60 cm / 24 in
82 cm / 32.25 in
58 cm / 23 in
Standard floor cabinet under a worktop
Wall Cabinet
60 cm / 24 in
60 cm / 24 in
35 cm / 14 in
Hanging cabinet above a run or appliance zone
Tall Cabinet
60 cm / 24 in
200 cm / 78.75 in
58 cm / 23 in
Full-height pantry or utility storage
High Cabinet
60 cm / 24 in
220 cm / 87 in
58 cm / 23 in
Taller full-height storage with stacked fronts
Base Corner
90 cm / 36 in
72 cm / 28.5 in
90 cm / 36 in
Corner base solution using an L-shape or blind corner
Wall Corner
90 cm / 36 in
60 cm / 24 in
35 cm / 14 in
Corner wall cabinet for upper storage runs
Filler
6 cm / 2.5 in
72 cm / 28.5 in
58 cm / 23 in
Narrow closing piece for gaps and end conditions
What changes when you switch type: Dimensions,
floor relationship, construction defaults, starter group layout,
and the default styling selections all change together, so it is
best to choose the cabinet type before doing detailed work.
Make Default & Restore Factory Defaults
The footer lets you turn your own preferred setup into the new
starting point for a cabinet type. This is one of the fastest ways
to align the dialog with your usual standards.
Make Default
After configuring a cabinet type exactly the way you prefer, click
Make Default. A confirmation message names the
current cabinet type so you know which starting point is being
updated.
Choose the cabinet type you want to customise.
Adjust the cabinet across any or all nine tabs.
Click Make Default.
Confirm the save. New cabinets of that type will open with those
values already loaded.
Restore Defaults
Click Restore Defaults to remove your saved
preference for the current cabinet type and return that type to
the original shipped setup.
Click Restore Defaults.
Review the confirmation message.
Confirm to return the current type to factory defaults.
Important: Defaults are saved per cabinet type.
Changing the default for a Base Cabinet does not change Wall,
Tall, High, Corner, or Filler defaults. These actions also do not
modify cabinets that are already placed in the model.
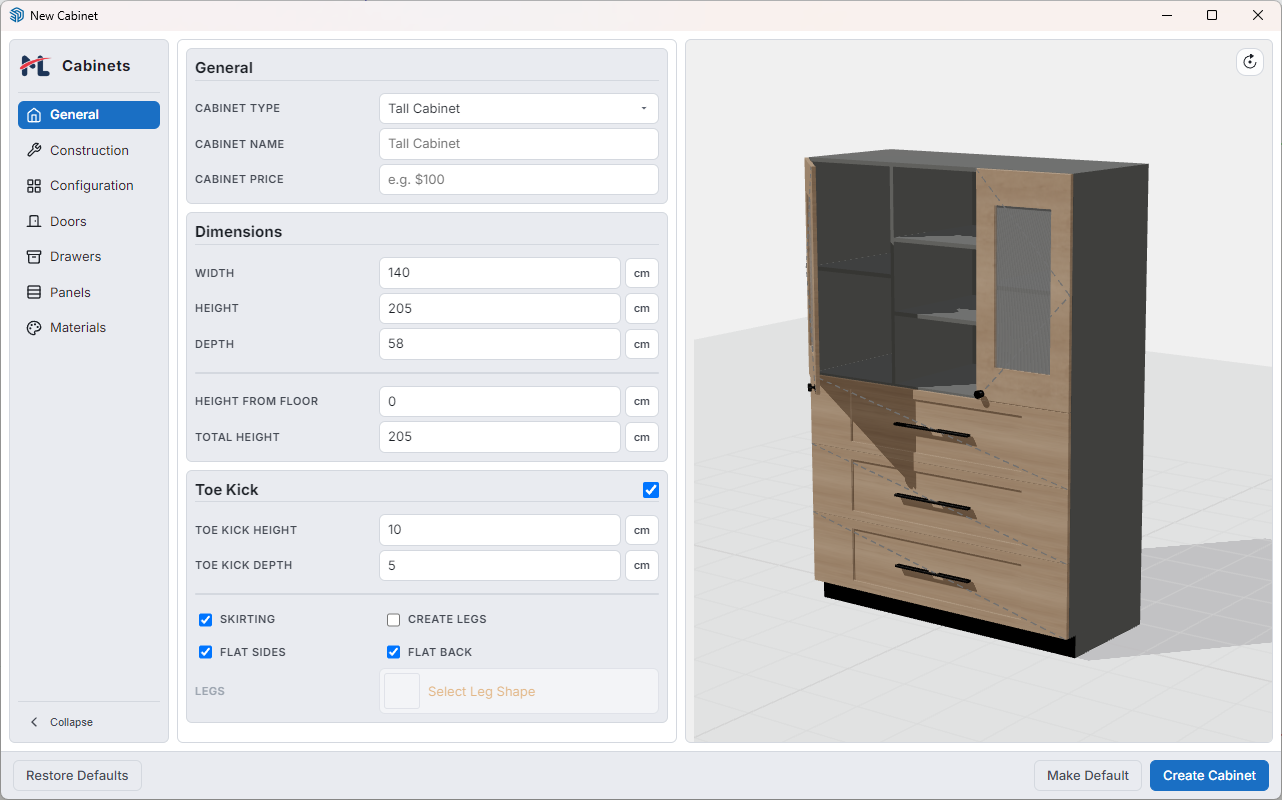
General Tab
The General tab establishes the cabinet's role,
size, and relationship to the floor. If you want to form the
overall cabinet body correctly, this is the first tab to finish.
Cabinet Identity
Cabinet Type chooses the family of cabinet and
reloads the matching defaults.
Cabinet Name gives the unit a readable project
name for schedules and review.
Cabinet Price stores the unit price used later
in the schedule manager.
Dimensions
Width, Height, and
Depth define the outer envelope.
Height from Floor is especially important for
wall cabinets, floating cabinets, or any unit that does not sit
on the floor.
Total Height lets you check the installed
height immediately.
Total Width appears for corner cabinets to help
you understand the full wall-space requirement of the chosen
corner solution.
The dialog follows the active model unit system automatically, so
the same workflow works in metric and imperial projects without
switching tools or manual conversions.
Toe Kick And Legs
The lower section of the tab defines how the cabinet meets the
floor. These settings are essential for floor cabinets and tall
units because they control both comfort and appearance.
Enable Toe Kick turns the recessed base on or
off.
Toe Kick Height sets the vertical size of the
recess.
Toe Kick Depth sets how far the recess sits
back from the front face.
Skirting uses the selected library profile. Enable Skirting in General, then use Skirting Profile to choose a library profile. The picker starts on the Skirting role; switch to All to see other profiles. Selecting a profile sets Toe Kick Height to its native height and keeps the cross-section unchanged. Disable Skirting or Toe Kick to remove skirting from the estimate. The factory default is Rectangle_0310, a 0.3 cm deep by 10 cm high skirting profile. A legacy configuration with no saved profile opens with this default; an explicit None choice remains selected when the cabinet is reopened. With None and Skirting enabled, the cabinet uses its plain skirting strip instead of a library profile. When a library profile is selected, pricing uses its rate per linear metre.
Create Legs defaults to LG_101
when no leg preset has been chosen. Toggling legs off and on
preserves an existing choice. This switches the support to legs and
enables the leg preset selector.
Flat Sides and Flat Back
adjust how the toe-kick zone is treated around exposed faces.
Best practice: Finish the full cabinet envelope
in General before building the layout. If width,
height, depth, and floor relationship are still changing, the
opening design stage will be slower and less reliable.
The live Cost estimate beside Cabinet Price opens the detailed estimate. Cabinet Price is your selling price for the schedule and is never overwritten by estimated costs. Enabled legs count as four on rectangular/blind cabinets or five on L-shaped corners.
Construction Tab
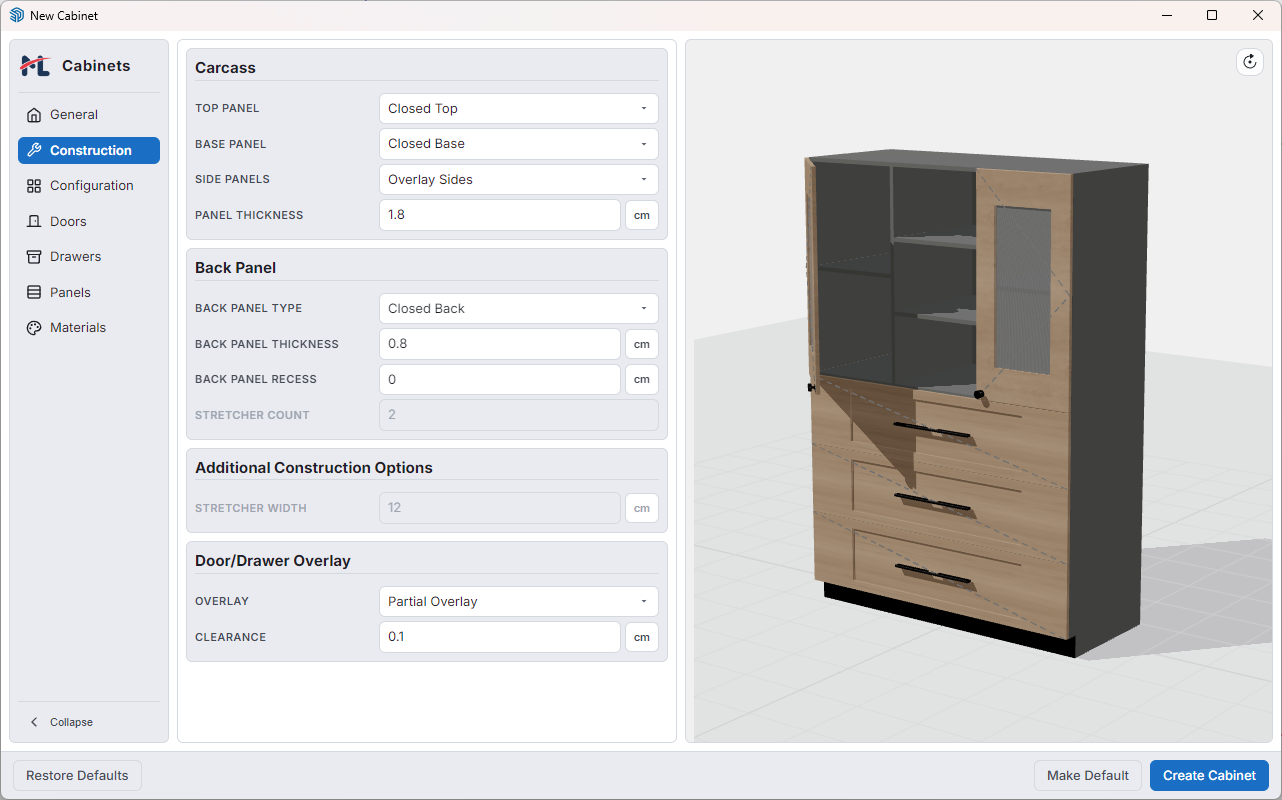
The Construction tab decides how the cabinet body
is assembled. In practical terms, this is the tab that turns a
simple volume into a believable cabinet carcass.
Corner Options Corner cabinets only
When you choose a corner cabinet type, this tab exposes the
controls that define how the corner is solved.
Setting
What It Does
Why You Would Use It
L-Shaped
Creates a true corner cabinet with two active wings meeting
at 90 degrees.
Use it when both sides of the corner are accessible and you
want to use the full corner volume.
Blind Corner
Creates a single accessible opening on one side with a
hidden return extending behind the adjacent run.
Use it when one side of the corner is blocked by the room
layout or another cabinet run.
Accessible Side
Decides whether the working opening is on the left or the
right side of a blind corner cabinet.
Use it to match the room layout and to make sure the door
swing opens away from the obstruction.
Carcass Construction
The central carcass controls define how the shell is built from
top to bottom.
Top Panel can be closed, open, or removed,
depending on whether the cabinet needs a full top, stretchers,
or an open upper condition.
Base Panel controls whether the cabinet has a
solid lower carcass panel.
Side Panels define how the sides relate to the
top and base.
Panel Thickness sets the structural thickness
for the carcass and influences other boundary elements such as
separators and dividers.
Side Panel Mode
What It Means
Common Use
Overlay Sides
Top and base sit between the sides.
Clean contemporary carcass design.
Inset Sides
Sides sit on the base and support the top.
Traditional and transitional construction.
Full Height Sides
Sides run full height and cover the toe-kick zone.
End conditions and more monolithic side elevations.
Back Panel Controls
Back Panel Type chooses between a closed back,
an open back using stretchers, or no back at all.
Back Panel Thickness sets the back material
thickness when a closed back is used.
Back Panel Recess sets how far the closed back
sits in from the rear edge.
Back Panel Joinery chooses between a standard
butt/recessed back and grooved side panels for closed backs.
Groove Depth controls how far the back panel
extends into each side panel when grooved joinery is active.
Groove Clearance adds installation clearance to
the groove width and pocket depth without changing the back
panel's actual thickness or extension depth.
Stretcher Count and
Stretcher Width become relevant when the back
or top uses stretchers rather than a solid panel.
Door And Drawer Overlay
This section decides how the visible fronts sit relative to the
opening they cover.
Mode
Visual Result
Typical Style
Partial Overlay
Fronts overlap the opening with a visible framing gap.
Traditional and transitional cabinetry.
Full Overlay
Fronts cover more of the carcass face.
Modern slab-based designs.
Inset
Fronts sit inside the opening.
Premium bespoke furniture appearance.
Clearance works with the overlay choice to manage
the visible gaps between fronts and between the fronts and the
carcass.
Body-forming rule: Complete the
Construction tab before laying out groups and
openings. The layout behaves best once the top, base, back, side,
and overlay rules are already settled.
Configuration Tab
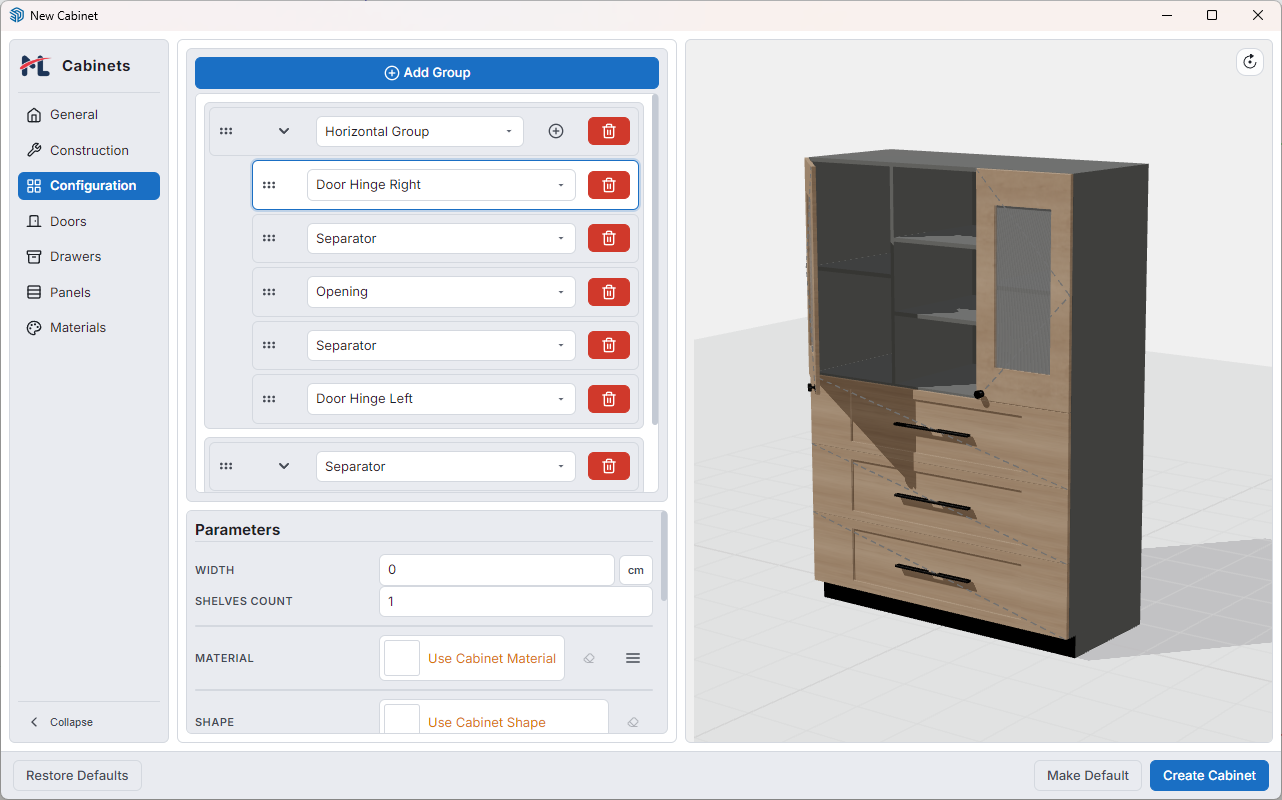
The Configuration tab is the layout engine of the
dialog. This is where the cabinet stops being a box and becomes a
useful storage unit with openings, doors, drawers, shelves,
separators, profiles, appliances, and blanks.
How The Layout System Works
The layout is built in two levels: groups divide
the cabinet into major zones, and items fill
those zones with doors, drawers, openings, and other content.
Control
What It Does
Add Group
Adds a new top-level zone to the cabinet layout.
Add Item
Adds a new opening or boundary item inside a group.
Grip Handle
Lets you drag groups and items into a new order.
Delete
Removes the selected group or item.
Collapse
Keeps complex layouts easier to manage.
Group Types
Vertical Group stacks items from top to bottom.
Horizontal Group places items side by side.
Separator creates a full-depth structural
boundary between larger zones.
Divider creates a thin front boundary rather
than a full-depth partition.
Profile Group inserts a continuous profile line
between cabinet zones.
Group size can be entered directly, or left at
0 to fill the remaining available space
automatically. This is especially useful when only one zone should
adapt as the cabinet height changes.
Divider vs Separator: A separator is a real
partition running into the cabinet depth. A divider is a thinner,
shallower face break. Use separators when you need a true internal
division. Use dividers when you mainly want a front framing line.
Item Types
Each group can contain one or more items. The dialog offers the
following seventeen opening and boundary types:
Door - Hinge Right
Door - Hinge Left
Door - Hinge Top
Door - Hinge Bottom
Double Door
Sliding Door
Bi-Fold Door
Lift Door
Drawer
False Drawer
Panel
Opening
Appliance
Separator
Divider
Blank
Profile
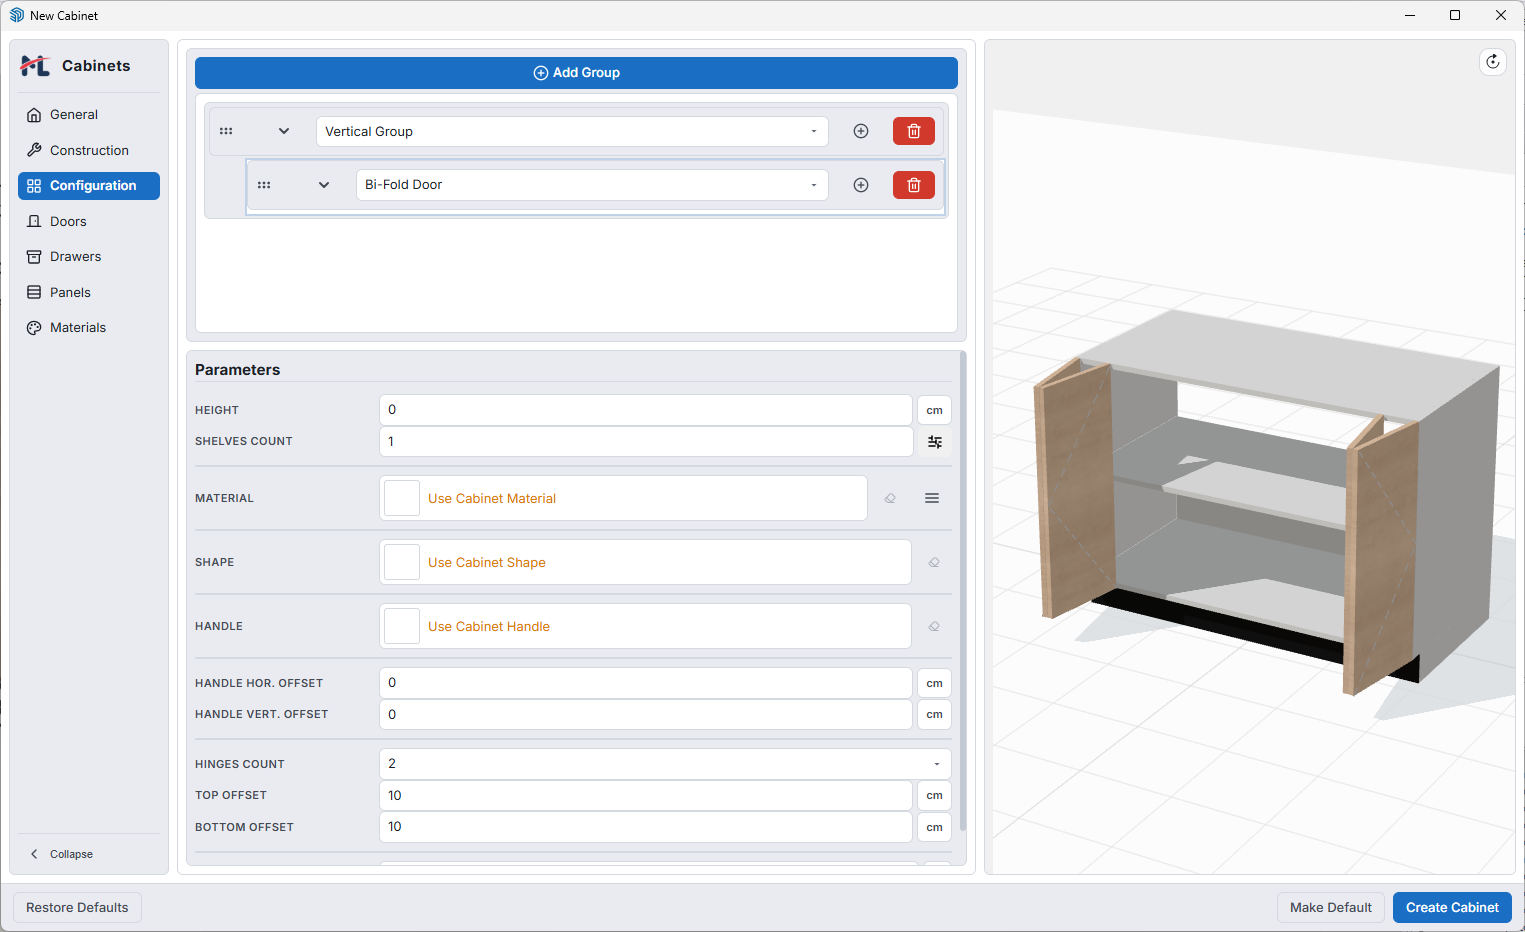
Sliding Door — two independent overlapping panels on separate bypass tracks.
Bi-Fold Door — four vertical leaves that fold in two pairs.
Lift Door — upper and lower leaves that fold together and lift upward.
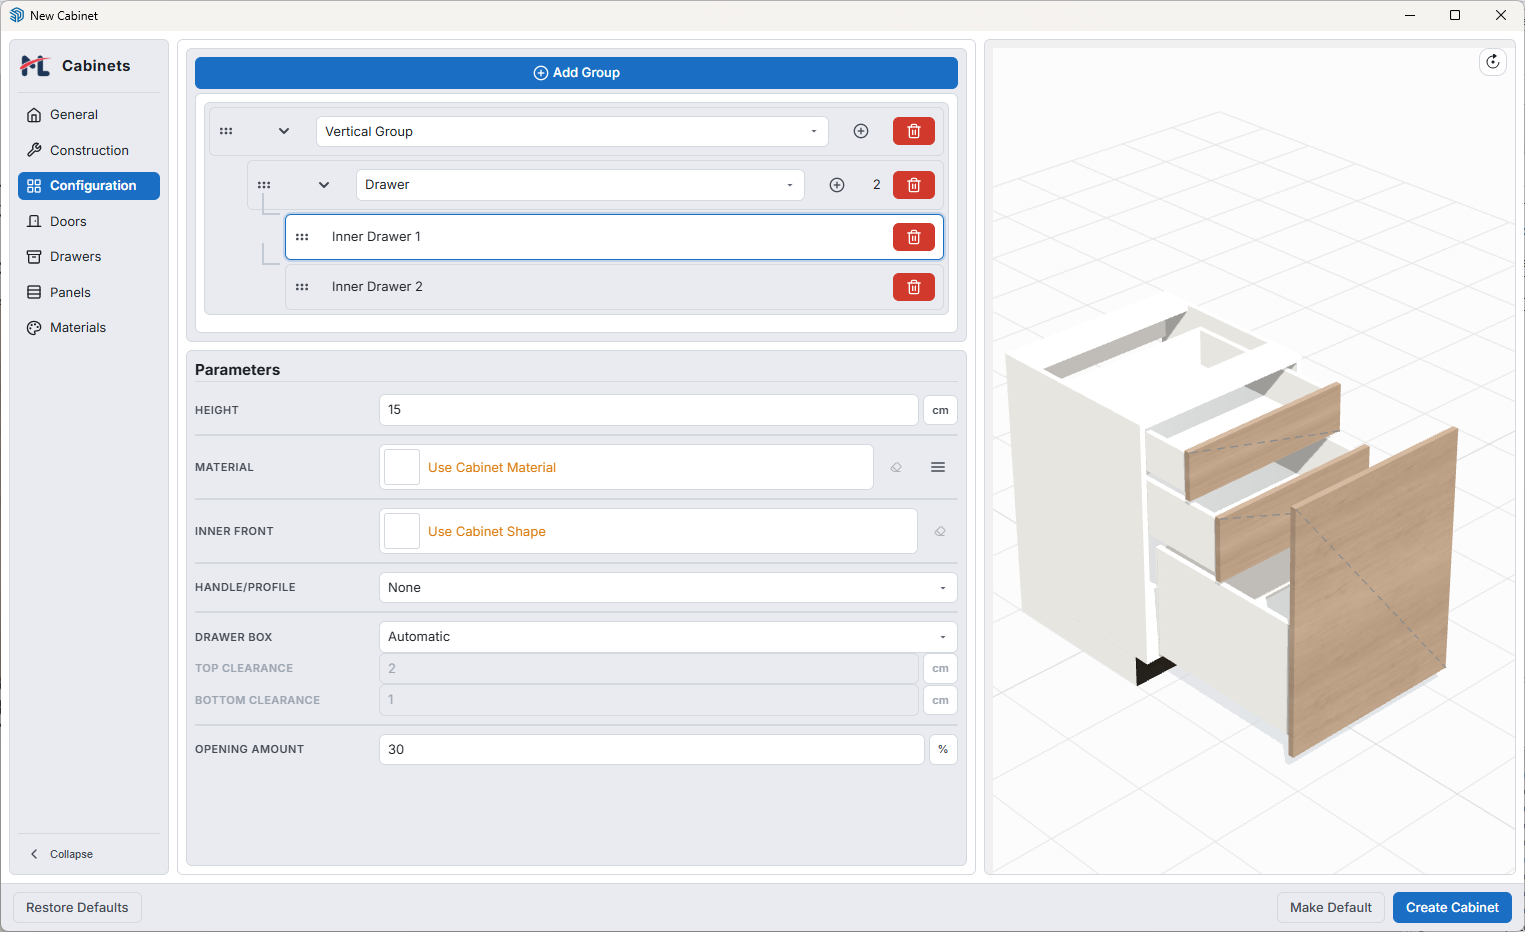
Inner Drawers
Inner rows offer Drawer, Opening, Separator and Divider types. Opening is empty space; Separator is a full-depth horizontal partition; Divider is a shallow front strip. Height 0 means Auto: after fixed heights, all Auto rows share the remainder equally. Put an Auto Opening above a fixed-height Drawer to place it at the bottom, or below it to place it at the top. A fixed Opening above the drawer sets its distance below the container top. Two Auto Openings, one above and one below, center the drawer. Separators and dividers remain stationary and count toward materials, edge banding and cost; openings have no geometry or cost. Empty space below the lowest occupied item does not reduce the parent drawer walls. Inner layouts do not insert automatic hidden dividers. In Bulk Edit, inner types remain locked, like regular item types.
Eligible parents are left-hinged and right-hinged doors, a
double-door pair, and a regular drawer. Inner Drawers are limited
to one level with multiple sibling Inner Drawers. Use the compact
+ Add Inner Drawer control; nested rows show the
shared caret, drag grip, and bin icon in top-to-bottom order, and
you can drag to reorder siblings.
A new Inner Drawer defaults to
min(30% of the remaining usable height, 15 cm / 6 in),
so creation never accidentally auto-fills; the user may deliberately
set one or more inner items to 0 auto-fill. Selecting a Drawer child exposes
Height, Drawer Box,
Inner Front, handle/profile, material, and
Opening Amount. The Inner Front is always inset;
its box uses the parent's usable interior depth and deducts an
inset parent front.
For a drawer parent, its sides and back reduce by the occupied inner stack down to the lowest drawer or fixed panel, while its bottom and decorative front
remain unchanged. Its children are cabinet-fixed and do not
inherit outer-drawer travel. A door containing an Inner Drawer locks Opening
Amount to 100%; 99.99 is
blocked, and both double-door leaves must finish opening before a
child can move. Closing a parent closes its Inner Drawers first,
before the parent, as one Undo operation.
Shelves coexist with Inner Drawers; collisions are left to visual
inspection, with no automated validation or warning. An
incompatible parent type change is blocked while Inner Drawers
exist. New, Edit, session, defaults, units, library, and Bulk
workflows preserve the hierarchy; related tools preserve it,
manufacturing preparation keeps the fixed assemblies, and
schedules count each logical Inner Drawer once.
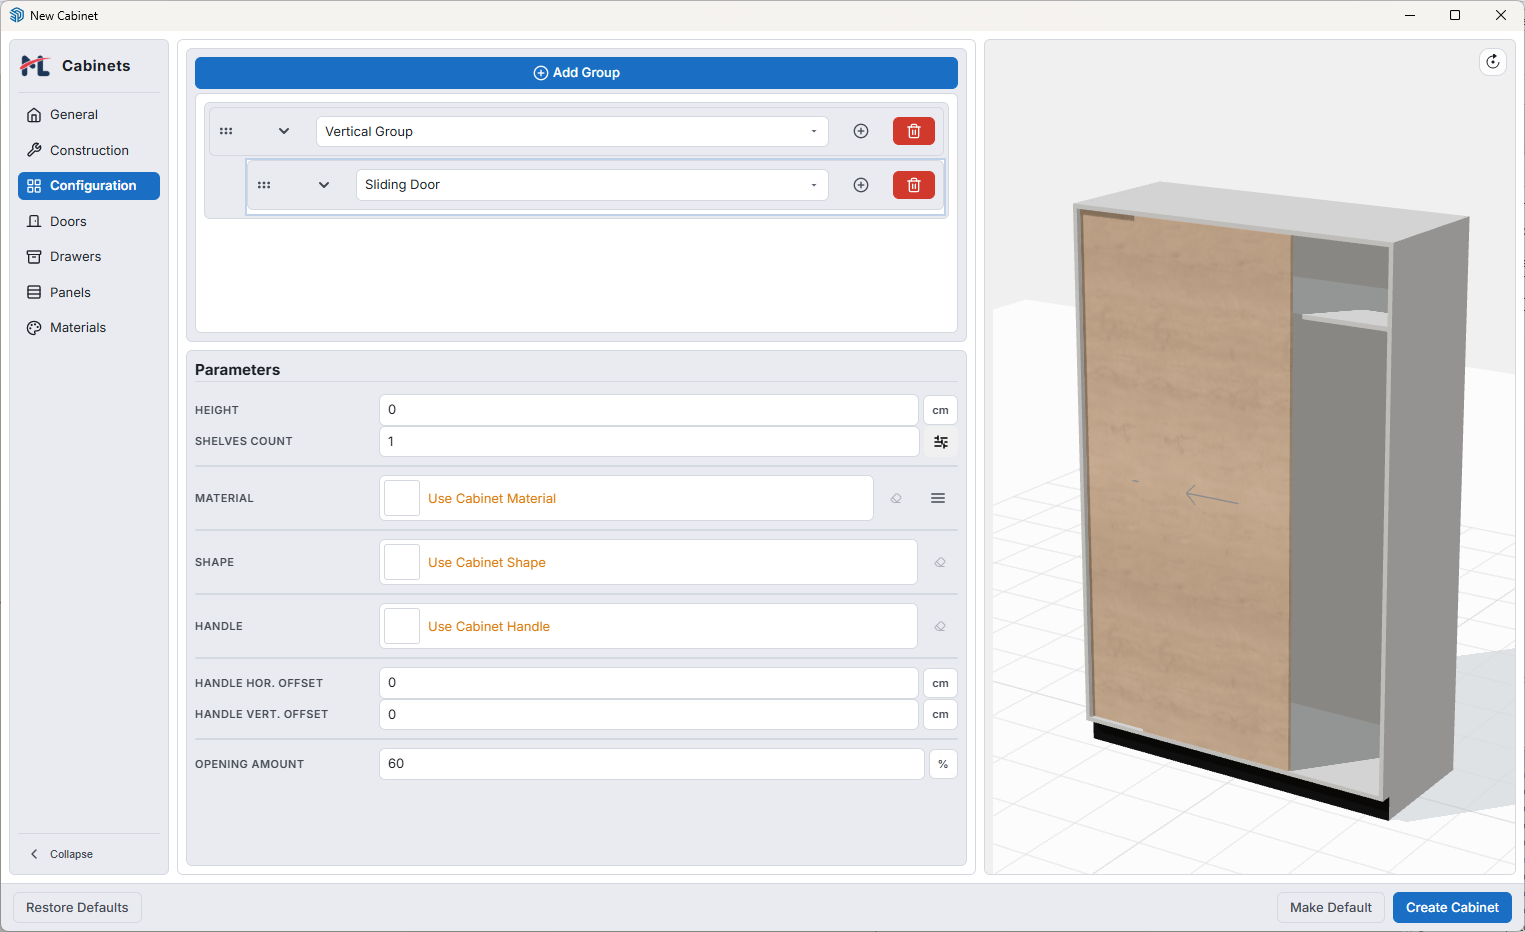
Sliding Door
Sliding Door is available for rectangular Base,
Wall, Tall, and High cabinets, but not corner cabinets. Each
opening has two independent bypass panels; the right panel uses
the front track by default.
The opening has three states: closed, left panel open, and right
panel open. Click either panel in the preview or with
Open / Close to open that side; click it again to
close, or click the other panel to change sides directly.
Opening Amount controls travel and defaults to
100%. Saved opening amounts are preserved unchanged through Edit,
defaults, and library workflows. Closed overlap follows
O = T + 2 × C. Swap Door changes
only the front-track assignment, while Swap Grain
rebuilds both panels.
Version 1 scope: Visible tracks, rollers,
guides, and other sliding hardware are not modeled.
Item Type
Main Use
Typical Extra Controls
Door Types
Hinged storage openings and double-door fronts
Shelves, material, shape, handle, handle offsets, hinges,
and opening amount
Drawer
Functional drawer front with drawer-box behaviour
Shape, material, handle, offsets, opening amount, and drawer
clearances
False Drawer
Drawer-look front without a working drawer box
Shape, material, handle, and offsets
Opening
Open niche or shelf bay
Shelves count
Panel
Decorative or closed panel-style opening
Shape and material
Appliance
Opening occupied by a saved appliance preset
Appliance selector
Profile
Gola or other profile detail inside the layout
Profile selector and profile material
Blank
Intentionally unused or blocked layout slot
Size only
Parameters Panel
Selecting a group or item opens the Parameters
panel. The fields change depending on what you selected, which
keeps the interface focused and prevents irrelevant settings from
cluttering the view.
Sizing switches between Height and
Width depending on how the selected element is
arranged.
Door and opening items can receive a
Shelves Count.
Drawer items can use automatic or custom drawer-box clearances.
Door items expose hinge count, physical end offsets, cup
radius, cup depth, and cup centre setback.
Door and drawer items can store an individual opening amount.
Profile items and profile groups expose profile selection and
profile material controls.
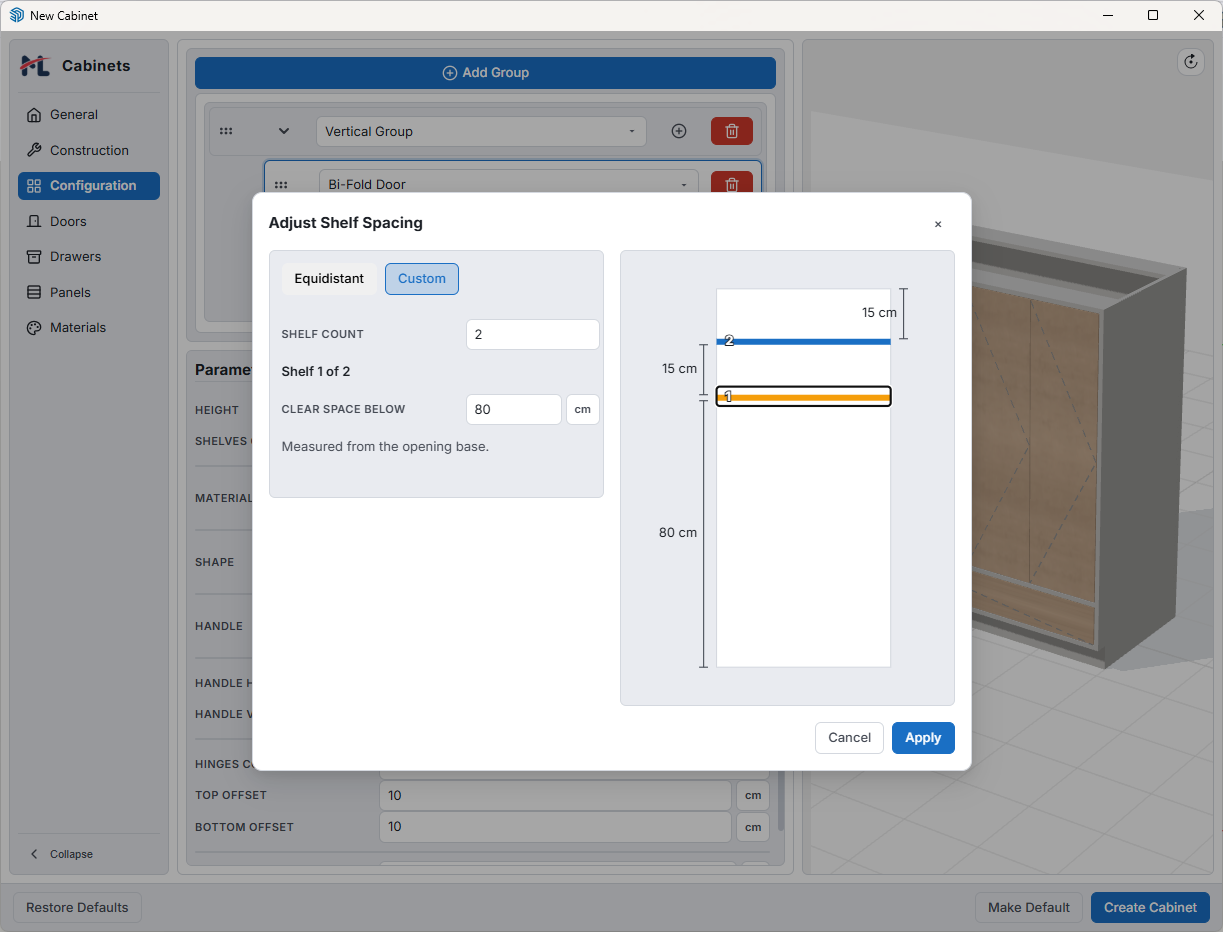
Shelf Spacing
Select a shelf-bearing item and enter Shelves Count.
Click Adjust Spacing…, immediately to the right of
the Shelves Count input, then choose
Equidistant or Custom. In Custom
mode, select a shelf and edit Clear Space Below.
The first datum is the opening base and every later datum is the
preceding shelf top face.
Popup input redraws only its inline SVG diagram. The main 3D
preview updates once only after Apply;
Cancel discards the draft without changing the
item or preview. Custom clear spaces are fixed construction
dimensions: valid height growth increases the top remainder,
while an invalid shrink is clamped before shelves can overlap.
Width and depth scaling continue to resize the shelves normally.
Door Hinges And Cups
Property
Purpose
Metric default
Hinges per connection
Planned hinge count for each carcass or joint connection (1–20)
2
Top / Left Offset
First hinge-edge end to the first cup centre
10 cm
Bottom / Right Offset
Opposite hinge-edge end to the final cup centre
10 cm
Cup Radius
Radius of the circular cup bore
1.75 cm
Cup Depth
Blind-pocket depth from the rear face
1.2 cm
Cup Center Setback
Hinged edge to the cup centre
2.25 cm
Left- and right-hinged doors show
Top/Bottom Offset. Top-/bottom-hinged doors and lift doors
show Left/Right Offset. Third and fourth hinge
centres are spaced evenly between the configured end positions.
Imperial models use 3.937 in offsets, 0.689 in radius, 0.4724 in
depth, and 0.8858 in centre setback.
Drag And Drop Reordering
Groups and items can be dragged into a new order. This is useful
when the layout is already close to correct and only the sequence
needs to change. A drop indicator shows where the dragged element
will land before you release it.
Automatic Dividers
The dialog automatically creates hidden internal boundaries where
necessary so the layout remains structurally sensible even if you
only add openings. These hidden dividers are different from the
visible separators, dividers, and profiles that you add on purpose
for an explicit design effect.
Recommended workflow: First define the big zones
with vertical and horizontal groups. Then add visible separators,
dividers, or profiles only where you need a deliberate break in
the design.
Doors Tab
The Doors tab sets the cabinet-wide defaults for
all door-based items. It is split into three subtabs:
Doors for the door style itself and
Handles for the handle family and default handle
placement, plus Hinges for hinge and mounting-plate choices.
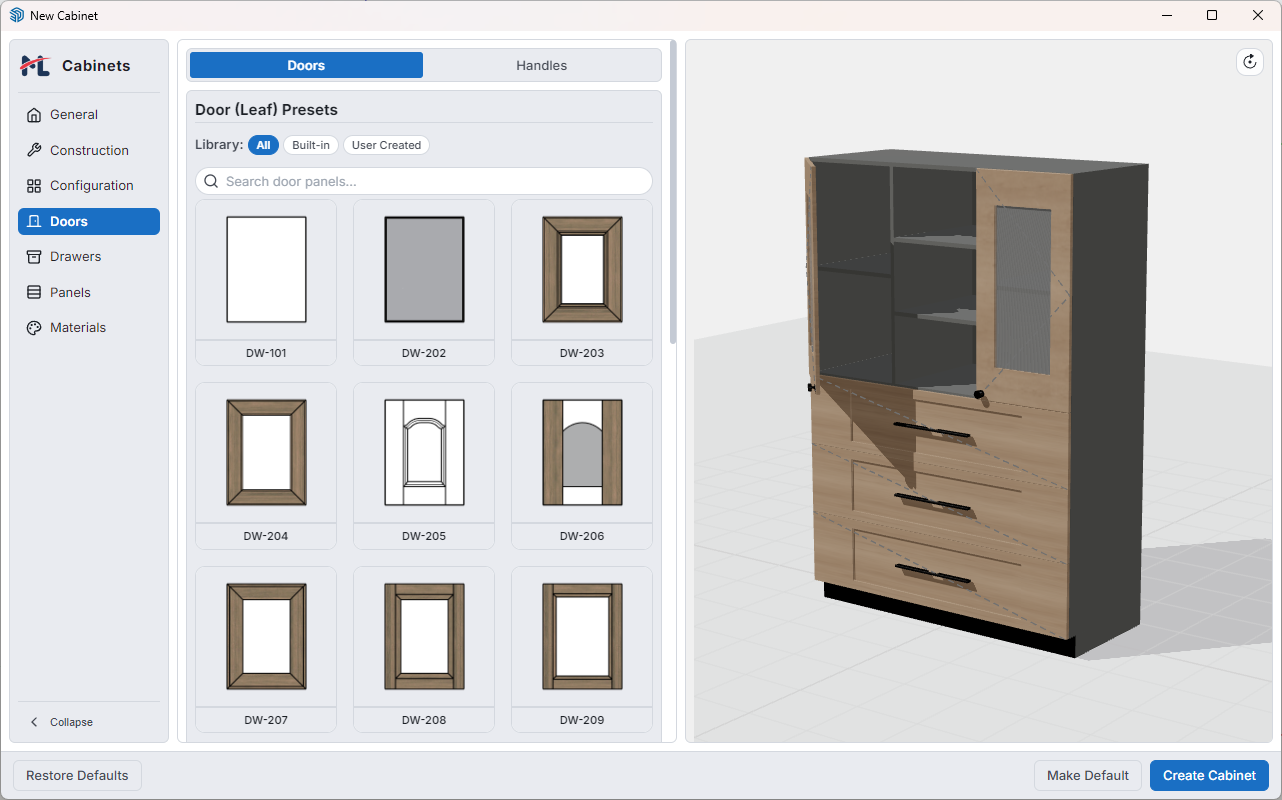
Doors Subtab
Browse built-in and user-created door presets in a card grid.
Use the All, Built-in, and
User Created filters to narrow the library.
Use the search field to find a door style quickly in a larger
library.
Click a card to make it the default door face for the cabinet.
DW-101 is selected initially; choose another
preset to replace it. This selection cannot be cleared.
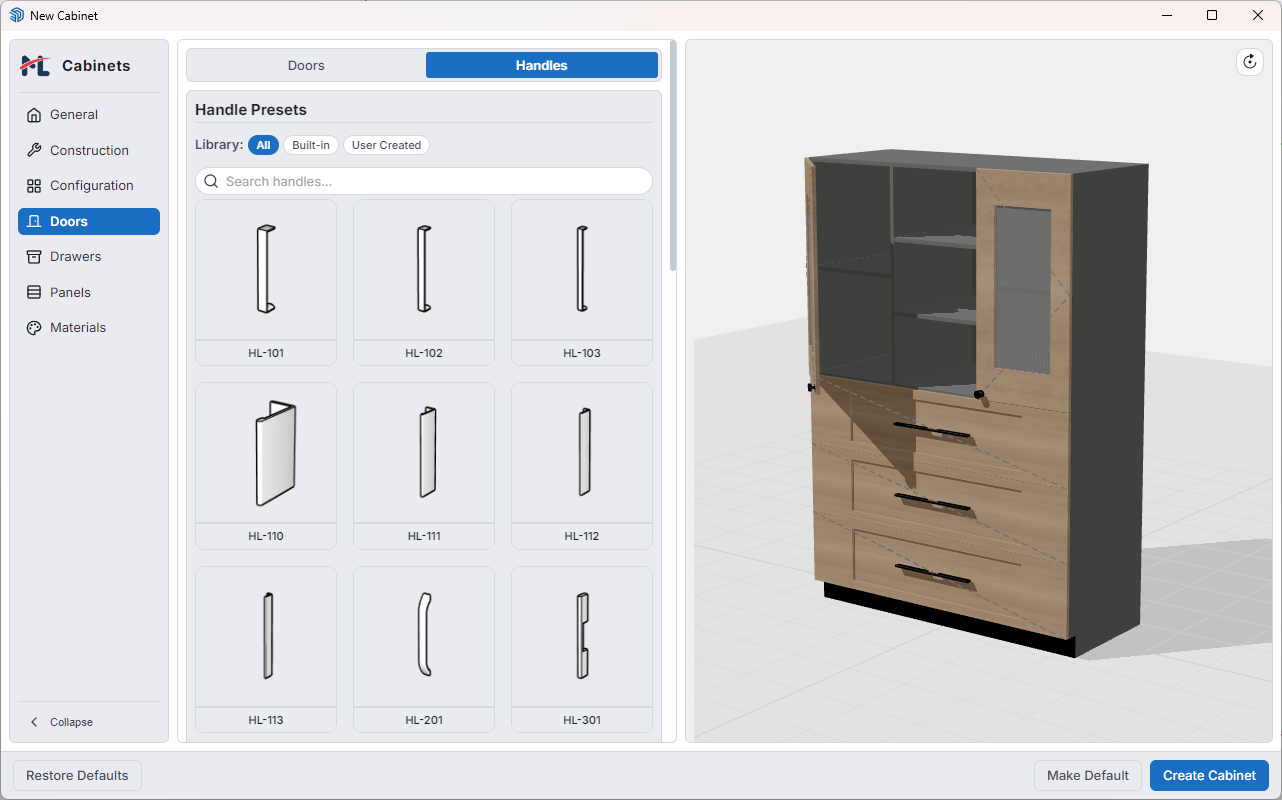
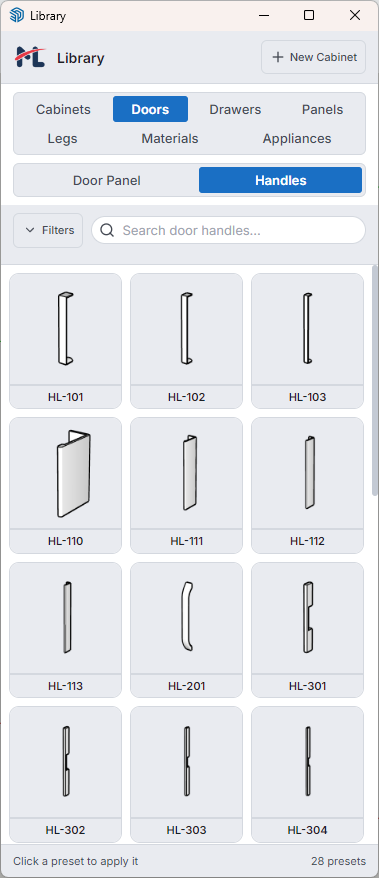
Handles Subtab
Choose the cabinet-wide default handle for all door items.
None is the first option and factory default;
it creates no cabinet-level handle or handle cost. Clicking
empty grid space keeps your selection.
Use Horizontal Offset and
Vertical Offset to set the default handle
position.
Use Rotation to rotate the selected door
handle preset by a specific angle in degrees without editing
the saved handle component.
Search, filter, and select from built-in or user-created handle
presets.
Handle rotation is added to ML Cabinets' automatic handle
orientation. Standard left- and right-hinged doors use the angle
directly, while hinge-top and hinge-bottom doors are first turned
horizontally and then adjusted by your rotation value.
These are cabinet-level decisions. Every door can still be
customised later from the Configuration tab if a
single door needs a different look or handle.
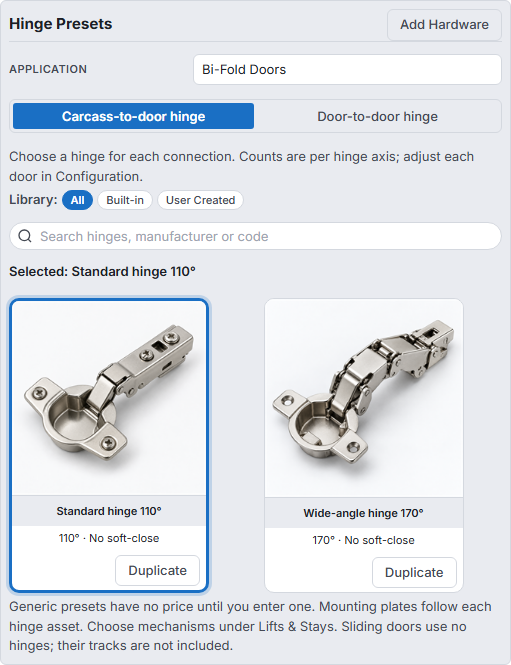
Hinges Subtab
Open Doors > Hinges to choose cabinet defaults by opening type. Search or filter the built-in and user-created cards; compound openings need a selection for each of their two roles.
Category
Hinge roles
Standard Doors
Carcass-to-door hinge
Top Flaps
Carcass-to-door hinge (top flap)
Bottom Flaps
Carcass-to-door hinge (bottom flap)
Bi-Fold Doors
Carcass-to-door hinge + Door-to-door hinge
Corner Doors
Carcass-to-door hinge + Door-to-door hinge (corner)
Lift Doors
Carcass-to-door hinge (lift) + Door-to-door hinge (lift)
Doors Hinges: choose the connection, then select a compatible hinge.
Folding hinge — door-to-doorCorner-joint hingeSeparate mounting plate
Selections describe the connection, not the opening angle. Standard and wide-angle side hinges appear together under Carcass-to-door hinge; new bifold defaults use the standard 110° preset. Door-to-door hinge selects the folding joint, filtered for flat-folding, corner or lift mechanisms. Each asset retains its own opening limit and price. Existing cabinet selections are preserved. Per-door hinge overrides use the same thumbnail preset picker as Shape and Handle. The reset icon restores Use Cabinet Hinge; cancelling the picker leaves the current choice unchanged. The hardware library and Add/Edit Hardware use the same connection/application categories.
In Configuration, select an opening to override its matching hinge roles or choose Use cabinet default. Each connection groups its hinge selector, Hinges per connection (1–20, default 2), and two end offsets. Use carcass hinge spacing links the door-to-door count and both offsets to the carcass connection by default. Clear it for independent joint spacing; enabling it again removes those overrides. Existing custom joint counts remain independent. Vertical connections use Top/Bottom Offset; horizontal flaps and lift doors use Left/Right Offset. Offsets measure from the edge to the first and last hinge centres; additional hinges are evenly spaced. Both connections save with the cabinet and convert between centimetres and inches. Counts describe planned hardware, not an automatic load calculation.
Let n be the primary count and j the joint count. A single side/top/bottom door uses n hinges; a double door uses 2n. Four-panel bi-fold doors use 2n cabinet hinges + 2j folding hinges. The two leaves of one L-shaped corner opening share n cabinet hinges + j corner-joint hinges; the estimate does not count that opening twice. A bi-fold lift uses n top hinges + j centre hinges. Sliding doors use zero hinges.
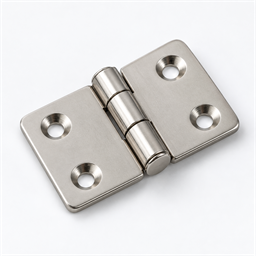
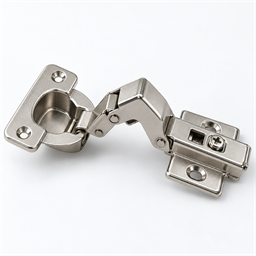
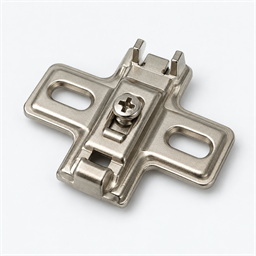
Use Add Hardware, Duplicate or an available Edit footer button to maintain hinge and mounting-plate assets. These are metadata-only library items: no selected SketchUp component or SKP model is required. Set Hardware Role, Manufacturer / Brand, Product Code, Description, Mounting Style, Soft close, Maximum Opening Angle (degrees), Pricing Unit and price. User assets are editable normally; built-in editing requires dev mode. Duplicate a built-in to create an editable personal choice. The eight built-in hinge presets and two plate presets have original generic illustrations, blank brand/code and unknown prices; the images do not establish product compatibility.
For Mounting Plate, choose Included in hinge price, Separate plate asset or Not required. A separate plate adds one plate per hinge automatically. Included and not-required choices add no separate plate charge. Verify the actual hinge/plate combination and what your supplier's price includes.
Opening Amount is a percentage of the resolved maximum: a standard 110° hinge at 50% opens 55°. Older cabinets without hinge selections retain their existing opening behavior. Compound mechanisms cap their linked joints together while preserving their existing motion ratios: four-panel doors retain the 90° cabinet / 180° fold ratio; L-shaped corners use the lower of 90° and both selected limits, giving 60° with the generic corner joint; lift doors use the lower of 105° and both selected limits, so the 134° centre-hinge preset does not make the lift open 134°. The corner preview follows its existing simplified motion path.
These selections supply cost quantities and opening limits. They do not render physical hinges, certify collisions or structural capacity, or infer drilling geometry from the chosen hardware. Choose lift mechanisms and flap stays in Lifts & Stays. Choose sliding-door hardware in Sliding Systems.
Sliding Systems Subtab
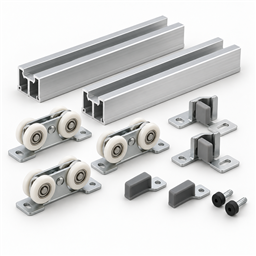
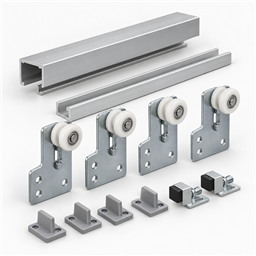
Open Doors > Sliding Systems to choose hardware for two-leaf bypass doors. The picker filters for the cabinet's Inset or Overlay setting; both Partial and Full count as overlay. Separate cabinet defaults are retained for each position. Generic inset bottom-running and overlay top-hung starters preserve the current geometry and have blank prices. Duplicate them to enter supplier specifications.
In Configuration, use the Sliding system thumbnail selector for a per-opening override. Reset restores Use Cabinet Sliding System. Missing or incompatible saved selections remain visible as warnings.
Add Hardware, Edit and Duplicate support manufacturer, code, description and fitting rules. Additional top, bottom and side clearances reduce the face after normal cabinet clearances. Door overlap sets leaf width; Gap between door faces sets track spacing. Blank overlap and gap retain existing geometry. Offset from cabinet front moves overlay doors forward or inset doors deeper; inset shelves follow the rear track. Maximum travel caps movement, with Opening Amount expressed as its percentage. Tracks and fittings are not modeled.
Optional limits cover leaf width, height, thickness and weight. If a load limit is specified, enter verified Weight per door (kg) in Configuration. Unknown or excessive weight leaves the estimate incomplete. Material density is not yet used for this calculation. These checks do not certify installation suitability or collision-free movement.
Piece prices one door's fittings, counted twice per opening; Set prices one complete two-door opening. Included tracks add no separate charge. Otherwise, tracks use a separate linear-metre price: face width before system side clearances, minus the deduction per rail, multiplied by Number of rail runs. Count a double-channel extrusion as one run. Missing prices, invalid fit and unit mismatches leave the estimate incomplete. Cabinet-only overrides follow the normal estimate rules.
Lifts & Stays Subtab
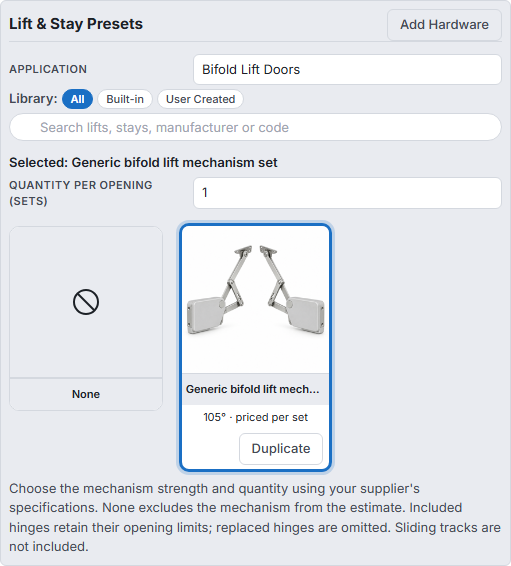
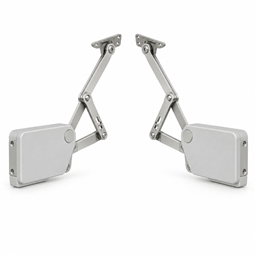
Open Doors > Lifts & Stays and choose Top Flaps, Bottom Flaps, or Bifold Lift Doors. Select a preset and set its quantity per matching opening. Quantity follows the preset's pricing unit: 2 pieces, 1 pair and 1 complete set are distinct entries. Choose the required strength and quantity from your supplier's specifications; the extension does not select them from door weight.
Doors Lifts & Stays: bifold lift selection and quantity.
Top-flap stayBottom-flap stayBifold lift system
Select a door in Configuration to override its mechanism and quantity with the same thumbnail picker used for hinges. Use Cabinet Mechanism inherits the cabinet selection. A different per-door preset starts with that asset's default quantity. Use default restores the inherited quantity, or the asset default for an explicit per-door preset. The reset icon restores both cabinet settings. None explicitly excludes the mechanism from that opening's estimate; existing cabinets without a selection keep their previous behavior.
In Add Hardware, Edit or Duplicate, enter manufacturer, code, description, price, pricing unit, default quantity and maximum opening angle. For each supported hinge connection, choose:
Hinge treatment
Estimate and opening behavior
Priced separately
Hinges and any separate mounting plates remain separate cost rows.
Included in mechanism price
No additional hinge or plate charge. Select the included hinge to retain its opening limit.
Replaced by mechanism
The connection no longer uses separate hinges or plates; their selections and limits are ignored while this mechanism is active.
The mechanism and applicable hinges jointly limit Opening Amount in preview and SketchUp. Bifold lift doors retain their existing folding path and 105° maximum. Changing the kit treatment preserves saved hinge selections so they return when needed. Missing assets, incompatible applications, invalid quantities or missing prices leave the estimate incomplete. An included hinge must still have a valid selection and opening angle.
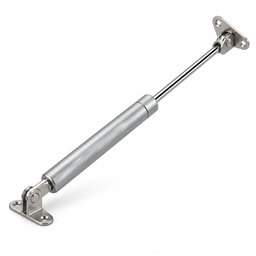
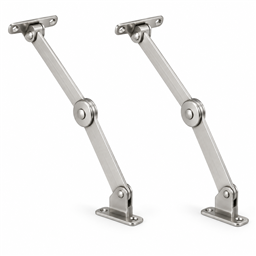
Three generic presets are provided with generated 256 × 256 thumbnails and blank prices. Their illustrative values do not establish compatibility or load capacity. Duplicate a preset to enter supplier specifications. These assets add quantities and motion limits; physical lift/stay models are not generated. After changing library specifications, edit and apply changes to an existing placed cabinet to rebuild its saved opening limits.
Drawers Tab
The Drawers tab works the same way as the Doors
tab, but for drawer-based items.
Slides Subtab
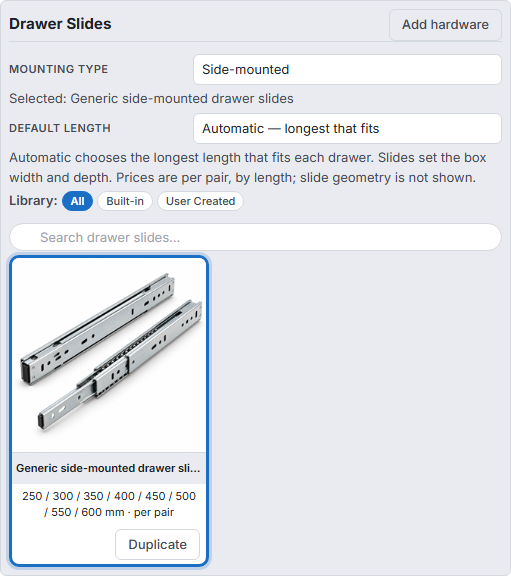
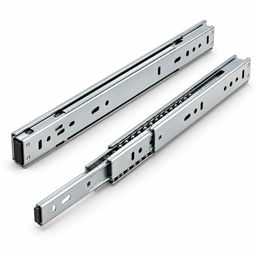
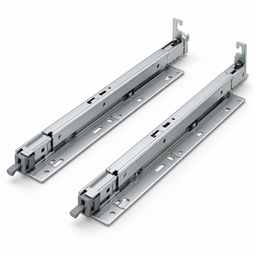
Open Drawers > Slides and choose Side-mounted or Bottom-mounted / undermount hardware. New cabinets start with the generic side-mounted preset. Existing cabinets without slides retain their current box dimensions until you assign a preset.
Drawers Slides: select a preset and use Automatic or a listed length.
Automatic chooses the longest listed length that fits each drawer's usable depth, after back construction, front inset, clearance and the slide's rear allowance. For example, 455 mm of usable depth with 5 mm rear allowance can use a 450 mm slide. Choose a specific length to override Automatic. A missing or oversized length displays a warning and makes the cost estimate incomplete.
Select a regular or inner drawer in Configuration to use the shared thumbnail picker for a slide override. Use Cabinet Slides inherits the cabinet preset; Use cabinet length inherits its length setting. Choosing a different preset starts at Automatic. The reset icon removes both overrides. Properties show the resolved length and clearance per side. False drawers have no slide selection or slide cost.
The selected slide sizes the box, including its sides, back and bottom, while the decorative front and overlay stay unchanged. Side clearance deducts the specified gap on each side from the opening width. Internal width deduction defines the inside box width as opening width minus the deduction; side thicknesses are then added to get outside width. Shorter boxes remain aligned with their fronts. Invalid fit retains the previous construction convention and displays a warning.
Use Add hardware, Duplicate or Edit asset to maintain slide presets. Enter manufacturer, product code, description, load capacity, extension type, soft-close/push-to-open options, the width rule and its dimension, rear clearance, and drawer length offset. Drawer length offset means box depth equals nominal slide length plus that offset. Add each available length once, with its price per pair. Leave unknown prices blank. The two built-in presets and their generated 256 × 256 thumbnails are generic examples; duplicate one and enter your product's specifications. User assets are editable normally; built-in edits require dev mode.
Cost Estimate counts one pair per actual wooden drawer box, including inner drawers, and groups pairs by preset and selected length. Different lengths keep separate prices and cabinet overrides. Drawer material quantities follow the adjusted box dimensions. Standalone slide presets do not add meshes. A selected drawer system includes its runners and takes precedence over separate slide settings.
Each slide length requires Maximum travel (mm) from the hardware specifications. Opening Amount is a percentage of that travel in the preview and SketchUp, for both regular and inner drawers. A 450 mm slide with 475 mm travel moves 237.5 mm at 50%. Travel may be shorter or longer than nominal length; the extension category does not replace this measurement. Properties show the selected maximum travel. Missing travel or invalid fit prevents an assigned slide from opening. Missing travel leaves box dimensions and pricing unchanged; enter the travel in the asset and update the cabinet. Cabinets without slides retain their previous movement.
Systems Subtab
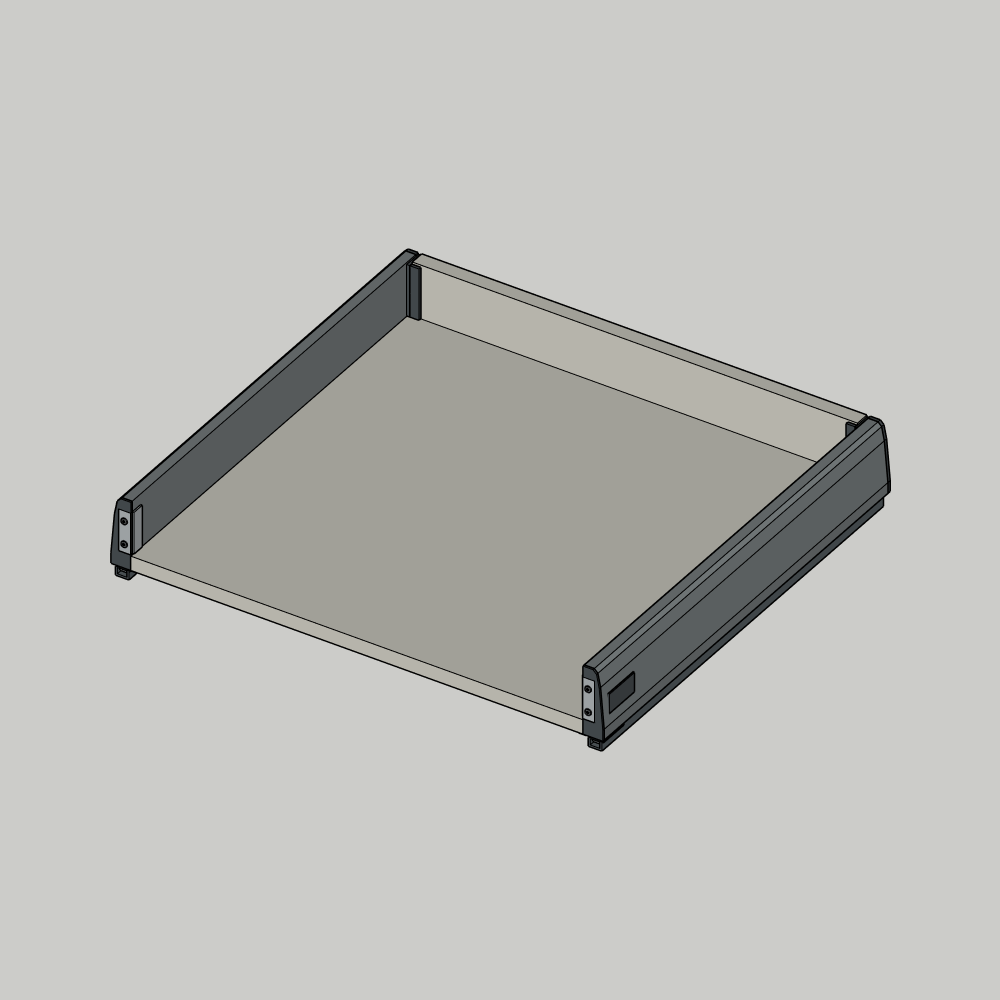
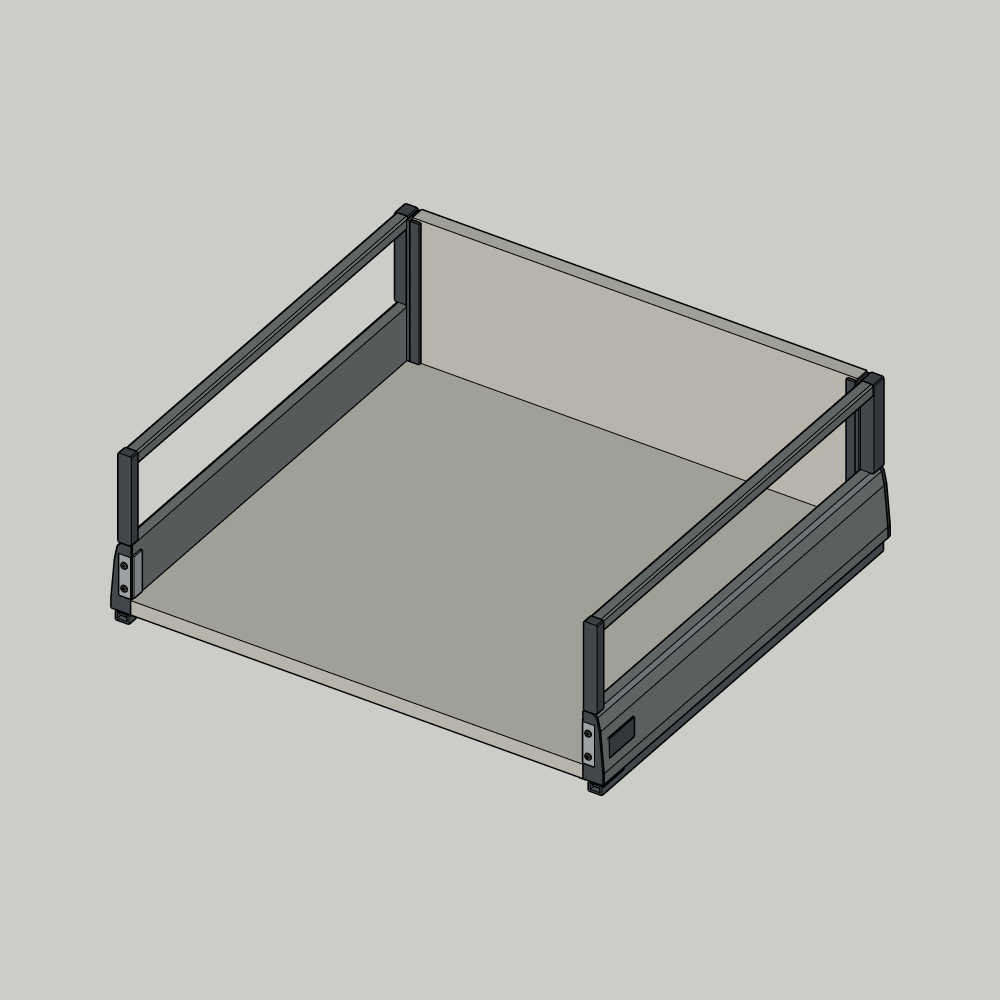
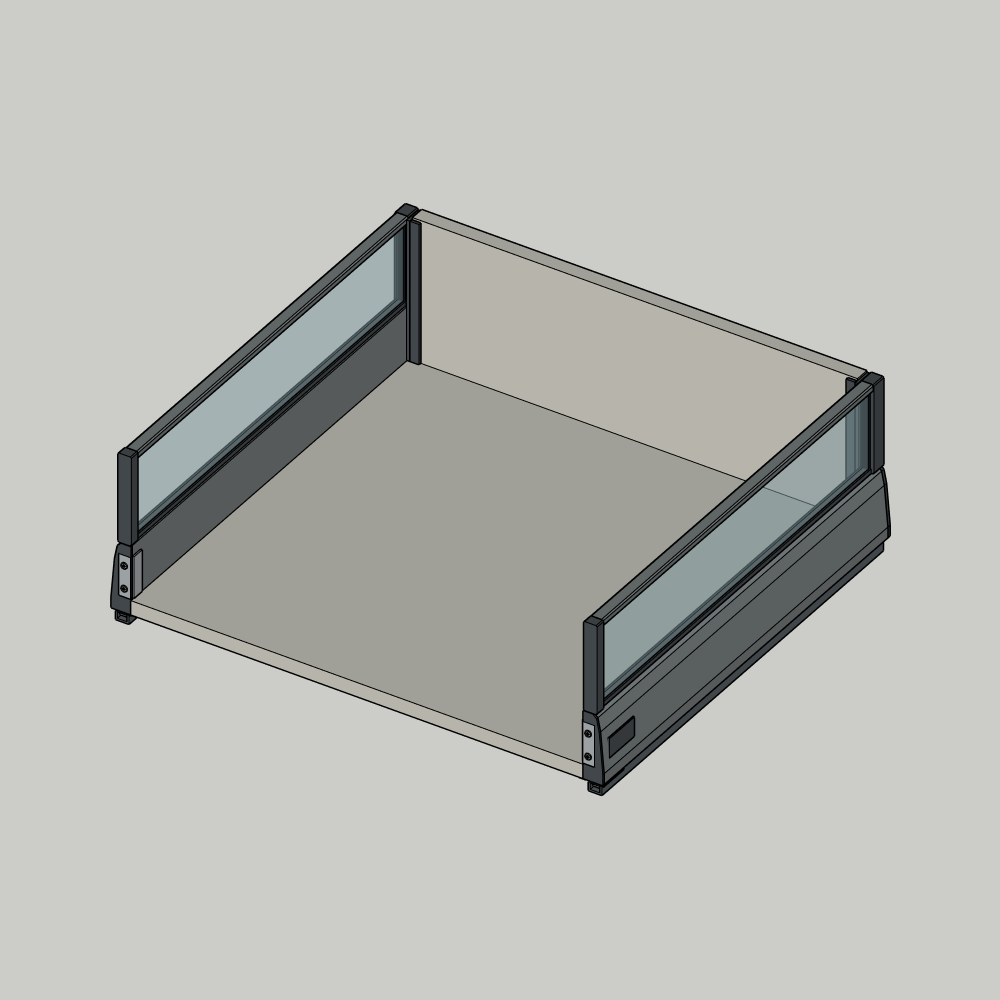
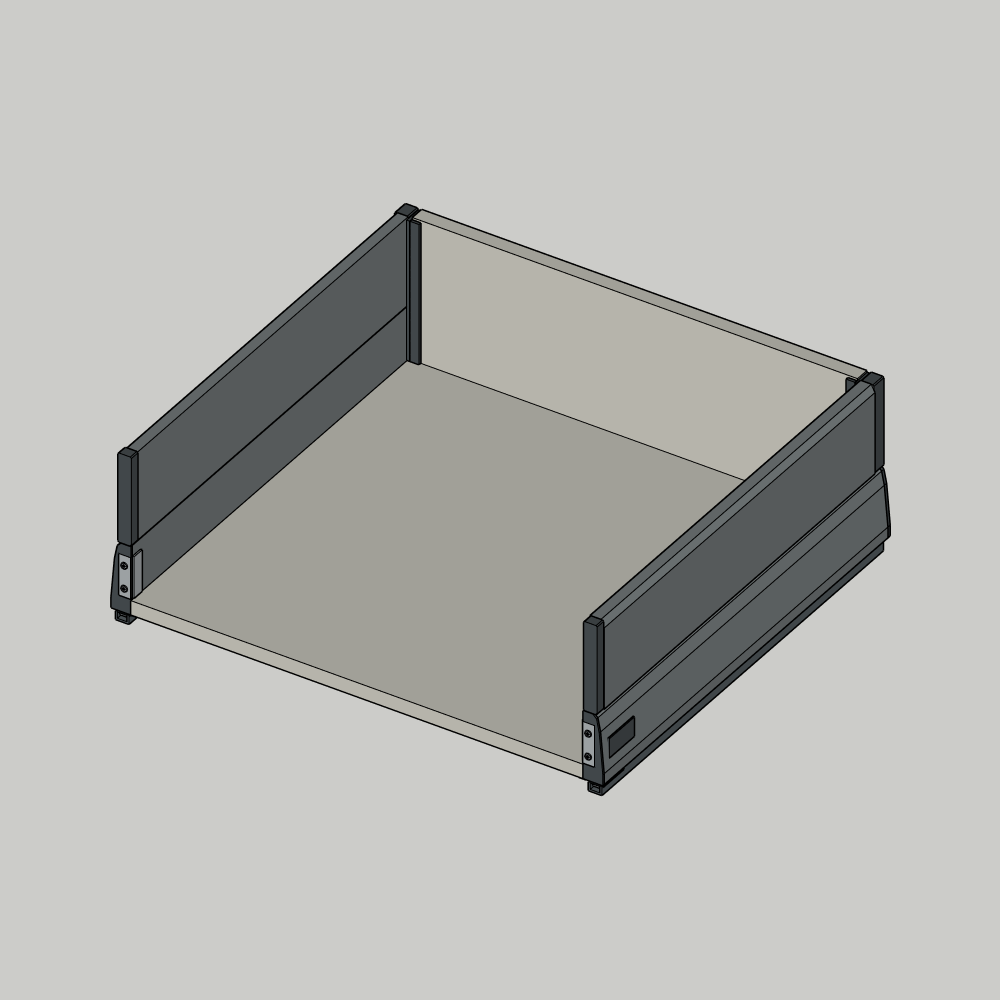
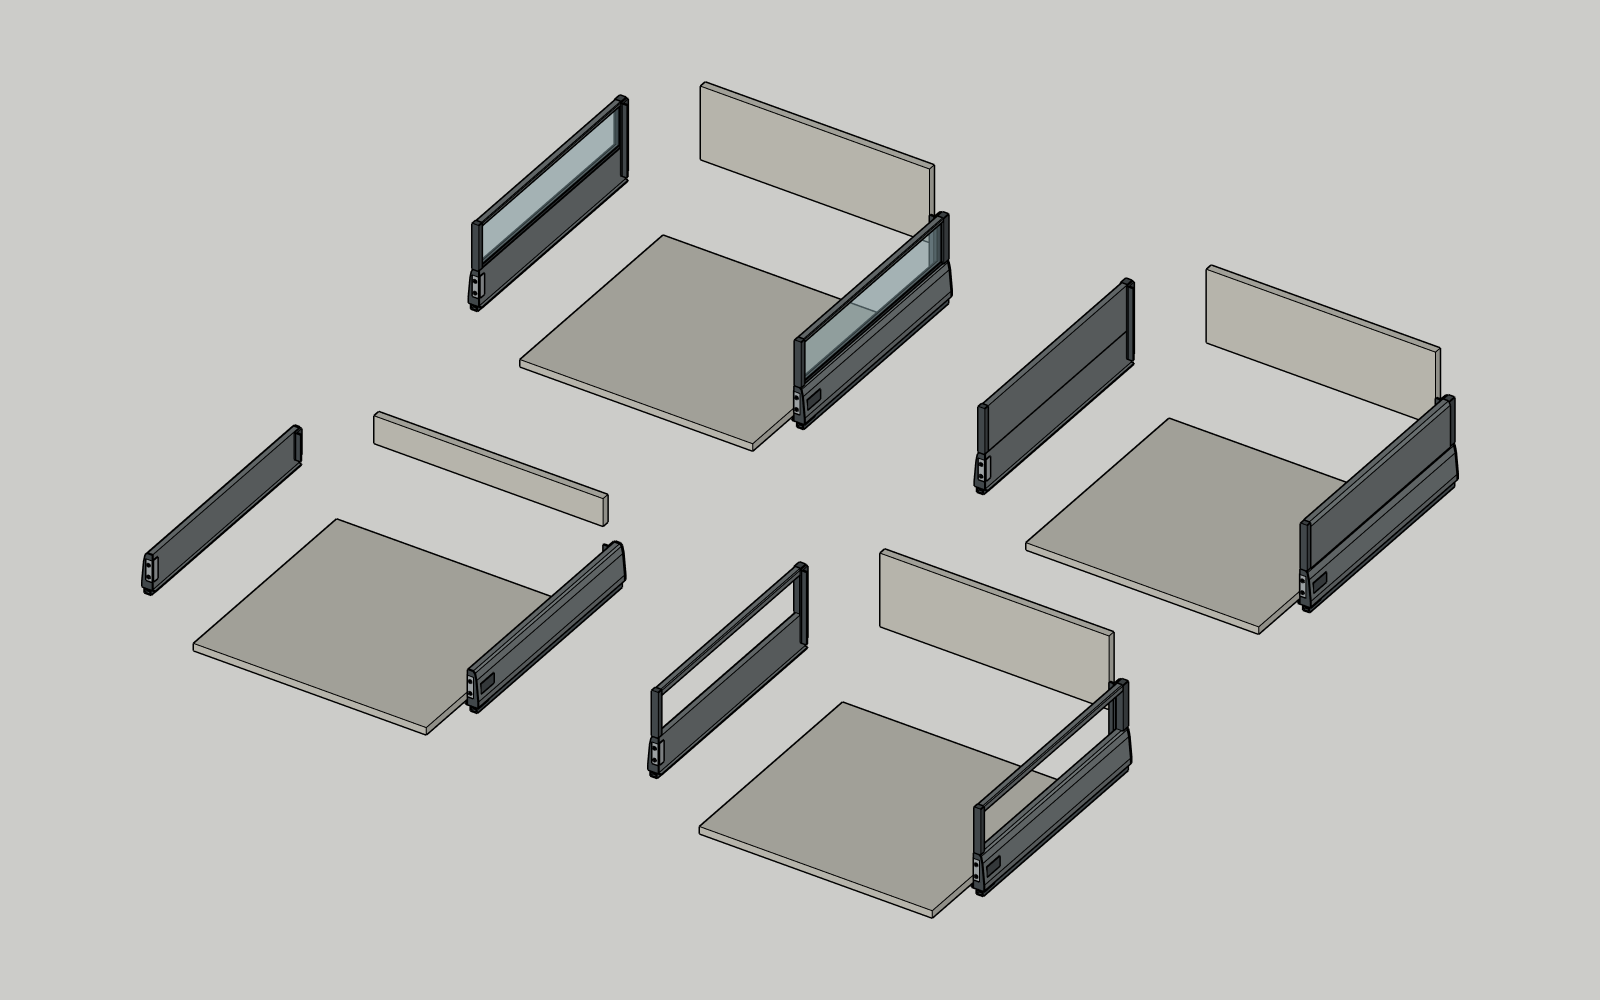
Open Drawers > Systems to replace the wooden box with a kit. Standard wooden box is the default; existing cabinets retain their box style until a system is assigned. Four generic MERIVOBOX-inspired starters are included: DS_101 Low solid side (91 mm), DS_102 High open gallery rail, DS_103 High glass infill and DS_104 High solid side (192 mm for all three high variants). These are simplified models, not manufacturer machining specifications.
DS_101 — Low solid side (91 mm)DS_102 — High open gallery rail (192 mm)
DS_103 — High glass infill (192 mm)DS_104 — High solid side (192 mm)
Click any image to enlarge it. The decorative drawer front is supplied separately by the cabinet.
The cabinet selection applies to regular and inner drawers. Select a drawer in Configuration and use its Drawer system thumbnail selector to override it. Use Cabinet System and the reset icon restore inheritance; Standard wooden box explicitly uses wood for that drawer. Use cabinet length inherits the cabinet length. Choosing an individual system starts at Automatic. False fronts have no box or system charge.
Automatic — longest that fits chooses a listed length after back construction, front inset, clearance and rear allowance. A manual length must be listed and fit. Width limits apply to the kit's total outside width: opening width minus twice the side clearance. The chosen side height remains fixed and must fit the available wall height, including any reduction for inner drawers. Invalid width, height or depth produces a warning rather than substituting another system. Shorter kits stay aligned with their decorative fronts.
Each length has its own Maximum travel (mm) and price per set. Opening Amount uses that travel in SketchUp and preview: 50% of 450 mm moves 225 mm. Invalid fit or missing travel prevents opening. Generic lengths and travel values are editable starting values; enter the specifications for the actual kit.
Cost Estimate counts one set per box, including metal sides, fittings and runners, without adding separate slides or wooden-side panels. Bottom and back boards use the Carcass material at their actual thickness—16 mm for built-ins—and fitted dimensions. The decorative front and its material remain separate. Unknown set prices or missing board-thickness prices leave the estimate incomplete.
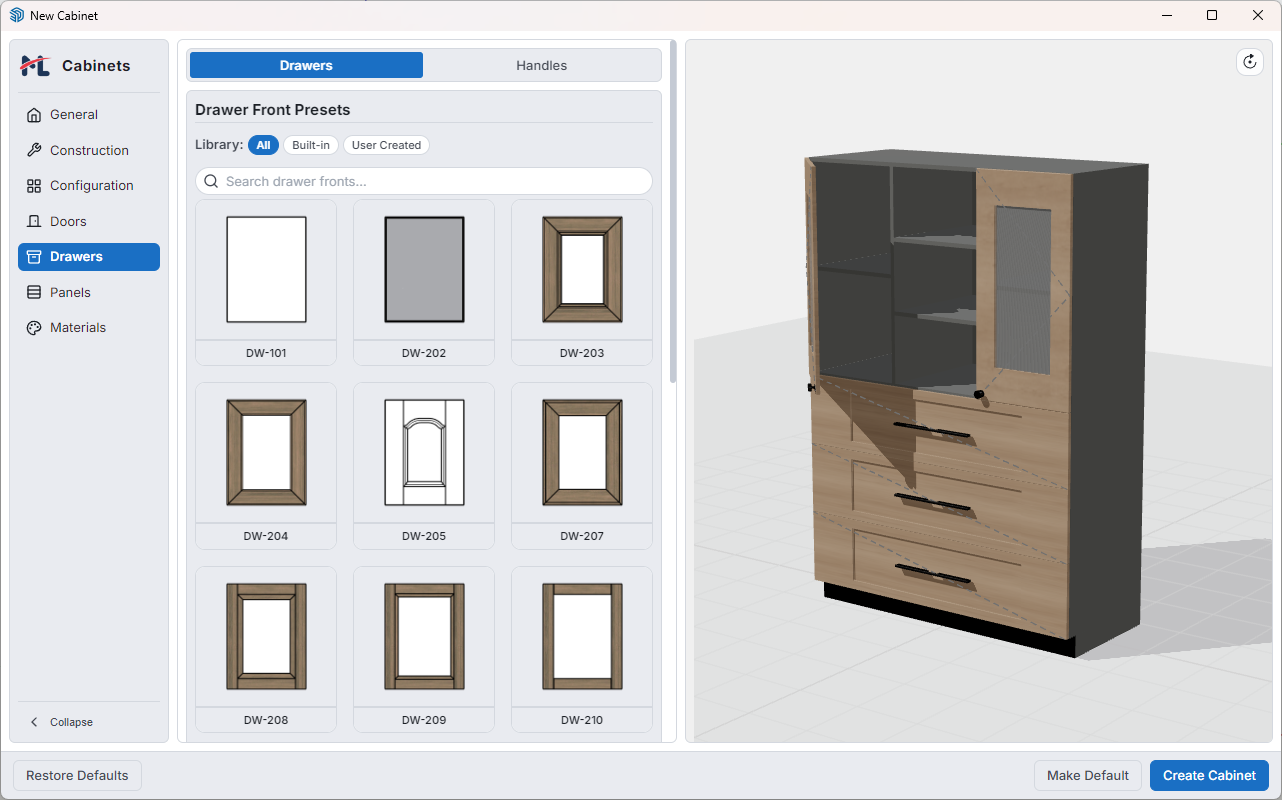
Drawers Subtab
Select the cabinet-wide default drawer front style.
DW-101 is selected initially and cannot be
deselected; choose another card to replace it.
Search and filter the drawer-front library by source.
Use user-created presets to align the cabinet with your own
preferred front families.
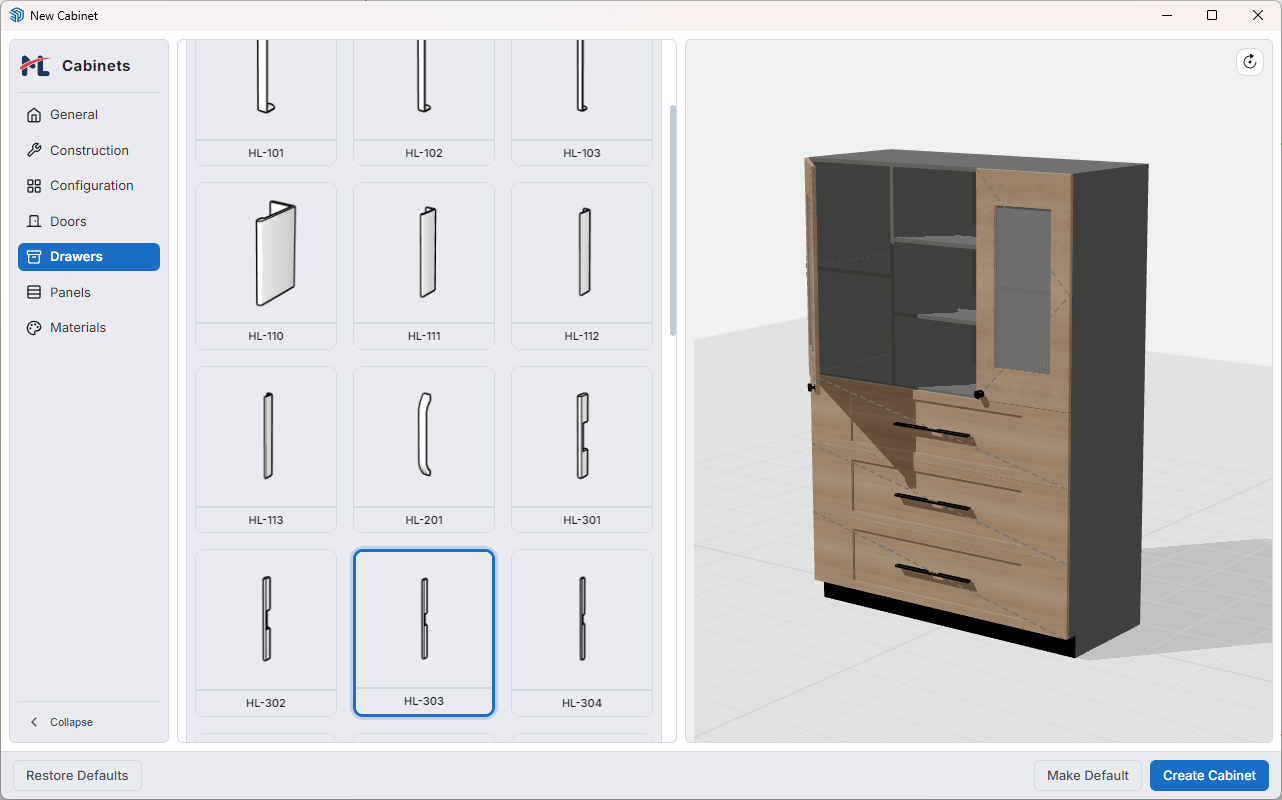
Handles Subtab
Select the default handle preset for drawer items.
None is the first option and factory default;
it creates no cabinet-level handle or handle cost. Saved None
choices are restored when you reopen the cabinet; individual
handle overrides remain independent.
Use Horizontal Offset and
Vertical Offset to define the cabinet-wide
default placement.
Use Rotation to angle drawer handles or correct
a custom handle preset that is slightly off-axis.
Review the live preview to check that the handle location suits
the drawer proportions.
Drawer handles are automatically rotated 90° so bar handles run
horizontally across the drawer face. The Rotation
value is applied after that automatic turn.
Working drawer items can then refine the result further in the
Configuration tab with their own clearances,
opening amount, and per-item styling overrides.
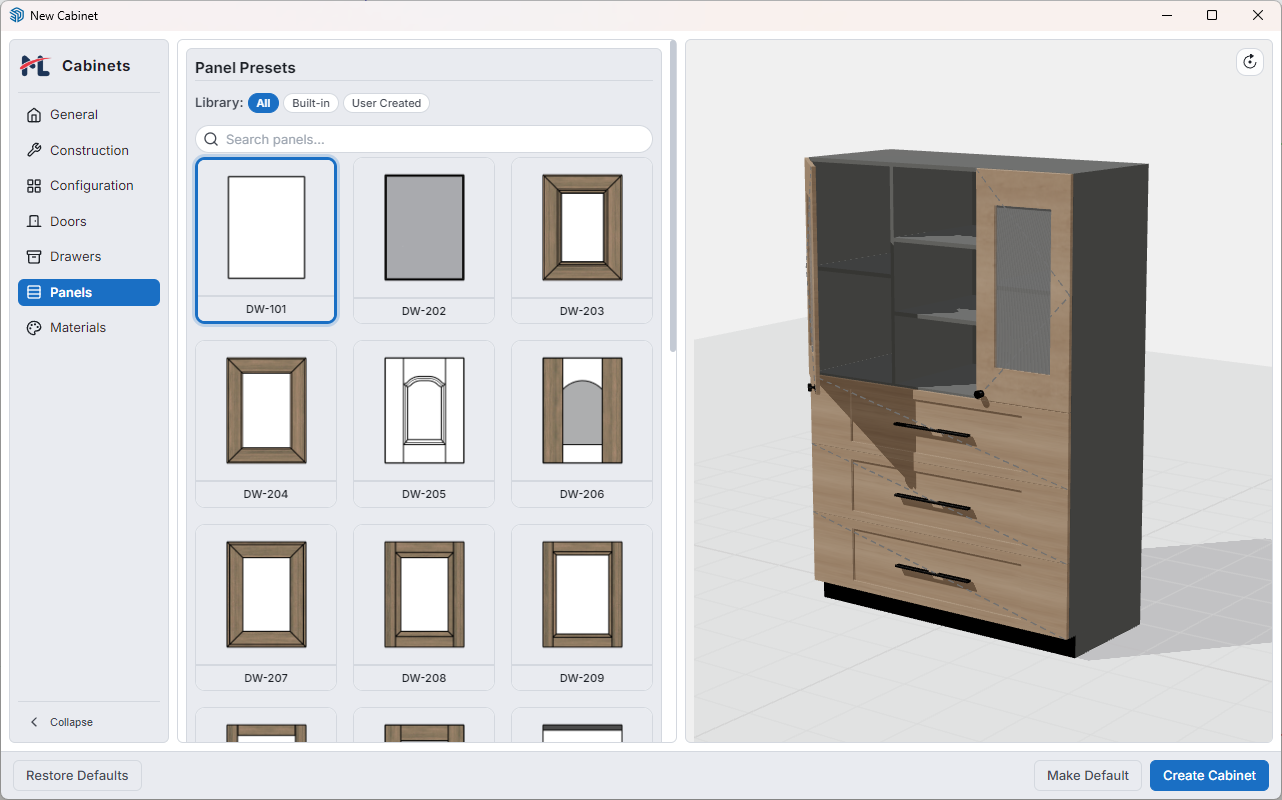
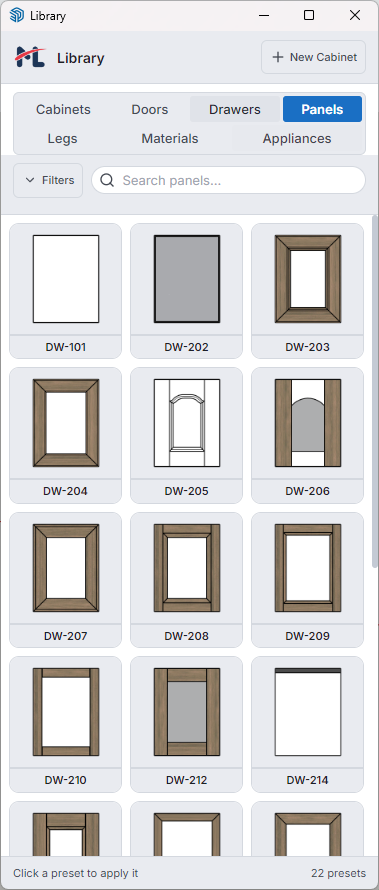
Panels Tab
The Panels tab sets the default face style used
by panel-based elements such as panel items and decorative end
panels.
Browse panel presets in the same visual card-grid workflow used
in the Doors and Drawers tabs.
Use the source filters to switch between all presets, built-in
presets, and your saved custom presets.
Use search to locate a panel family quickly in a larger library.
Select a preset to make it the cabinet-wide panel default.
This is especially useful when the cabinet includes a decorative
panel opening, a side feature panel, or a panel-based design theme
that should match across multiple items.
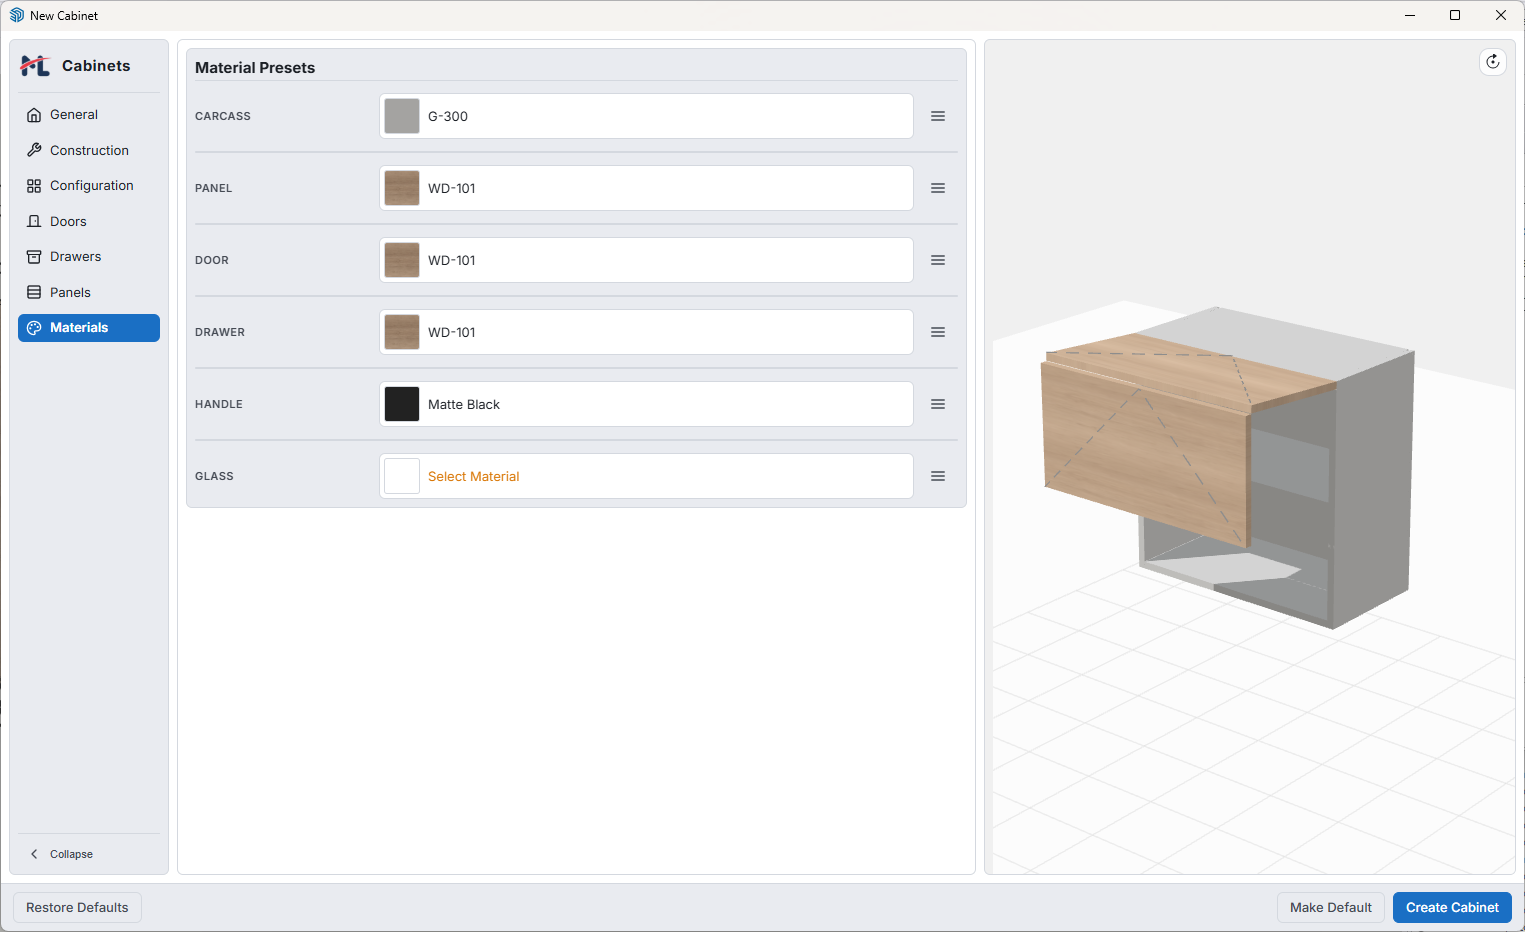
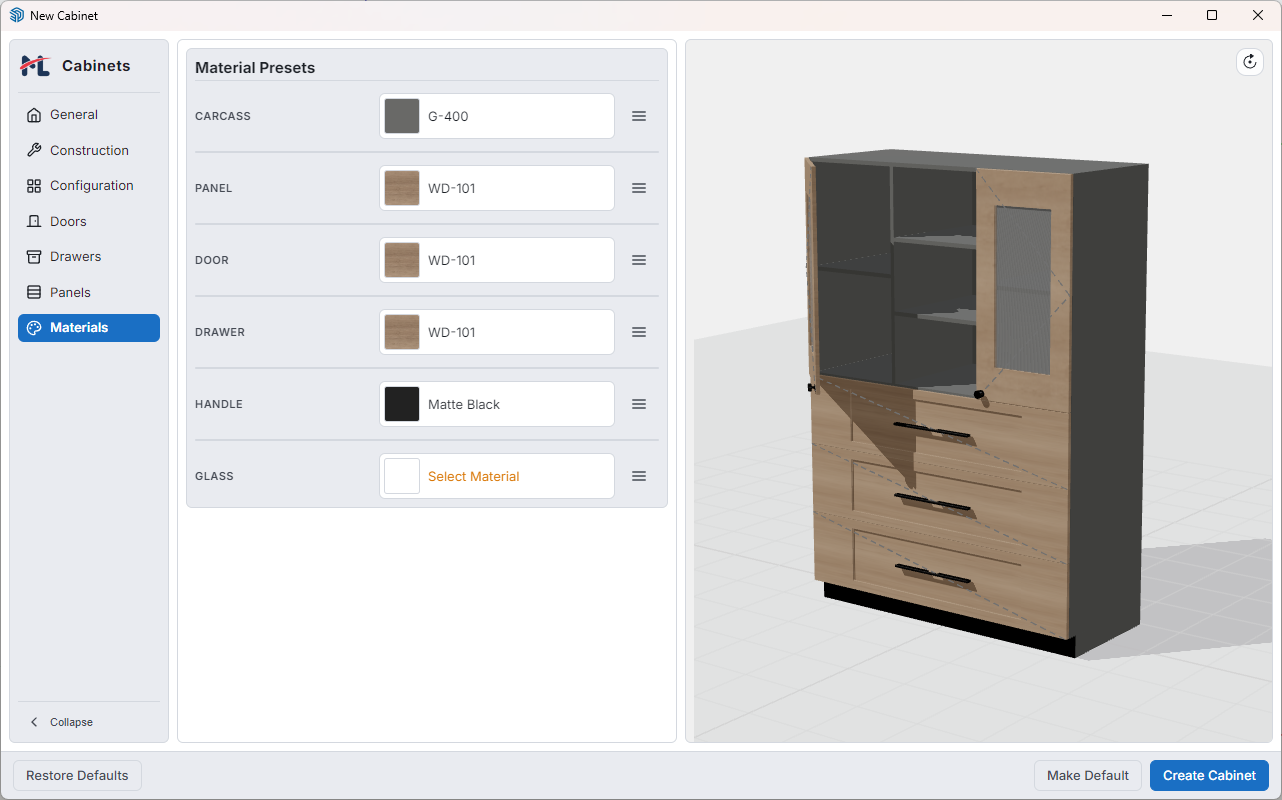
Materials Tab
The Materials tab assigns cabinet-wide finishes.
This is where the model gains its visual identity: carcass tone,
feature panel finish, front materials, handle material, and glass.
Material Library
Material pickers open a visual selection modal. You can usually
filter by source and by broad finish family, then choose from
swatches such as wood, marble, metal, colour finishes, and glass.
Cabinet-Level Material Rows
Row
What It Controls
Carcass
Structural cabinet parts such as sides, top, base, back, and
toe-kick-related body surfaces.
Panel
Panel-style faces and decorative end panels.
Door
Door-based items across the cabinet.
Drawer
Drawer fronts across the cabinet.
Handle
Handles and, by default, profile elements unless a profile
material override is applied.
Skirting
The independent finish for skirting strips.
Glass
Glass inserts where the selected front style uses them.
Grain Direction
Each material row includes a grain toggle button. Use it to switch
the grain between horizontal and vertical whenever the chosen
finish needs a different visual direction.
Useful strategy: Treat this tab as the cabinet's
default finish plan. Set the overall language here, then only use
item-level material overrides for exceptions.
Skirting has its own finish selector and grain control, independent of handles. Choose its profile in General. The finish affects appearance only; Cost Estimate uses the selected profile price per linear metre. Older cabinets inherit their saved handle finish when no separate finish exists.
Edge Banding
In the Asset Library, open Edge Bands to search, filter, add, edit, duplicate or delete band presets. Select a band and click a cabinet to replace all existing strips, including overrides. Hold Alt/Option and click a banded panel, its core or strip to replace only that panel's bands. The tool never enables edges; unbanded cabinets and panels remain unchanged. Manage edge selections in New/Edit Cabinet. Thickness changes rebuild the board core while preserving finished dimensions, invalidate the previous cost estimate, and support Undo/Redo. If an edited band specification is already used on other panels, apply it to the whole cabinet to update that shared specification.
Open Edge Banding in New/Edit Cabinet, enable it and choose a cabinet band. Factory defaults for base, wall, tall, high, filler, base-corner and wall-corner cabinets select White_EdgeBand (2 mm thickness, 22 mm tape width). Existing cabinets, saved drafts and custom Make Default selections retain their saved choices. Use Add band, Edit band or Duplicate band to maintain a specification: positive band thickness and tape width in millimetres, optional linked material finish and fallback colour, supplier details, and price per metre. Tape width must cover the board thickness; the finished strip is trimmed to that thickness. A missing linked material or texture uses the saved colour with a warning; it does not change the saved physical specification.
Eligible parts are supported rectangular structural boards, shelves, toe-kick boards and drawer-box boards, including wooden inner-drawer parts and supported drawer-system bottom/back boards. Rectangular parts in straight, blind-corner and L-shaped cabinets are supported; each separate L-shaped shelf section is a separate panel. Grooved sides retain their grooves. Doors, all drawer fronts (including false and inner fronts) and configured panel faces are excluded. Hardware, profiles, glass and supplied metal kit sides are excluded. Unsupported shapes or imports are not assigned a fictitious rectangular perimeter; imported frames and arbitrary shaped assets are not covered. The standalone End Panel tool is outside this feature.
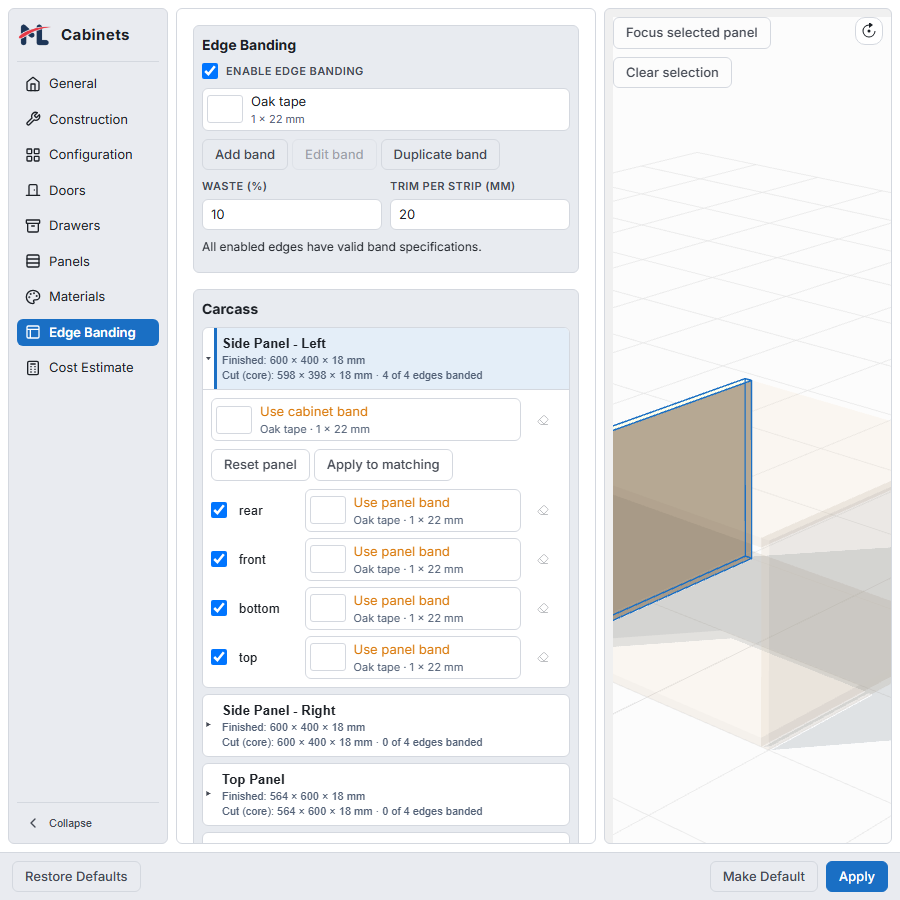
Expand a panel in the tree and use each edge checkbox to control physical presence. An edge band choice overrides the panel choice, and the panel choice overrides the cabinet band; reset buttons restore inheritance. Use panel band and Use cabinet band mean inherit, not remove the strip. Turn an edge off to remove its strip. New wall cabinets start with all four side-board edges enabled and a 10 mm back-panel recess. New base, tall, high and filler cabinets start with rear/front/top edges on side boards. All five types use rear/front edges on top boards, top rails, bottom boards and shelves; the top edge on Back Stretcher 01 and the bottom edge on Back Stretcher 02. Toe-kick defaults are left/right/bottom on the front board, rear/bottom on the side boards and bottom on the back board. Tall cabinets also start with top/bottom edges enabled on wooden drawer sides and all four edges on drawer backs; drawer bottoms remain unbanded. Tall factory configuration uses two 800 mm door sections with one shelf each, two automatically sized drawers between them and a 10 mm back-panel recess. Other eligible boards start with edges off. L-shaped base and wall corners use separate panel defaults for the two wings and their toe-kick boards. Blind base and wall corners use their own panel defaults, including the blind front closure and toe-kick boards. Existing assignments remain unchanged when switching corner shapes. Edit these defaults for the cabinet and use Make Default to retain them for new cabinets of that type. Existing panel assignments remain explicit. Side Panel - Left and Side Panel - Right mean left and right while facing the cabinet front; Top Panel, Bottom Panel, numbered Shelf and Partition labels match the preview and rebuilt model.
Cabinet and panel dimensions remain the finished design size; cutting dimensions show the reduced board core after band thickness is deducted. The tree labels both Finished and Cut (core); Cut (core) is unavailable when band assignments cannot produce a valid cutting size or the panel source is rejected. Selecting a panel highlights its physical bands and fades surrounding geometry. Strip instances use the Edge Banding tag inside the ML Cabinets tag folder, with raw faces and edges Untagged. Hiding the tag reveals the core without changing quantities or costs. Strip thickness stays fixed in physical millimetres through supported cabinet resizing. For four edges, the pair spanning the full panel width keeps full-width strips; the other pair is shortened between them to avoid doubled corners.
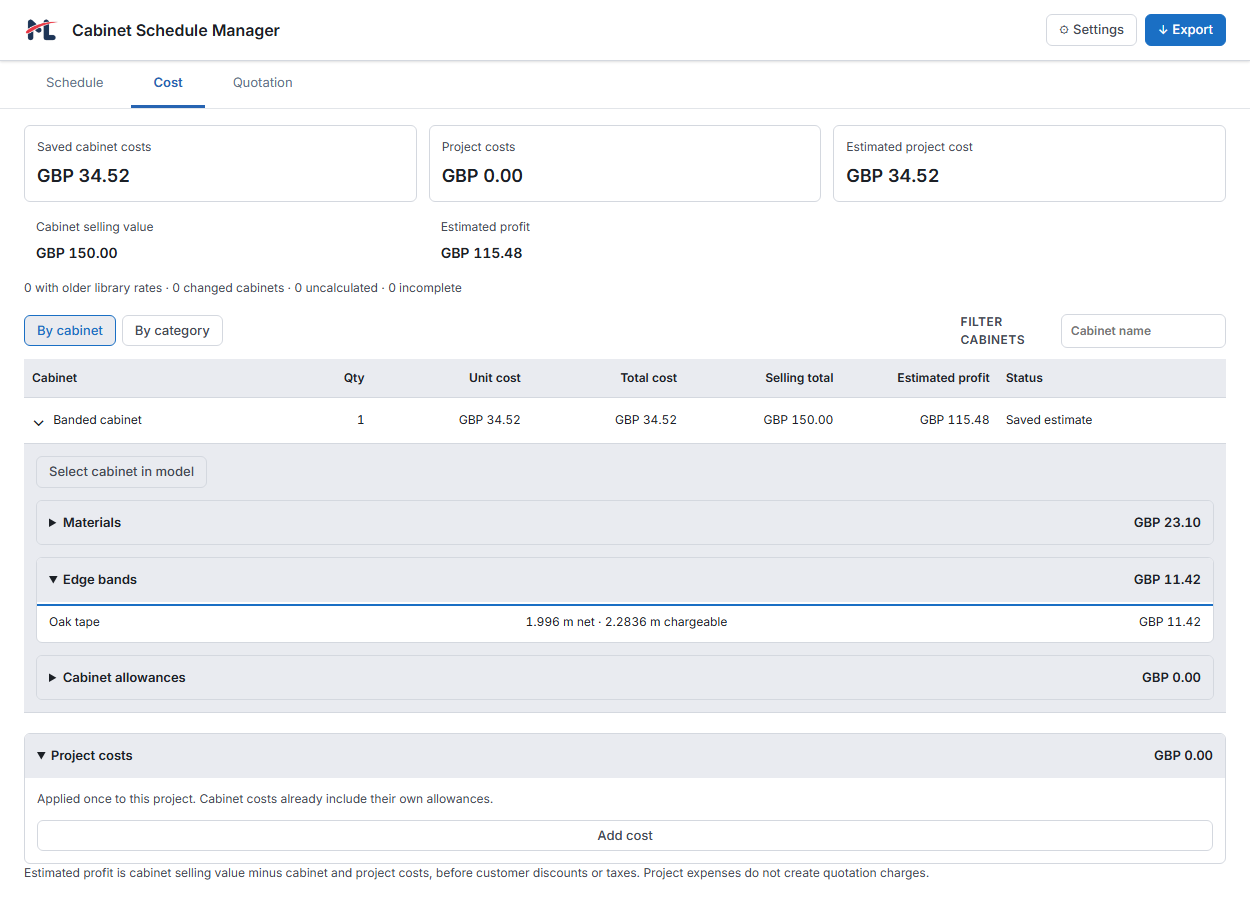
Cost Estimate and Schedule group tape under Edge bands and expand each contributor to show net installed length and chargeable length. Trim per strip and band waste default to zero. Chargeable length is (net length + trim for each strip) × (1 + band waste / 100), priced per metre. General board waste applies only to board materials and never adds band allowance again. Where an eligible purchased panel has banding included in its price, its physical strips remain and its purchasing basis stays finished-size, with no separate tape charge. This policy does not enable excluded configured fronts. Missing prices leave the estimate Incomplete; an explicit zero price is valid.
Accepted historical rates remain saved until you explicitly review and accept newer prices. Check prices only refreshes comparisons. A successful Edit band save for a band already selected by this cabinet immediately adopts its linked finish and fallback colour. This explicit editor save keeps accepted prices and the remaining technical specifications unchanged. Passive catalog refresh keeps the saved band finish and specifications unchanged. Changes to thickness, tape width, included purchasing policy or a finish updated only by passive refresh require separate Review construction and explicit adoption. Price acceptance never changes technical specifications. Old cabinets without banding retain their geometry and costs until explicitly enabled. Previously created front strips or older side assignments require normal Edit Cabinet Apply rebuild under the current scope and front-facing convention; opening or reading a cabinet does not migrate it. This feature does not provide CNC/toolpaths, a new cutlist exporter, sheet nesting, roll purchasing, machine sequencing, mitres, glue thickness or automatic application labour.
Side Panel - Left selected, with its inherited edge choices and physical strips.Schedule Cost: expand Edge bands to compare net and chargeable tape lengths.
Cost Estimate Tab
Use Cost Estimate to see what one cabinet is expected to cost, including its consumed items and cabinet-specific allowances. Open it from the tab list or click the Cost estimate readout beside Cabinet Price in General.
Amount
Where to enter or review it
What it means
Library price
Edit the material, panel, hardware or other asset
A cost rate used to estimate consumed items.
Estimated total
Cost Estimate
Items plus waste, labour, shipping and additional costs for this cabinet.
Cabinet Price
General
Your selling price, used by Schedule and new quotations. It is entered separately.
Estimated profit
General
Selling price minus the estimated cabinet cost.
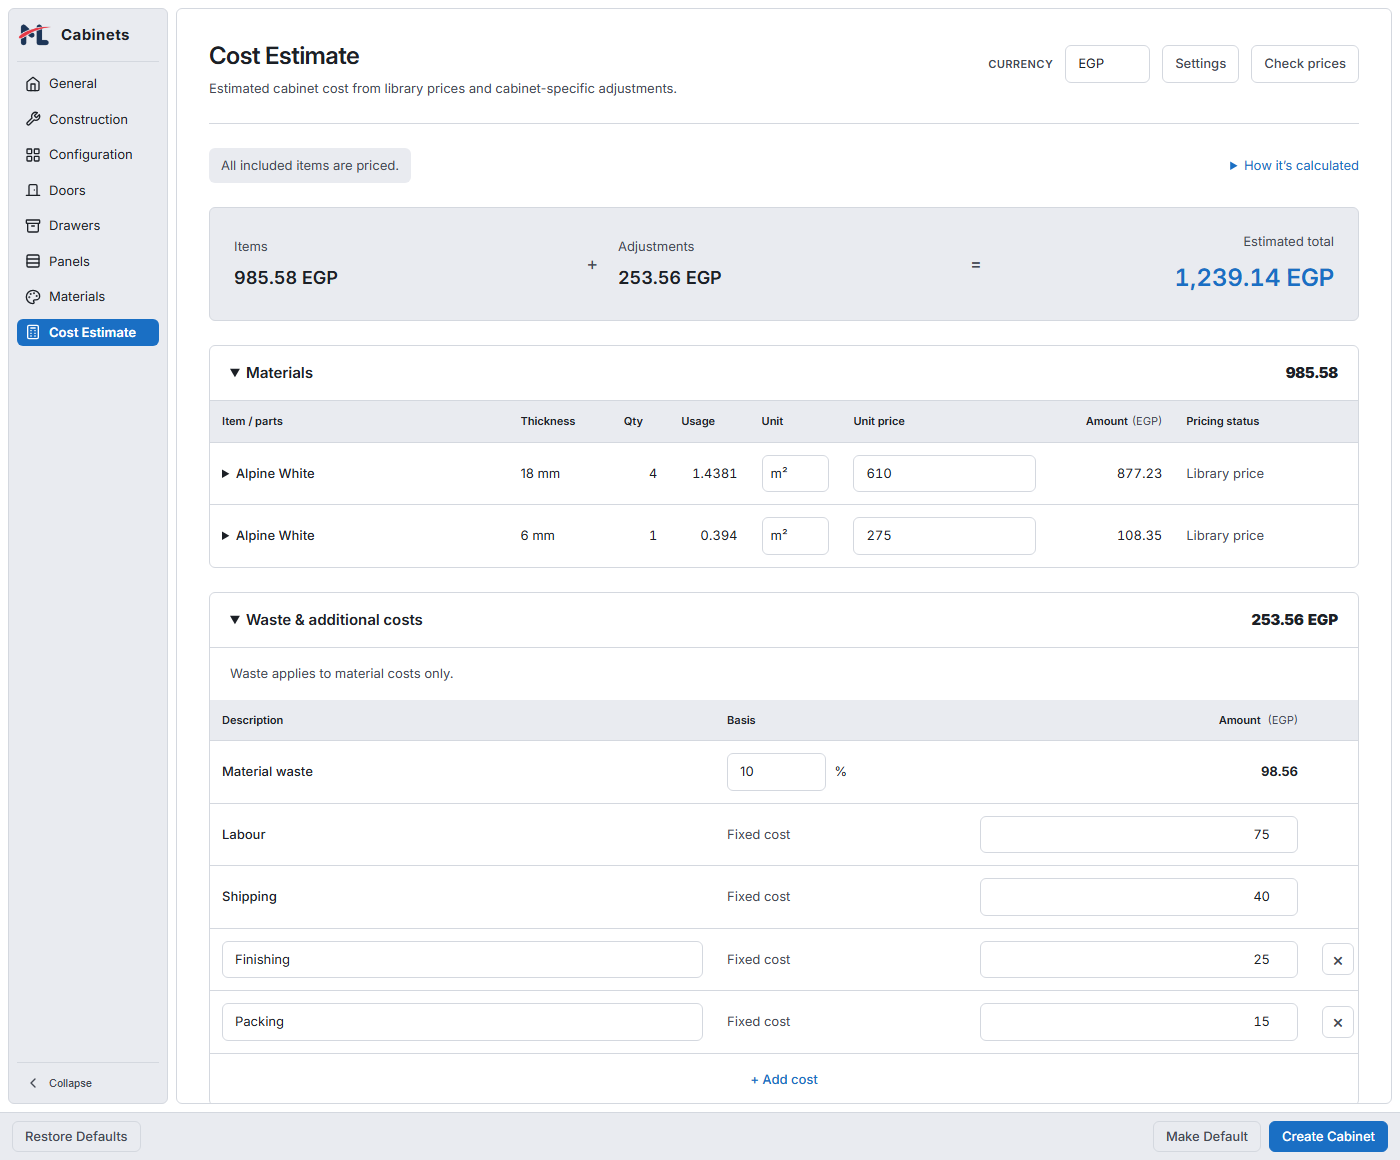
Example: the redesigned worksheet keeps totals above the item breakdown. Screenshots in this pricing walkthrough use sample data in the current extension dialogs; names, prices and tax percentages are illustrative. Click a screenshot to enlarge it.
1. Set the currency and library prices
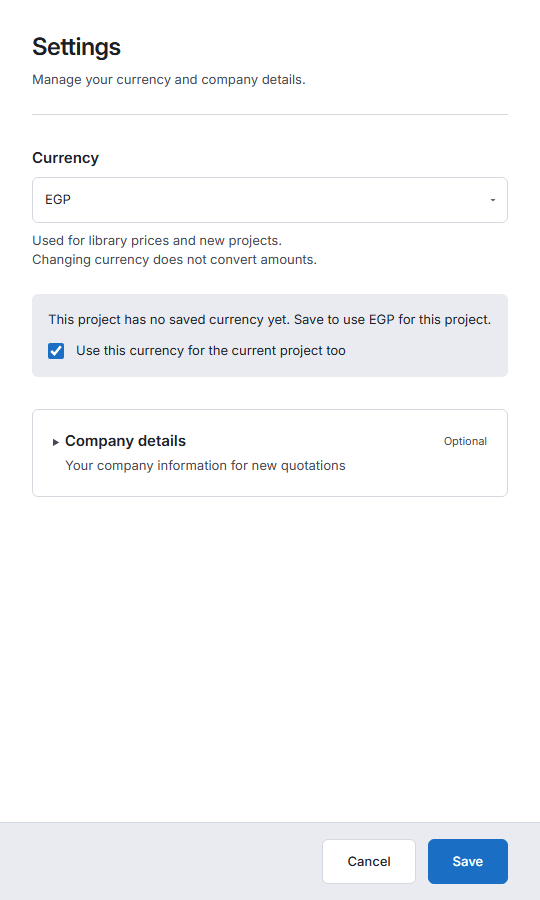
Open Settings from the gear toolbar button, Extensions ML Cabinets Settings, or the Settings button in Cost Estimate. The same window is available in Schedule Manager.
Choose Currency for library prices and new projects. To set or change the open model's currency, leave Use this currency for the current project too checked and click Save. If the dialog says the project has no saved currency yet, the library currency has not yet been saved to that model.
Enter asset prices in the library's Edit dialog. Materials need a separate price for every used thickness; slides and drawer systems need a price for the selected length. The pencil beside an estimate row is a shortcut to that asset's editor when editing is available.
Return to Cost Estimate and click Check prices. Review any missing-price or currency warnings before relying on the total.
Changing currency does not convert amounts. When a change affects existing prices, review the warning and confirmation before saving. Saved estimates and issued documents keep their original currency. The estimate's project currency is read-only in normal use; change it through Settings.
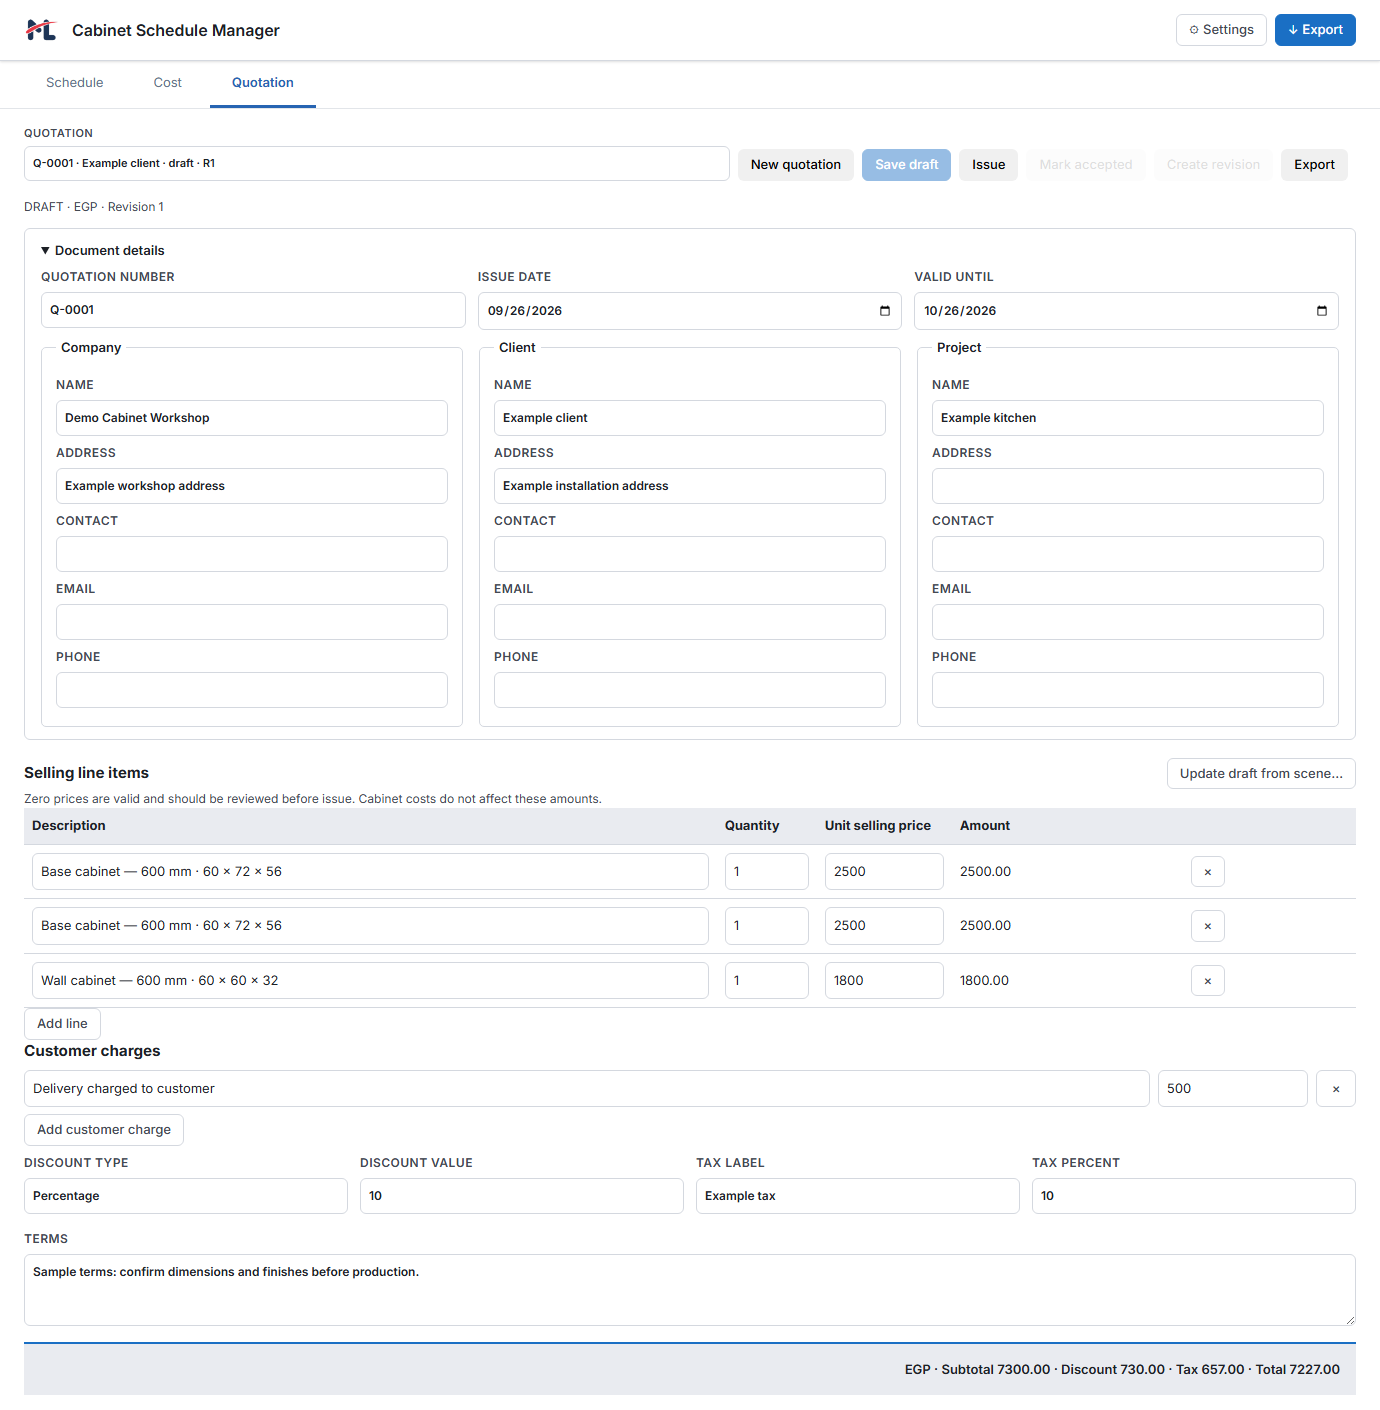
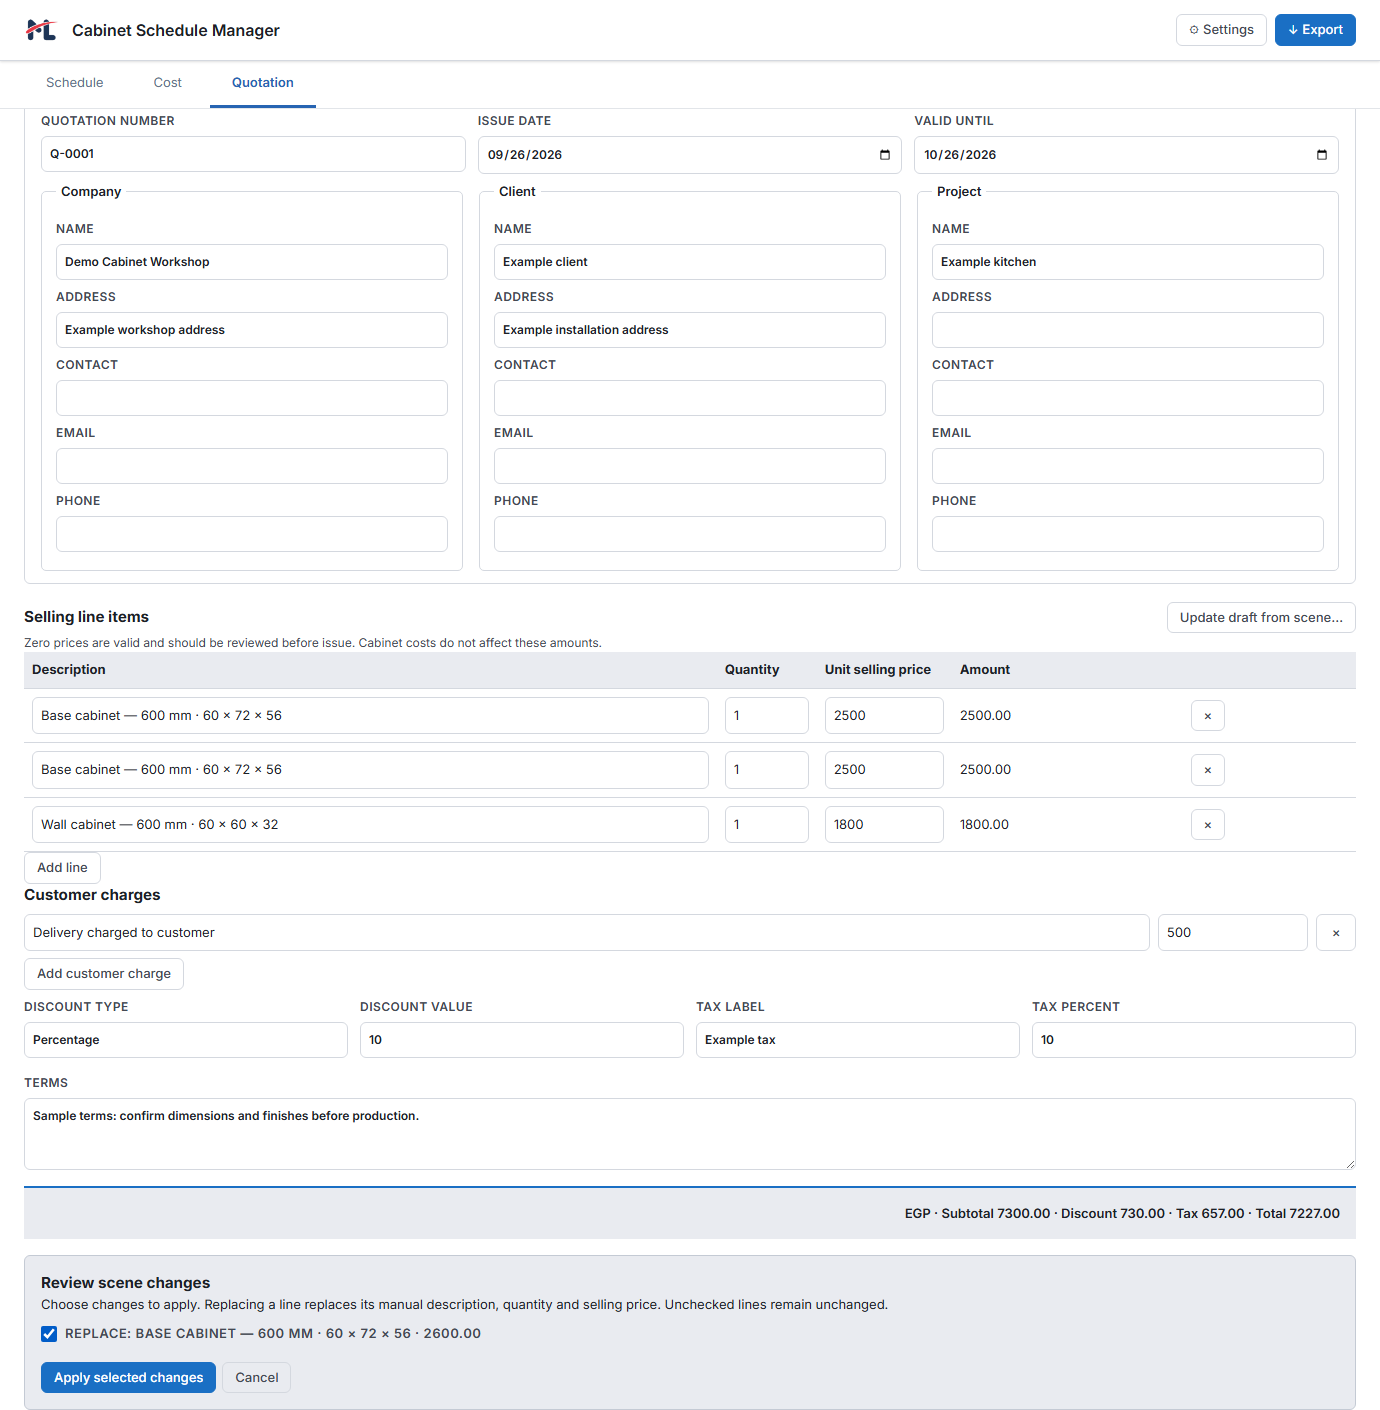
Optional Company details in Settings supply defaults for new quotations. They do not replace the company information in quotations already saved in the model.
2. Read the worksheet
The summary follows Items + Adjustments = Estimated total. If an item is unpriced, the known item subtotal remains visible but the full total is incomplete.
Expand Materials, Hardware & systems or another used category to see its rows. Expand an Item / parts row to inspect the contributing parts, dimensions or runs. The columns distinguish physical quantity, consumed usage, pricing unit, unit price and calculated amount. Currency appears in the amount heading; narrow windows scroll within the tables.
Collapse a category to keep its heading, subtotal and any Incomplete warning visible. Waste & additional costs works the same way. Expand How it's calculated for the calculation rules and exclusions.
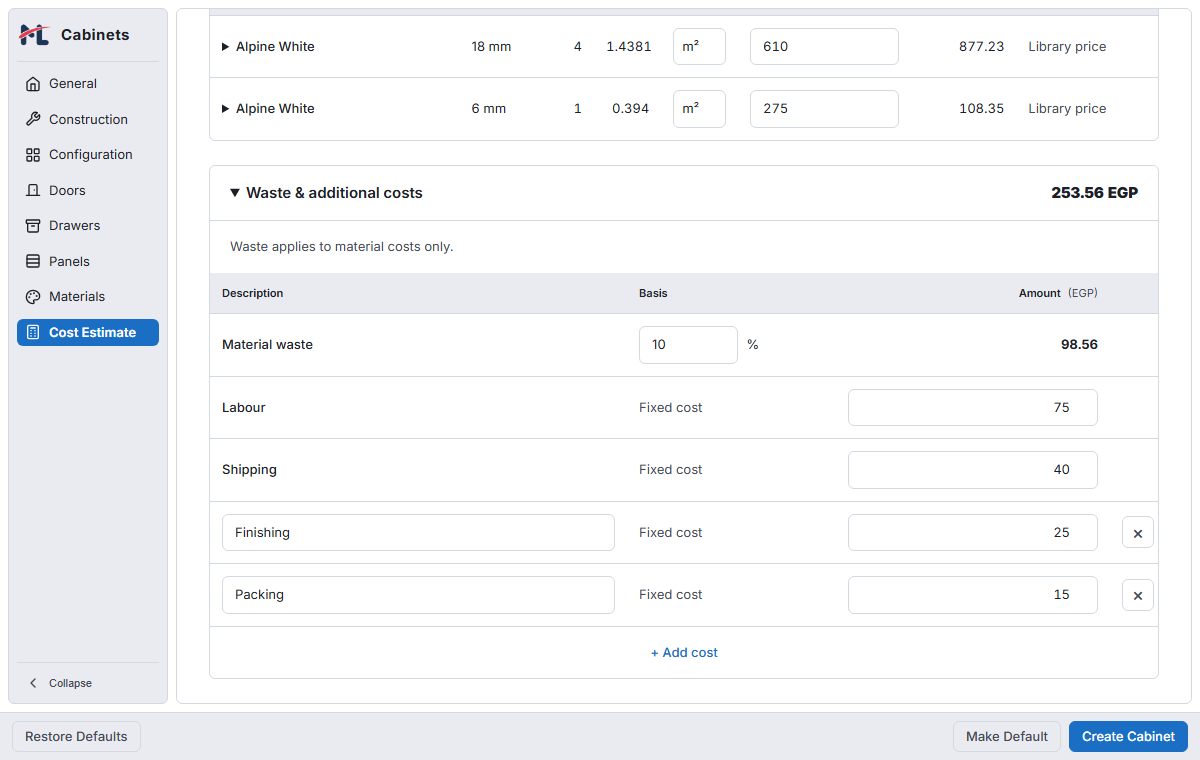
3. Add waste, labour, shipping and other costs
Expand Waste & additional costs below the item breakdown.
Enter Material waste as a percentage. It applies only to material-priced parts, including cabinet-only price overrides. Purchased panel assets, profiles, handles, hardware, appliances and complete systems receive no waste allowance.
Enter Labour and Shipping as fixed amounts for this cabinet.
Click Add cost, enter a description such as finishing or packing, and enter its amount. Repeat for further costs. The button removes that row.
Return to General to enter your Cabinet Price and compare it with Estimated profit.
All fixed amounts use the estimate currency. Blank adjustment amounts count as zero; negative amounts are not accepted. Costs are rounded to two decimals. If a material price is missing, its waste amount remains unknown and the estimate stays incomplete.
Worked example: materials cost 800 and other included items cost 200, making Items 1,000. Material waste at 10% adds 80. Labour 75, shipping 40 and finishing 25 make Adjustments 220, so the estimated total is 1,220. A selling price of 1,500 gives estimated cabinet profit of 280. These are example amounts, not suggested prices.
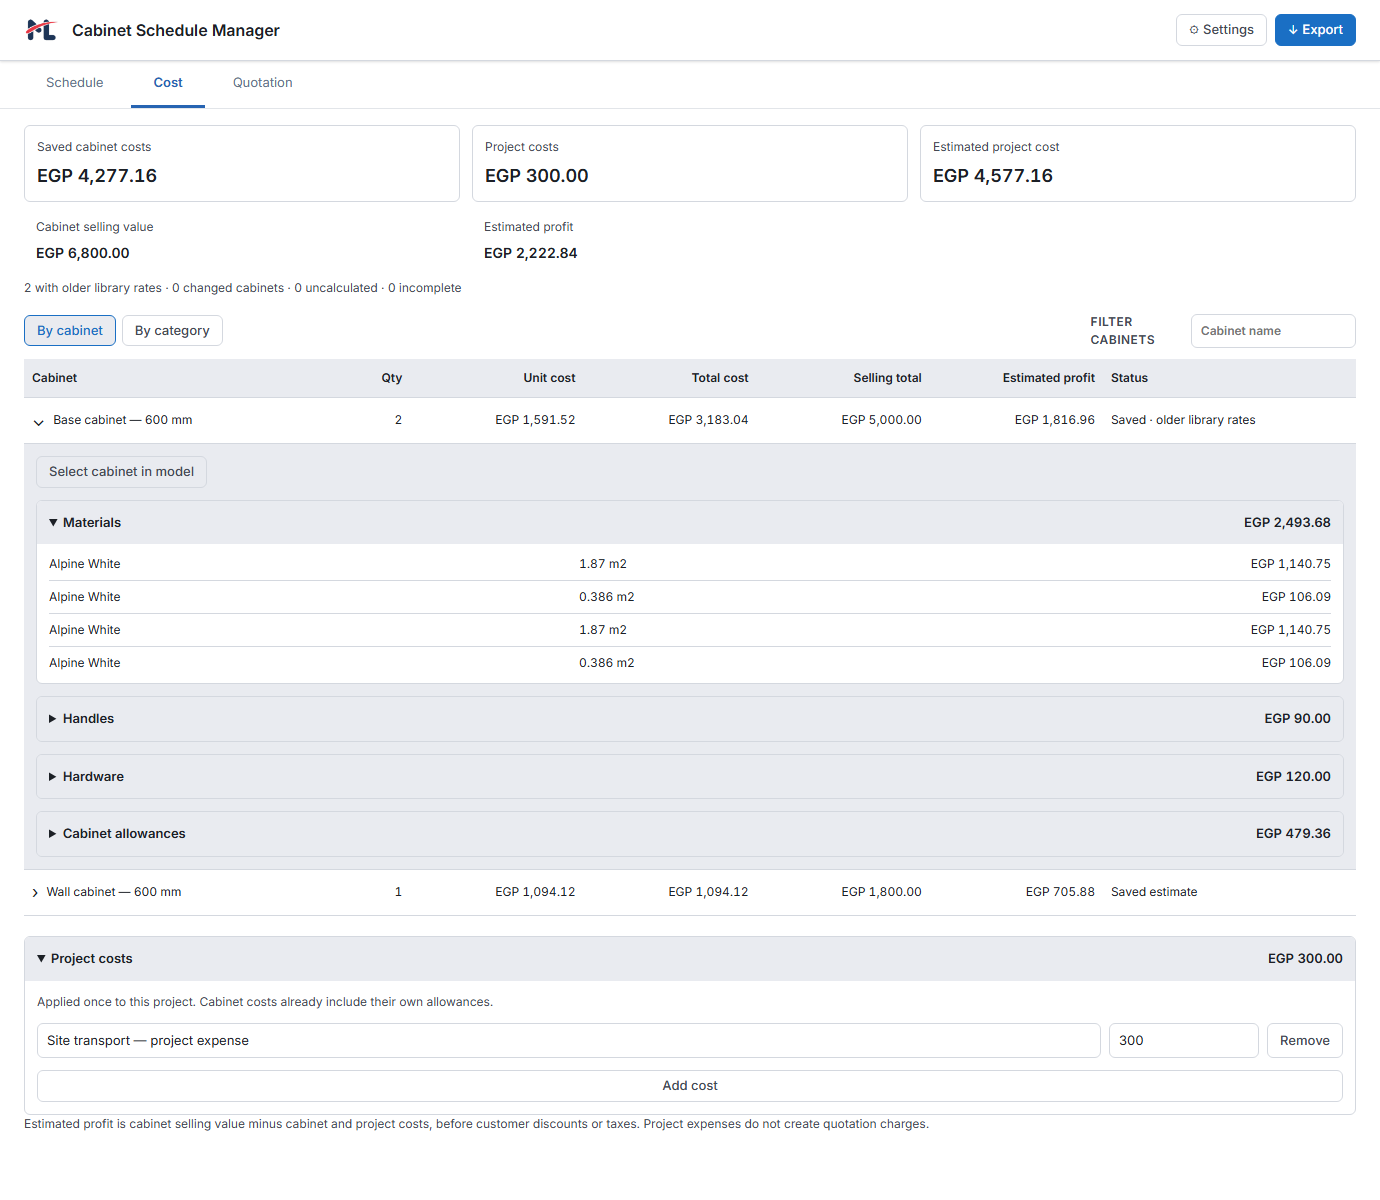
Use cabinet allowances for costs repeated for each cabinet. A cost incurred once for the whole job belongs under Schedule Manager Cost Project costs, so it is not multiplied by cabinet quantity.
4. Resolve an incomplete estimate
What you see
What to check or do
Not priced / a blank unit price
Add an asset price or enter a cabinet-only unit price. An explicit zero is valid; a blank price is unknown.
Thickness not listed
Add the exact material thickness. A 6 mm back does not use the 18 mm price.
Missing asset or selection
Choose the intended preset, or restore the missing asset. Enabled items without an asset remain unpriced.
Pricing unit mismatch
Match the asset's unit exactly. A manual price cannot bypass a unit mismatch; no metre/foot or area conversion is performed.
Invalid hardware length or fit
Select a listed, compatible length and resolve the fit warning.
Currency warning
Review project and library currencies in Settings. Relabelling is not exchange conversion.
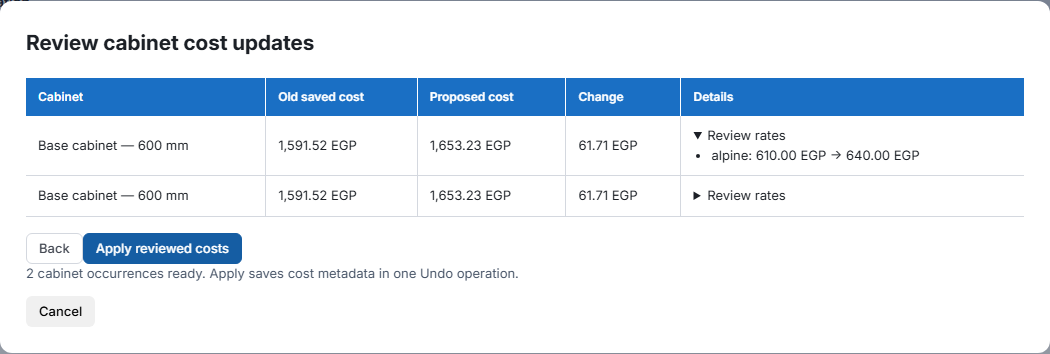
To override a rate for just this cabinet, edit the row's Unit price. This does not change the library asset. Use library, or clearing the override, removes the custom price. An existing cabinet then returns to its accepted base rate until you explicitly accept newer library prices. Unit-only edits also persist; restore the correct unit or use Use library if an unsupported unit is saved.
5. Save the estimate and review later price changes
Creating and placing a new cabinet saves an independent estimate with that cabinet. In Edit Cabinet, save your changes with Apply. Save the SketchUp model to retain these estimates in the project file.
Reopening an existing cabinet keeps its accepted rates. Check prices refreshes comparison data; it does not automatically accept new rates. To adopt changes:
Click Check prices, then Review prices.
Compare saved and updated totals and the rate changes. Manual overrides are retained and the selling price stays unchanged.
Click Use updated prices to accept the reviewed rates in the dialog, or Cancel to keep the accepted rates.
Save the cabinet with Apply to retain the accepted update.
An older cabinet may show No saved estimate with Calculate cost. Use that action to review and explicitly initialize an estimate; opening or saving an old cabinet does not invent a historical cost. Bulk Edit has no combined estimate: open one cabinet to inspect its costs, or use Schedule Manager to review several cabinets.
What the included items mean
Panels set to From material use each part's rectangular blank area and actual thickness, with the assigned material price. From panel asset uses the selected panel preset's price instead and appears in Purchased panels, without a second material charge. This applies to door leaves, drawer fronts (including inner and false drawers), and panel items, using each item's preset override where selected.
Skirting uses the profile selected in General and its price per linear metre. Both L-shaped corner runs are counted, with the joint allowance based on the profile depth. Its finish adds no material charge.
Handles are counted per piece using selected assets and per-item overrides, including selected inner-drawer handles.
Legs count as four on rectangular/blind cabinets and five on L-shaped corners, when both Toe Kick and Create Legs are enabled.
Appliances count once per appliance item. Repeated uses of the same asset share one cost row.
Profiles use linear metres only. Profile groups, vertical/horizontal profile items and inner-drawer profiles use their resolved run lengths, even in inch-based projects.
Drawer systems use one set per regular or inner box at the selected length's price. Their runners are included; bottom/back boards use the carcass material at actual thickness and the decorative front is priced separately.
Selected lifts and stays use their configured Piece, Pair or Set quantities. Included or replaced hinge connections do not add duplicate hinge or mounting-plate charges.
A profile's finish does not add a material charge, even if it shares a material with panels or handles. Actual panels follow their selected costing mode. Two 564 mm profile runs consume 1.128 m; at 100 per metre they cost 112.80. A 600 mm skirting run consumes 0.6 m; a profile priced at 550 per metre costs 330, regardless of its finish material.
Hinges and separate mounting plates are grouped by selected asset in Hardware & systems. Piece uses the physical count; Pair uses count divided by two. Three hinges consume 1.5 pairs, without rounding up to purchased packs. Missing hinge/plate selections, unavailable assets, wrong hardware roles, invalid angles, unset prices or incompatible pricing units leave the combined total Incomplete while priced subtotals remain visible. Cabinet-only overrides, Check prices and Use library follow the same saved-rate rules as other assets.
The estimate includes sliding-system fittings and separately priced tracks. It excludes unlisted hardware, separately purchased glass, whole-sheet nesting and selling markup. Glass already included in a panel asset or drawer-system kit has no separate charge. It estimates consumed items, rather than whole-sheet purchasing or a final selling price.
Per-Item Overrides
One of the most powerful parts of the New Cabinet dialog is the
ability to keep cabinet-wide defaults while still giving a single
opening its own styling. This happens in the
Configuration tab after you select an item.
Override Type
Available For
What It Lets You Do
Shape
Doors, drawers, and panel items
Give one opening a different face style without changing the
rest of the cabinet.
Handle
Doors and drawers
Use a different handle preset for one item only.
Material
Doors, drawers, and panel items
Override the cabinet-level finish for one selected item.
Profile Material
Profile items and profile groups
Give a profile its own finish instead of inheriting the
handle material.
Clear buttons beside the override selectors return the selected
item to the cabinet-level default. This makes it easy to test a
variation and then go back to the shared cabinet style without
rebuilding the layout.
Live 3D Preview
The live 3D preview is one of the most valuable parts of the New
Cabinet workflow. It updates as you change dimensions,
construction, layout, materials, handles, profiles, and grain
direction, so design decisions are checked before anything is
placed in the model.
Why It Matters
It helps you catch proportion issues early when changing width,
height, depth, or height from floor.
It shows whether the chosen construction method gives the look
you intended.
It makes divider, separator, and profile decisions easier to
judge before placement.
It helps you compare cabinet-level defaults against per-item
overrides in real time.
It lets you evaluate materials, handle offsets, handle
rotations, and grain direction before committing to the cabinet.
What You Can Review In The Preview
The complete cabinet body and panel geometry
Doors, drawers, shelves, openings, separators, and dividers
Profiles, handle placement, and handle rotation
Material assignments across the whole cabinet
Glass where the chosen style uses it
Preview Controls
Orbit by dragging the view.
Zoom with the mouse wheel.
Pan with right-drag.
Use Reset camera to return to a reliable review
angle after inspecting details.
Recommended habit: Treat the 3D preview as a
design checkpoint after every major decision: after sizing the
cabinet, after changing the construction method, after building
the opening layout, and again after assigning final materials.
Footer Controls And Final Action
The footer controls support the last part of the workflow: saving
your preferred starting point, returning to factory defaults, and
committing the cabinet to the next stage.
Button
What It Does
Restore Defaults
Returns the current cabinet type to its original default
setup after confirmation.
Make Default
Saves the current values as your new starting point for the
selected cabinet type.
Create Cabinet
Sends the designed cabinet to the placement tool so you can
position it in the SketchUp model.
Apply
Appears when editing an existing cabinet and rebuilds that
cabinet in place with the new settings.
In short, the New Cabinet dialog is designed to take you from a
cabinet idea to a reviewable, placeable, and editable cabinet in a
single continuous workflow.
Placement & Interaction
Interactive Placement Tool
After clicking Create, the dialog closes and a
colour-coded wireframe preview follows your cursor in real time.
Keyboard shortcuts let you refine position before you click to
place.
Toggle vertical anchor between bottom and top edge
[ / ]
Rotate cabinet 90° counter-clockwise / clockwise
Space
Cancel placement
Tip: Corner, anchor, and rotation settings are
remembered between placements in the same session.
Open / Close Interactive Tool
Click any door or drawer in a placed cabinet to animate it open or
closed in real time. Click again to toggle it back.
Supported Hinge Types
Door Type
Hinge Edge
Opens Toward
Single door (right hinge)
Right edge
Left
Single door (left hinge)
Left edge
Right
Hinge top
Top edge
Upward
Hinge bottom
Bottom edge
Downward
Double door
Left + right edges
Both leaves outward
Sliding Door
Separate bypass tracks
Clicked left or right panel slides; three states
Bi-Fold Door
Outer vertical edges + folding joints
Four leaves fold in two pairs
Lift Door
Top edge + centre folding joint
Upper and lower leaves fold together and lift upward
Regular and inner drawers move outward by Opening Amount × the selected slide's maximum travel. For example, 50% of 450 mm travel opens the drawer 225 mm. The same limit applies in the preview and SketchUp. Drawers without an assigned slide retain their previous movement.
If an older cabinet does not open after assigning or updating slide hardware, reopen it with Edit Cabinet, check the selected length, fit warning and maximum travel, then apply the cabinet changes. Updating an asset in the library alone does not rebuild hardware settings already saved in placed cabinets.
Dynamic Component Intelligence
Every sub-component is driven by formulas that chain back to the
root cabinet's dimensions. Resizing with SketchUp's Scale tool
automatically updates every child component.
Cabinet (root)
Group (layout zone)
Item (opening)
Shelf & Drawer Box
Panels maintain their specified thickness regardless of scaling —
a 1.8 cm panel stays 1.8 cm. The formula chain ensures all
geometry recalculates in a single evaluation pass.
Editing Tools
Edit Cabinet — In-Place Modification
Reopens any previously placed cabinet in the same configuration
dialog with every setting restored. Change dimensions, interior
layout, materials, handles, or any parameter and apply the update
without deleting or repositioning.
Select a cabinet and click Edit Cabinet on the
toolbar (or right-click ML Cabinets Edit Cabinet).
The dialog opens in Edit mode — title bar reads
"Edit Cabinet" and the footer shows Apply.
Make your changes across any tab.
Click Apply — the cabinet rebuilds in place.
Position and rotation are preserved.
Note: Undo is fully supported — a single
Ctrl+Z reverts the cabinet to its pre-edit
state.
Bulk Edit — Multi-Cabinet Editing
Select two or more cabinets and open Edit Cabinet. The dialog
shows shared settings normally and differing settings with a
••• mixed-value indicator. Only fields you modify
are applied — everything else stays at each cabinet's original
value.
Select multiple cabinets with Shift+Click or a
selection box.
Click Edit Cabinet — a banner reads "Editing N
cabinets".
Modify only the fields you want to unify.
Click Apply — all selected cabinets update
simultaneously.
Style Picker — Copy & Apply Cabinet Styles
Works like a Format Painter for cabinets. Pick a source cabinet's
style, then click targets to apply it.
Click Style Picker on the toolbar — cursor
changes to an eyedropper.
Click a cabinet to pick its style (outlined in
green).
Click other cabinets to apply the style — they
rebuild in place.
Press Esc to re-pick a different source, or
Esc again to exit.
Pro Tip: Hold Alt/Option while clicking the
source to open a filter dialog — choose exactly which properties
to transfer (dimensions, materials, configuration, etc.). The
filter selection is remembered for the rest of the session.
The filter has nine sections: General, Construction, Configuration, Doors, Drawers, Panels, Materials, Hardware & Kits, and Edge Banding. Hardware controls independently transfer hinge defaults (with their library mounting-plate settings), lifts/stays and quantities, sliding systems, drawer slides, and drawer-system kits with automatic or manual lengths. Edge Banding transfers enabled state, tape specifications, panel/edge selections and overrides, trim and waste. Assignments follow compatible owner positions when the target layout is retained; unmatched owner assignments are omitted.
Cabinet-level selectors preserve item overrides, including explicit None. Copy Configuration to replace the complete layout and its per-item settings, shelves and inner drawers. General has separate Toe Kick and Skirting Profile controls: select Skirting Profile alone to copy the profile without changing the target's toe-kick height, depth, legs, or skirting toggle. Toe Kick alone preserves the target profile. Materials includes the independent skirting finish. Handle offsets include rotation, and Back Panel includes groove/joinery settings. Filtered transfers convert dimensional values to the target unit; hardware lengths and tape specifications remain in millimetres. Target names, prices and cost adjustments are preserved. Review saved estimates after a technical style change; they are not replaced by the source estimate.
Swap Door Opening — One-Click Hinge Flip
Flips a door's hinge direction with a single click. Hover over a
door (orange highlight confirms the target), click to flip. The
handle repositions and all construction details update
automatically.
Vertical doors: left-hinged ↔ right-hinged
Horizontal doors: top-hinged ↔ bottom-hinged
Sliding doors: left-front ↔ right-front track
Double doors are unaffected
Swap Grain Direction — One-Click Grain Toggle
Toggles material grain between vertical and horizontal on any
door, drawer front, decorative panel, end panel, or blind face
panel. Hover (cyan wireframe highlights valid targets), click to
toggle. The UV mapping rotates 90° in place.
Grain overrides are saved per item and survive re-edits and Style
Picker transfers.
Blind face panel support: On blind corner
cabinets, the front-facing strip that closes the blind zone is
also a valid grain target. Click it to toggle its grain
independently of the main door panels — the override is stored
separately in the cabinet configuration and persists through edits
and rebuilds.
End Panel Tool — Decorative Side Cladding
Click any exposed cabinet side to place a correctly sized
decorative end panel. The panel uses the cabinet's Panel material
and panel shape preset automatically.
Activate the End Panel tool from the toolbar.
Hover over a cabinet side — orange wireframe highlights the
target face.
Click to place the decorative end panel.
To re-face an existing end panel, use the Asset Library's Panels
tab: click a preset card, then click the placed end panel to swap
its face geometry.
Asset Library
Browse, Place & Apply in One Panel
A persistent panel that serves as the creative hub for your entire
ML Cabinets asset collection. Browse and place saved cabinet
designs, swap door panels and handles, change drawer fronts,
update decorative panels, assign legs, apply materials, and
replace appliance items — all from a tabbed visual catalogue.
Library Categories
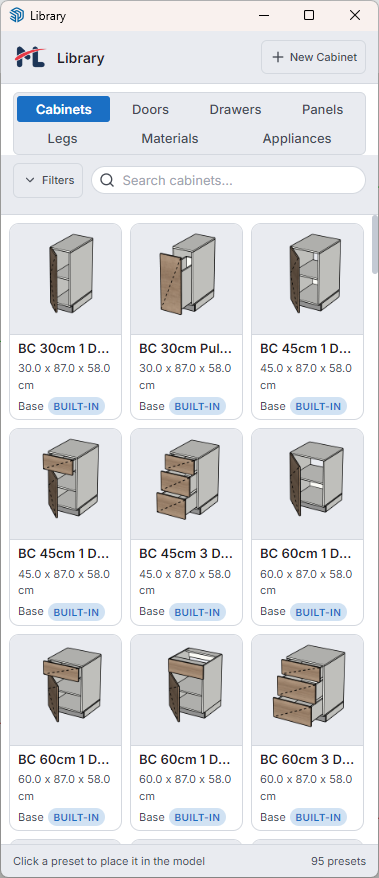
Cabinets — browse and place saved cabinet
presets. Click a card to build and enter Placement Tool.
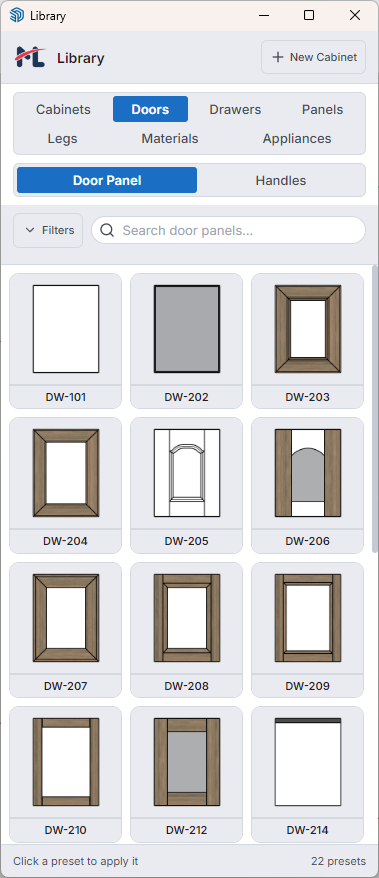
Doors — sub-tabs for Door Panels and Handles.
Click to activate Apply Preset Tool; click a cabinet to repaint
all doors. Alt/Option+click for a single door.
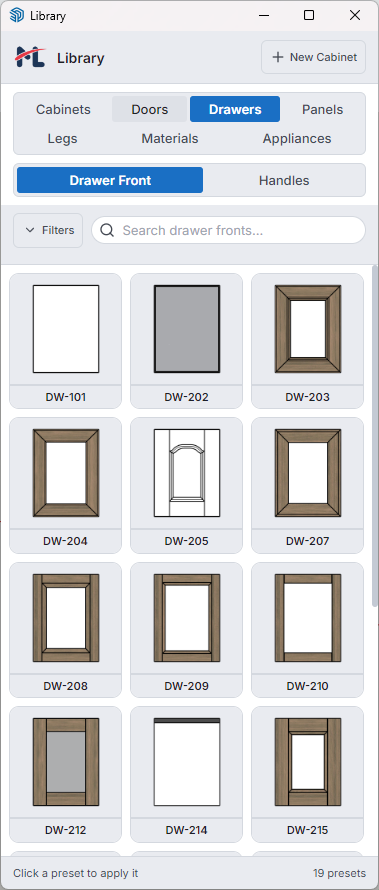
Drawers — sub-tabs for Drawer Front, Handles and Systems.
Drawers > Systems — browse kits, edit personal details/prices, duplicate a complete kit or add a selected four-part model. Click a preset, then click a cabinet to apply it to all regular and inner drawers, replacing their system overrides. Alt/Option-click a drawer to override only that drawer. Each application uses Automatic length; fronts, handles and false drawer fronts remain unchanged.
System search and filters — search by name, manufacturer, product code or description. Open Filters for All, Built-in or User Created source choices; source filtering and search work together. Add Selected Model is also inside the expanded Filters area.
Hardware — add, edit and duplicate hinges, mounting plates, standalone slides, lifts and stays.
Panels — End Panel and Decorative Panel
presets. Apply to Panel items via click or Alt/Option+click.
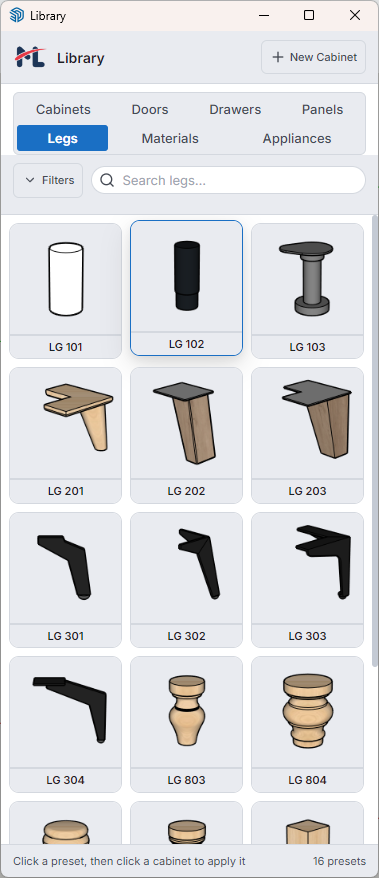
Legs — apply a leg preset to an existing
cabinet. This enables legs and updates the cabinet-level leg
style.
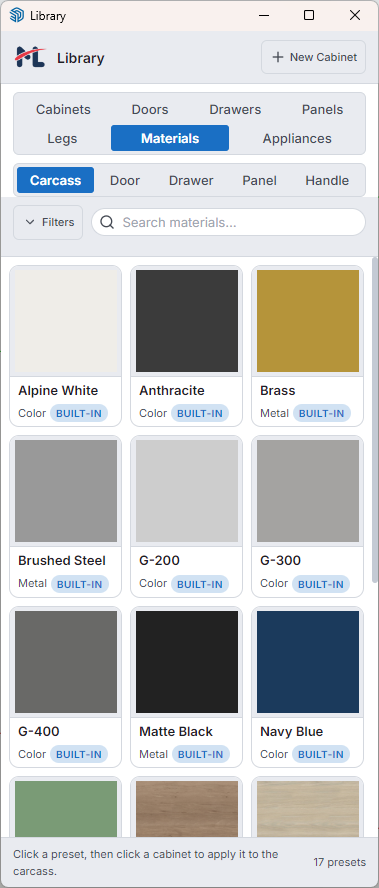
Materials — choose a target
(Carcass, Door,
Drawer, Panel, or
Handle), then apply a material preset to that
surface family. Alt/Option+click supported item targets for
single-item material overrides.
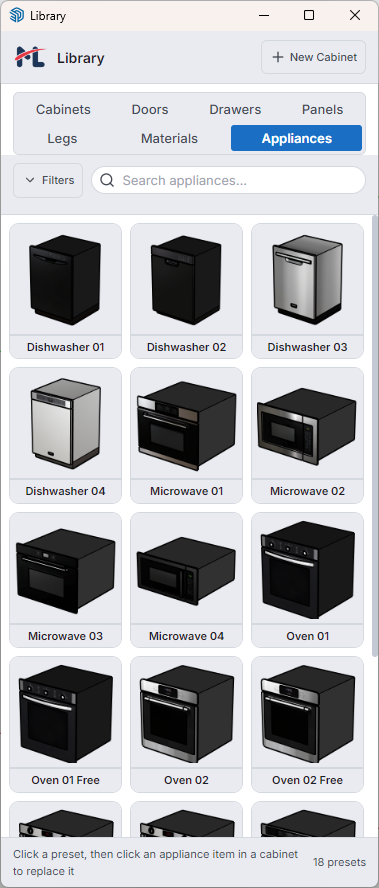
Appliances — click a preset, then click an
appliance item inside a cabinet to replace that appliance.
How Applying Works
Most styling tabs use the Apply Preset Tool. Click a preset card,
then click a cabinet to update all matching items in that cabinet.
Hold Alt/Option and click a single door, drawer, panel, or
handle target when you want only that item to change. Legs are
cabinet-level only, and Appliances are item-only.
Filters And Search
Each tab includes a search field and a
Filters button. Filters separate
All, Built-in, and
User Created
presets. Cabinets also filter by cabinet type, while Materials add
finish categories such as Wood, Marble, Metal, Color, and Glass.
Tip: The library panel stays open while you work
— place several cabinets in rapid succession without reopening it
each time.
Add to Library
Add to Library
Save a selected component or material image as a reusable library asset, with the product details and prices used by Cost Estimate.
Select the component in SketchUp, or select an imported PNG/JPG Image entity for a material, then click Add to Library.
Review Preset Name and Library Type. The extension suggests a type; choose the appropriate available type: Cabinet, Drawer System, Profile, Panel, Appliance, Handle, Leg, or Material. Complete any type-specific options, such as panel roles, material finish category and grain direction, or appliance behaviour.
Enter the optional Manufacturer / Brand, Product Code, and Description. These identify the product without changing the preset name.
Complete the pricing fields for the selected type using the guide below. You can leave unknown prices blank and edit them later.
Click Add to Library to save. If the name already exists, choose another name to keep both assets, or confirm Save Anyway to replace the existing preset. For cabinets, replacement saves the current configuration and captures a fresh thumbnail.
Library type
Pricing setup
Material
Choose Pricing Unit, then use + Add Thickness under Available Thicknesses. Enter each thickness in mm or inches and its own price per selected unit. For example, 8 mm and 18 mm can have different prices per square metre.
Handle, Leg, Appliance
Choose Piece and enter Price per piece for cabinet estimates. The estimator multiplies this rate by the number used in the cabinet.
Hardware: hinge or mounting plate
Choose Piece or Pair and enter the matching price. Set the hinge connection role and maximum opening angle; choose whether a mounting plate is included, separate, or not required.
Hardware: sliding door system
Choose Piece for one door's fittings or Set for a complete two-door opening. Select inset/overlay compatibility and fitting rules. If tracks are not included, enter their price per linear metre, rail-run count and length deduction.
Hardware: drawer slide
Prices use Pair. Add each nominal length with its Maximum travel (mm) and price per pair. The estimate selects the price for the resolved length and counts one pair per drawer box.
Drawer System
Prices use Set, with one nominal length, maximum travel and set price per row. Include metal sides, fittings and runners in the kit price; bottom/back boards and the decorative front are priced separately.
Hardware: lift or stay
Choose Piece, Pair or Set, enter a price and default quantity per opening, and specify how each hinge connection is treated.
Profile
Select Profile Role (Gola, Skirting, Molding, Edge, or Other). Linear metre (m) is fixed. Enter Price per m; the estimator uses the profile run length and keeps its charge separate from its finish material.
Panel
Choose Cost Calculation: From material (the default) uses the assigned material and thickness. From panel asset reveals the preset's pricing unit and price. Piece counts actual leaves/panels; m²/ft² uses finished width × height; m/ft requires Linear Price Basis set to finished width or height.
Cabinet
No separate pricing unit or unit-price fields appear. Set Cabinet Price in the cabinet dialog's General tab before saving the placed cabinet. Its selling price is separate from the calculated cost estimate.
Adding hardware: Open the Asset Library's Hardware category and click Add Hardware, or Duplicate an existing hinge, mounting plate, drawer slide, sliding-door system, lift or stay. No selected SketchUp component or 3D model is needed. Choose the hardware role, enter the product details and relevant specifications, then save. For slides, supply the width rule, rear clearance and drawer length offset as well as each available length, maximum travel and price. Duplicate a built-in preset to create an editable personal asset; the generic thumbnail represents the hardware type.
Panel pricing: Existing presets remain on From material until changed. Asset pricing changes costs only; the selected finish still controls appearance, and handles/hardware remain separate. Changing back to material pricing retains the stored asset price for later use. Pair and Set have no defined panel quantity and produce an incomplete estimate. Missing panel presets or prices also remain incomplete rather than falling back to material pricing. Estimate unit overrides must match the asset unit exactly. For a glazed panel, choose From panel asset and enter a price that includes the glass. With m² or ft², the estimate uses the complete panel's finished width × height, not the glass opening. There is no separate glass charge or glass-included setting.
Material units and thicknesses: Use the unit in which you buy or price the material, such as square metre (m²), square foot (ft²), linear metre (m), or linear foot (ft). The estimate group must use the same pricing unit as the material; changing the group unit does not convert its library price. A missing exact thickness or a mismatched unit leaves the estimate incomplete. Skirting is priced through its selected profile per linear metre; its separate material selection controls appearance only.
Prices: Use the same currency for all library prices. A blank price means not priced; zero means no cost. The estimate currency field labels the amounts and does not convert currencies.
Editing later: Use Edit asset on an eligible asset card or estimate row, update its product details or prices, and click Save Changes. User-created assets are editable; built-in assets require Development Mode. Metadata editing keeps the asset name and model intact. Cabinet asset cards have no Edit action, including in Development Mode. Place the cabinet, edit it in the model, then save the changed design through Add to Library using a new name or a confirmed same-name replacement.
Asset Pricing and Editing
Door leaf and drawer front selections default to DW-101 and cannot be deselected in their tabs. In both handle grids, None is the first option and the factory default. Select None to remove the cabinet-level handle and its cost; individual handle overrides remain independent. Clicking empty grid space leaves the current selection unchanged. Existing custom choices are preserved when reopening cabinets, and saved None choices are restored correctly.
Enabling Create Legs uses LG_101 when no leg preset has been chosen. Toggling legs off and on keeps an existing choice.
Use Duplicate in the card footer to copy any built-in or user asset. Enter a name, adjust product details if needed, and click Create Copy. The independent copy is stored in your external personal library with its existing models, textures, thumbnail and configuration. It is marked User Created, so it can be deleted and, except for cabinet assets, edited. None and other placeholder choices cannot be duplicated.
All asset cards use the same footer, with Edit, Duplicate and Delete in that order when available. Delete is always visible for user assets; cabinet assets have no Edit action. Confirming removes that personal asset and refreshes the picker. Built-in assets cannot be deleted. Cabinets that reference a deleted asset may report it as missing, so replace those references before removing an asset you still use.
Add to Library and Edit Asset provide optional Manufacturer / Brand, Product Code and Description fields. Use Edit in eligible card footers or the Edit asset pencil in estimate rows. User-created assets are editable; built-in assets remain read-only unless Development Mode is enabled.
Materials have a Pricing Unit and Available Thicknesses. Add each thickness and its price per selected unit, entering thickness in millimetres or inches. A finish category such as Wood or Metal does not decide the pricing unit. Leave unknown prices blank rather than entering zero.
The mm/inches selector starts in inches for imperial SketchUp models and mm for metric models. Each choice shows its own stock-thickness list and row count; + Add Thickness adds to the selected list. Both lists are saved together, including hidden rows. Existing thicknesses belong to mm. Estimates check both lists by actual physical thickness, so either stock system can be used in any project. Equivalent sizes such as 19.05 mm and 0.75 inches can only be added once per material.
Materials also have an optional Density (kg/m³) field. Enter a positive density from the supplier or leave it blank when unknown. One density applies to the material across its thicknesses. It is saved for future weight calculations and currently does not change cost estimates, calculate front weight, or choose lift strength. Existing materials keep their prices and can leave density unset.
Handles, legs and appliances have a single unit price; choose Piece for their cabinet estimates. Profiles have a price per Linear metre (m) only. In Add to Library or Edit Asset, select a Profile Role: Gola, Skirting, Molding, Edge, or Other. The profile picker combines independent Library and Role filters. Older unclassified profiles appear under Other. Their cross-section and finish do not create a second material charge. When correcting a legacy profile with another unit, enter a new price per metre instead of reusing the old rate.
Save Changes updates the library metadata and refreshes open library views and estimates. The asset name, references and model files remain intact. Existing assets receive missing fields without invented prices or replacement of saved prices and manufacturer information.
Cabinet assets have no separate Pricing Unit or unit-price fields in Add to Library. Set the selling price in General. To change a cabinet preset's design, use the edit-and-place workflow below.
Drawer System Presets
Select a drawer-system group or component and choose Drawer System in Add to Library, or open Filters and use Add Selected Model in the Asset Library's Drawers > Systems subtab. Exactly four direct child groups/components are required: Left Side, Right Side, Bottom and Back. Names are case-insensitive and every part needs useful 3D geometry. Keep fittings, runners, rails, glass and connectors nested inside their side parts; leave the decorative front out of the kit.
The four main parts: Left Side, Right Side, Bottom and Back.
Use a front-left-bottom origin, with X = width, Y = front to back, Z = up and the front at Y = 0. Bottom and Back must use the same board thickness. Custom Dynamic Component formulas must follow root LenX and LenY, keeping LenZ, fittings and board thickness fixed. Existing formulas are preserved. Ordinary four-part models receive simple role-based fitting; author a DC when detailed fittings must retain their dimensions. The browser preview approximates sizing and does not interpret custom DC formulas.
Height, authored width/depth, board thickness and board deductions are inferred from geometry and read-only. Re-add a changed model to update them. Fit limits, side/rear clearances, available lengths, maximum travel and per-length set prices remain editable. Duplicate copies geometry, supporting files and the thumbnail to a new personal asset, allowing a built-in kit to be priced without Development Mode. Metadata edits retain the existing asset identity and model files.
Saving exports SKP, DAE, metadata and a 256 × 256 PNG thumbnail to the permanent personal library outside the extension folder. Development Mode follows the existing built-in authoring policy. Back up the complete asset folder, including exported textures.
Profile Presets
Save any 2D cross-section — a gola rail, LED channel, decorative
cornice — as a named preset for the Profile item selector.
Important — Axis placement:
Place the origin on the front lower centre of the profile's
bounding box, on the edge that will sit against the cabinet
face.
Red axis (X) runs through the profile depth.
Green axis (Y) runs along the profile length.
Blue axis (Z) points upward from the profile and becomes the
extrusion height direction.
Panel Presets — Door Panels & Drawer Fronts
Save a flat panel (Shaker door, slab drawer front, end panel) and
assign it roles: Door Panel,
Drawer Front, Decorative Panel,
or End Panel. The preset appears in the
corresponding tabs automatically.
Important — Axis placement:
Place the origin on the bottom-right corner of the front face,
with the panel standing upright in its final cabinet
orientation.
Red axis (X) runs across the panel width.
Green axis (Y) runs through the panel thickness, from the
front face toward the back.
Blue axis (Z) runs up the panel height.
Tip — Nine-part panels: For decorative details
that should not distort when scaled (moulded frames, routed
profiles), build the panel as a Dynamic Component divided into a
3×3 grid. Corner pieces stay fixed; edge pieces stretch in one
direction; only the centre scales both ways.
Handle Presets
Save any 3D handle component as a reusable preset. Orient the
handle vertically with the centre as its pivot point. The saved
handle appears in both Door and Drawer handle pickers.
For unusual handle geometry, keep the saved preset aligned to the
standard vertical axis and use the Rotation
fields in the Doors or Drawers tab to adjust the final angle per
cabinet. This keeps one clean library asset reusable across
vertical doors, horizontal flap doors, and drawers.
Important — Axis placement:
Place the origin at the handle's centre point, on the mounting
centreline where the hardware should pivot and align to the
door or drawer front.
Blue axis (Z) runs along the handle's long direction. Save bar
handles vertical; drawer and flap-door handles are rotated
automatically when ML Cabinets places them, then adjusted by
any handle rotation value you set in the cabinet dialog.
Red axis (X) and green axis (Y) define the handle's width and
projection from the cabinet front.
In the Asset Library, door handles and drawer handles are applied
from their matching subtabs. Click a handle preset and then click
a cabinet to update all matching handles, or hold
Alt/Option and click a single door or drawer to override only
that item.
Leg Presets
Save cabinet legs as reusable presets, then apply them from the
Asset Library's Legs tab. Click a leg preset and
then click a cabinet to enable legs and assign that leg style to
the cabinet's toe-kick configuration.
Important — Axis placement:
Place the origin at the centre of the leg footprint on the
floor plane, not at one outside corner.
Red axis (X) and green axis (Y) run across the leg's width and
depth so ML Cabinets can size and mirror corner legs cleanly.
Blue axis (Z) runs up the leg height toward the cabinet base.
The leg is stretched to the cabinet toe-kick height from this
vertical reference.
Legs are cabinet-level settings, so they do not use
Alt/Option single-item override mode.
Appliance Presets
Save any volumetric 3D appliance (oven, dishwasher, microwave,
etc.) with two behaviour flags:
Important — Axis placement:
Place the origin at the appliance's front-bottom centre, on
the floor line of the visible face.
Red axis (X) runs across the appliance width, centred on the
opening.
Green axis (Y) runs through the appliance depth, from the
visible front toward the back of the cabinet.
Blue axis (Z) runs up the appliance height so fixed-size and
free-standing appliances land correctly in the opening.
Fixed Size — locks the appliance to its saved
dimensions (recommended for manufacturer-specified enclosures).
Free Standing — places the appliance at the
cabinet's floor level (for tall appliances like refrigerators).
In the Asset Library's Appliances tab, click an
appliance preset and then click an appliance item inside a cabinet
to replace that appliance opening. Appliance application is
item-only; it does not apply to the whole cabinet at once.
Material Presets — Custom Textures
Drag an image file onto the SketchUp viewport, select the Image
entity, and click Add to Library.
Drag a PNG or JPG onto the viewport to create an Image entity.
Select it and click Add to Library.
Choose the finish category (Wood, Marble, Metal, Color, Glass).
Click Draw Grain Line and draw two points along
the grain direction.
Enter any Manufacturer / Brand, Product Code, and Description.
Choose the Pricing Unit, then use + Add Thickness to enter each available thickness and its price per selected unit. Leave unknown prices blank.
Review the name and click Add to Library. The material is saved with its grain orientation and pricing details.
In the Asset Library's Materials tab, first
choose the target surface family: Carcass,
Door, Drawer,
Panel, or Handle. Then click a
material preset and click a cabinet to apply it to that family.
For Door, Drawer, Panel, and Handle targets, hold
Alt/Option and click a single matching item to create a local
material override. Carcass material is cabinet-level only.
Cabinet Presets — Save & Reuse Entire Cabinets
Save a fully configured cabinet — every dimension, layout,
material, handle, leg, appliance, and construction detail — as a
library preset with a clean thumbnail. Recreate the exact same
unit in any future project with a single click.
Select a placed cabinet.
Click Add to Library.
Review the preset name and optional product details. The selling price comes from General > Cabinet Price, so there are no separate pricing fields here.
Click Add to Library. If replacing a preset with the same name, confirm Save Anyway to save the updated configuration and a new thumbnail.
The preset appears in the Asset Library's Cabinets tab
immediately.
Edit and Replace a Cabinet Preset
Cabinet assets support duplication and deletion of user copies, but have no Edit action. Click the cabinet card to place it in the model, then use Edit Cabinet on the placed cabinet to adjust dimensions, layout, materials, hardware, selling price or estimate overrides.
There is no Save button in this dialog, and the library preset remains unchanged. To keep the modified design, select the placed cabinet and use Add to Library. Choose a new name to keep both versions, or enter the existing name and confirm Save Anyway to overwrite it. Overwriting saves the updated configuration and captures a new thumbnail of the placed cabinet.
The ordinary New Cabinet draft is kept separate from preset editing. User-created presets are editable normally; editing built-in presets requires Development Mode.
Prepare for Manufacturing
The Prepare for Manufacturing command converts
selected editable cabinet assemblies and standalone end panels into
cleaner manufacturing and cutlist parts. Use it after you finish
designing and scaling, because the baked parts are no longer the
same formula-driven Dynamic Component assemblies.
Current Scope
The selected cabinet is made unique first, so matching cabinets
elsewhere in the model are not changed.
Modular side-panel assemblies are baked into single solid
side-panel components.
Grooved side panels keep their groove profile.
Butt/recessed side panels remain simple rectangular side panels.
Door leaf panels, corner door leaf panels, drawer fronts, panel
item faces, and standalone end panels are copied into single
manufacturing face components without a boolean union.
After each door face is baked, one blind circular hinge-cup
pocket is cut from its rear face for every configured hinge.
Single left/right doors, top/bottom doors, both double-door
leaves, and both corner-door leaves use their assigned physical
hinge edge. Third and fourth hinges are evenly spaced between
the configured end offsets.
Radius, depth, centre setback, end offsets, and rear-face fit are
validated before cutting. If any cup cannot be cut cleanly, the
complete operation is cancelled and the original cabinet is
restored.
Source face UVs are preserved, then matching shared edges are
softened rather than erased when the adjacent face angle is 30
degrees or less, so grain direction survives while shallow
construction seams are hidden.
Handles, drawer boxes, opening indicators, shelves, and other
hardware remain separate components.
The cabinet is marked with manufacturing metadata for future
tooling.
How To Use It
Select one or more placed ML cabinets, standalone end panels, or
a mix of both.
Click Prepare for Manufacturing on the toolbar,
choose
Extensions ML Cabinets Prepare for Manufacturing,
or use the ML Cabinets context menu.
Confirm the warning dialog.
Confirm the result in the model: side panels and front face
panels should remain in place but become single
manufacturing-ready components. Face-panel UVs are preserved and
matching shallow-angle seams are softened.
Note: Keep an editable copy of a cabinet if you
expect to keep changing its construction or scaling it later.
Prepare for Manufacturing only bakes supported side panels and
front parts. It does not generate hinge, lift-system, screw, dowel,
or other hardware holes. Handles, drawer boxes, opening indicators,
shelves, and other part families stay editable.
Opening Indication Lines
ML Cabinets automatically draws architectural opening-direction
symbols on every generated door leaf and drawer front.
Opening Type
Indication
Hinge-left door
Two dashed lines from the left-edge midpoint to the opposite corners
Hinge-right door
Two dashed lines from the right-edge midpoint to the opposite corners
Hinge-top door
Two dashed lines from the top-edge midpoint to the lower corners
Hinge-bottom door
Two dashed lines from the bottom-edge midpoint to the upper corners
Double door
Each leaf receives its own hinge-direction symbol
Sliding Door
Each panel receives a horizontal arrow toward its slide direction
Drawer
One dashed diagonal line from top-left to bottom-right
All indication lines are placed on the Indications
tag inside the ML Cabinets layer folder. Toggle
that tag off for clean render views, or turn it on for elevation
drawings and installation communication.
Tip: Because the indication lines are Dynamic
Component children of the door or drawer wrapper, they resize
automatically when the cabinet is scaled.
Cabinet Schedule Manager
Open Schedule Manager from the toolbar or Extensions ML Cabinets. Its Schedule, Cost and Quotation tabs serve different parts of the same project workflow.
Sheet
Use it for
Where the amounts come from
Schedule
Cabinet quantities, selling prices and cost status
Model cabinets, Schedule selling-price edits and saved cabinet estimates.
Cost
Internal project costs and estimated profit
Saved cabinet costs plus project expenses entered once.
Quotation
Customer-facing selling lines, charges, discount and tax
A saved commercial document initialized from cabinet selling prices.
Cost is not selling price. Updating cabinet costs does not change Cabinet Price or a saved quotation. Project expenses do not automatically become customer charges. Save the SketchUp model to retain project expenses, quotations, revisions and invoice details.
Check saved cabinet costs in Schedule
Schedule groups matching cabinet configurations, while counting each physical occurrence, including cabinets nested inside groups or repeated parent components. The example shows two base cabinets and one wall cabinet.
Look at Unit Cost, Total Cost and Cost Status. Use Columns if a column is hidden by your preferred layout.
Compare cost with Unit Price and Subtotal, which are selling amounts. Double-click the selling Unit Price to edit it where appropriate.
Tick row checkboxes to select cabinets for a cost update. A grouped row selects all its occurrences. Clicking the row itself selects matching cabinets in SketchUp; it does not tick the update checkbox.
Check the selected count before updating. Selection survives sorting and filtering; the toolbar reports selected occurrences hidden by filters.
If identical cabinets have different saved unit costs, Unit Cost shows Varies and the total adds their individual amounts: costs of 100 and 120 give a total of 220. Different selling prices can also show Varies. Missing or unusable estimates leave the full cost total incomplete, with the known subtotal shown separately.
Cost status
Meaning and next step
Checking
Read-only comparison is still running; wait for the result.
Up to date
The saved estimate matches the checked cabinet and library data.
Prices changed
Current library rates differ from the accepted rates. Review them if you want to adopt the new prices.
No saved estimate
Initialize an estimate through the cabinet editor or Update Costs using current prices.
Cabinet changed / Construction rules changed
Review or recalculate the affected estimate; individual cabinet review may be needed.
Incomplete / Asset unavailable
Resolve missing prices, selections, assets or incompatible items before relying on a complete total.
Currency unresolved / Currency mismatch
Check project currency and the saved estimate currency; amounts are not converted.
Unavailable
Review the cabinet individually before trying a batch update.
Opening Schedule Manager or clicking Refresh checks the saved data without accepting new rates. Prices changed does not by itself invalidate a usable saved cost: the Cost sheet can continue to total the accepted older rates while identifying them for review.
Review and apply a batch cost update
Tick the intended rows, then click Update Costs or Review changes.
Choose the Scope: Selected cabinets, Outdated or missing, or All cabinets (ignores filters). The last option includes the whole model, even when rows are hidden.
Choose Prices using the table below. Leave Reset manual price overrides unchecked to retain cabinet-only rates; check it only when you intend to remove them. The dialog shows how many scoped cabinets contain overrides.
Click Prepare review. Preparation can be cancelled. Read any exclusions before proceeding.
Compare Old saved cost, Proposed cost, Change and Details. Expand rate details and check any unpriced groups. Nothing is written while you prepare or inspect the review.
Click Apply reviewed costs to save the reviewed update, or Cancel to leave the estimates unchanged. Save the SketchUp model afterward.
Prices option
Use it when
Initialize / accept current prices
You want current library rates or need to initialize missing estimates. Manual overrides remain unless explicitly reset.
Recalculate quantities with saved prices
You want to retain accepted rates while updating quantities. This cannot initialize a cabinet that has no saved rates.
Applying an update changes cost metadata in one SketchUp Undo operation; it does not rebuild cabinet geometry or change selling prices. If cabinet configuration, project settings or library data changes after review, prepare a fresh review before applying.
For a cabinet under a shared parent component, include every affected occurrence or make the parent unique first. Read the exclusion reason rather than assuming a skipped cabinet was updated.
Use the Cost sheet and project expenses
Open Cost and read Saved cabinet costs, Project costs, Estimated project cost, Cabinet selling value and Estimated profit.
Use By cabinet to compare cabinets. Click a cabinet name to expand its saved categories and Cabinet allowances. Select cabinet in model identifies the corresponding model cabinets.
Use By category to review material, hardware and other consumed-item totals. Different rates, variants and currencies remain distinguishable.
Under Project costs, click Add cost, enter a description and amount, and press Enter or leave the field to commit the edit. Escape cancels an uncommitted edit; Remove deletes the expense. Blank amounts count as zero and negative values are rejected.
Use Filter cabinets to narrow the visible list. Full-project summary totals remain separate from the visible-cabinet subtotal, which excludes project expenses.
Project expenses apply once per model, not once per cabinet. For example, site transport incurred once belongs here; shipping charged separately for each cabinet belongs in that cabinet's allowances. Avoid entering the same expense in both places.
Estimated project cost = saved cabinet costs + project costs. Estimated profit = cabinet selling value − estimated project cost. This profit is before quotation discounts and taxes. It is unavailable when required estimates are missing, incomplete, stale from cabinet changes or in incompatible currencies. Usable saved costs at older library rates can still contribute, with their older-rate status displayed.
Create and issue a quotation
Set a project currency in Settings and review the cabinet selling prices. Optional Company details seed new quotations; existing saved documents retain their own company details.
Open Quotation New quotation. Choose All cabinets or Selected cabinets. For a selection, tick the Schedule checkboxes first. Schedule filters alone do not select the quotation's scope.
Review Document details: company, client, project, quotation number, issue date and validity date. A blank number receives a generated number when the draft is saved. An issue date, client name and document number are required before issue.
Review Selling line items. Each starts from a cabinet occurrence's selling price; different prices remain distinct. Edit descriptions, quantities and unit selling prices as needed. Add line creates a manual line; its remove button deletes it. Zero selling prices are allowed but flagged for review.
Use Add customer charge for a customer-facing charge such as delivery or installation. This is separate from an internal project expense, even if both are described as delivery.
Choose a fixed or percentage discount, enter any tax label and percentage, and add terms. Verify the displayed total. A positive tax percentage requires a tax label; a discount cannot exceed the subtotal.
Click Save draft. Review the saved document, then click Issue to record it as issued and lock its commercial fields. This does not email or send the quotation; export it to share with the customer.
Use Mark accepted after the customer accepts an issued quotation. Use Create revision when an issued or accepted quotation needs changes; it creates a new editable draft with a new number and a higher revision while retaining the previous saved document.
Worked example in the screenshot: two base cabinets at 2,500 and one wall cabinet at 1,800 make selling lines of 6,800. Delivery charged to the customer adds 500, giving a subtotal of 7,300. A 10% discount deducts 730, leaving 6,570; example tax at 10% adds 657, giving a quotation total of 7,227 EGP. These percentages demonstrate the calculation and are not a prescribed tax rate.
Line amounts and customer charges are rounded to two decimals before totaling. The discount applies to that subtotal; percentage tax applies after the discount. Cabinet estimates and project expenses are not added to a quotation automatically.
Keep a draft in sync with scene changes
A quotation is a saved commercial snapshot, not a live schedule. Editing cabinets or their costs does not silently rewrite it.
Open the editable draft and click Update draft from scene….
Review proposed Add, Replace and Remove changes. Check only the changes you want; this review can propose additions from the current scene, including cabinets outside the draft's original selection.
Click Apply selected changes, then Save draft. Cancel closes the review without applying it.
Replacing a source line replaces its manually edited description, quantity and selling price. Unchecked lines remain unchanged; manual lines without cabinet source references are retained. Issued and accepted documents require a revision before editing. If project and quotation currencies differ, resolve the currency review before adopting scene prices.
When switching documents with unsaved changes, choose Save and continue, Discard changes or Cancel. Save the SketchUp model to retain the document history.
Export a schedule, cost sheet, quotation or invoice
The shared Export popup is available from any sheet. Choose its Document and output format; saving or issuing a document does not itself produce a file.
Choose Excel Workbook to save a formatted .xlsx report for any of the four document types. It includes numeric amounts, saved totals, currency formatting and cabinet previews where available, with headers and page settings for printing. Schedule keeps the current filters and visible columns; Cost keeps the selected expense scope; quotations and invoices use their saved document values. Missing monetary values remain explicitly incomplete. This is an exported report: changing a quantity or price in Excel does not automatically recalculate its saved totals or update the SketchUp model. Excel export works offline and does not require Excel to be installed. The writer loads only when requested; a progress message appears while the workbook is generated and saved.
Document
Export scope
Current Schedule
Currently filtered rows and visible columns.
Cost sheet: Whole project — includes project expenses once
All cabinet costs plus the project's one-time expenses.
The visible Cost-sheet cabinet scope, without project expenses.
Saved quotation
The selected saved document's selling lines and charges, independently of Schedule filters.
Invoice from saved quotation
Saved invoice amounts initialized from the selected saved quotation.
For a quotation, Save draft first, then choose Saved quotation and select the saved document. Choose Excel Workbook for a formatted spreadsheet or Printable HTML for the customer document. Confirm Export and choose the destination in SketchUp's file picker. Open the HTML file in a browser to print or save it as PDF.
Create invoice details and record a deposit
In Export, choose Invoice from saved quotation, then select the source quotation. If it is still a saved draft, tick the confirmation that you reviewed it for invoicing.
Leave Saved invoice on Create invoice details for a new invoice. Enter invoice number, issue/due dates and payment terms. A blank invoice number receives a generated number when saved.
Click Add payment / deposit for each payment; enter its date, description and amount.
Click Save invoice details, then check Saved total, Paid and Balance. In the example, a quotation total of 7,227 and a deposit of 2,000 leave a balance of 5,227 EGP.
Choose Excel Workbook or Printable HTML and confirm Export. To export the same invoice later, select it under Saved invoice instead of creating another one.
The invoice retains the saved quotation's commercial amounts rather than live cabinet costs. A saved invoice's commercial identity and amounts remain fixed; payments can be updated through Save invoice details. Cancelling the file picker does not remove invoice details already saved in the model.
Stat Cards
Four summary cards at the top show: total cabinets, unique
configurations, total project value, and the time the schedule was
last generated.
Schedule Table Features
Feature
Detail
18 columns
Row number, thumbnail, name, ID, category, quantity, unit
price, subtotal, width, height, depth, door count, drawer
count, shelf count, cost selection, unit cost, total cost, cost status
Sortable
Click any column header to sort ascending/descending
Filterable
Text columns support substring matching; numeric columns
support comparison operators (>, <, >=, <=, =)
Column presets
Minimal, Standard, All Details — switch visible columns in one
click
Row density
Compact, Normal, Comfortable row heights
Inline editing
Double-click Name or Unit Price to edit directly in the table
Row click
Select and zoom to matching cabinets in SketchUp
Client Information
A collapsible panel records client name, mobile, email, and address
— saved in the SketchUp model file and included in exports.
Export
Export Excel — formatted .xlsx reports for Schedule, Cost, saved Quotation and Invoice, with saved values and embedded previews.
Export HTML — print-ready HTML with thumbnails,
totals row, and date. Open in any browser and print or save as
PDF.
Automatic Layer Organisation
Every time a cabinet is placed, ML Cabinets sorts every component
into a named layer inside a dedicated
ML Cabinets layer folder — with zero manual effort.
Layer
What It Contains
Carcass
Side panels, base, top, back, toe kick, shelves, blanks
Doors
All door leaf instances
Drawers
Drawer box carcasses and drawer face wrappers
Panels
Decorative panels, drawer faces, end panels, separators,
dividers
Legs
All leg instances
Handles
Door and drawer pull handles
Profiles
Decorative profile strips
Tip: Toggle the Doors layer off in
SketchUp's Tags panel to hide all doors and inspect the carcass
construction. Toggle layers to create selective presentation views.
Context Menu & Help
Right-Click Context Menu
Right-click in the SketchUp viewport to open the
ML Cabinets context menu. It gives quick access to
common commands without leaving the model.
New Cabinet
Edit Cabinet
Add to Library
Style Picker
Open / Close
Prepare for Manufacturing
About Dialog
Open About ML Cabinets from the toolbar or
Extensions ML Cabinets About. The dialog shows
the installed extension version, SketchUp version, Ruby version,
author information, and a View User Manual button.
Built-In User Manual
Open the manual from the About dialog or
Extensions ML Cabinets User Manual. The manual
is stored locally with the extension, so it works offline and can be
used on-site without an internet connection.
Development Mode
Development Mode is for testing extension changes without restarting
SketchUp after every edit.
Activate it by either:
Creating a .dev file in the
ML_Cabinets plugin folder.
Setting the ML_CABINETS_DEV=1 environment variable
before launching SketchUp.
When active, ML Cabinets prints a [DEV] notice in the
Ruby Console and exposes development utilities.
Utility
What It Does
reload_ml_cabinets
Hot-reloads the extension Ruby files in load order
ML Cabinets Dev menu
Adds development commands to the Extensions menu
mlc_debug(true/false)
Turns verbose Ruby Console logging on or off
mlc_version
Prints the loaded ML Cabinets version
Note: Development Mode is intended for extension
development and troubleshooting. Normal users do not need to enable
it.
Shortcuts & Tips
Every ML Cabinets command can be assigned a custom shortcut in
SketchUp's Shortcuts preferences. Filter for
ML Cabinets to see the available commands.
Placement Tool Shortcuts
Key
Action
Cycle insertion corner
Toggle bottom / top anchor
[]
Rotate 90° counter-clockwise / clockwise
Esc or Space
Cancel placement
Click
Place cabinet at cursor position
Interactive Tools
Tool
Activation
Exit
Open / Close
Toolbar button or Extensions menu
Esc or switch tools
Swap Door
Toolbar button
Esc, Space, or switch tools
Swap Grain
Toolbar button
Esc, Space, or switch tools
End Panel
Toolbar button
Space or switch tools
Style Picker
Toolbar button
Esc (twice to fully exit)
Prepare for Manufacturing
Toolbar button, Extensions menu, or context menu
Command completes immediately
Style Picker
Action
Behaviour
Click (pick mode)
Pick source cabinet style
Click (apply mode)
Apply full style to target
Alt/Option+Click (pick mode)
Open property filter dialog
Esc
Return to pick mode / exit
Asset Library
In Edge Bands, select a preset and click cabinets to replace their existing strips. Alt/Option limits application to one banded panel, including when its core or strip is clicked. Edge choices remain in New/Edit Cabinet.
Action
Behaviour
Click preset card
Place a cabinet, apply to all matching cabinet items, or
start the relevant item tool depending on the active tab
Alt/Option+click item
Apply supported door, drawer, panel, handle, or material
presets to one item only
Materials target buttons
Choose whether the selected material affects Carcass, Door,
Drawer, Panel, or Handle surfaces
Appliances tab
Click an appliance item in a cabinet to replace it
Pro Tips
Use the Style Picker as a batch updater. When a
client asks to change every base cabinet's door style, pick the
reference cabinet once and click every target — faster than editing
each one individually.
Zero means auto-fill. Setting a group or item
height to 0 tells ML Cabinets to calculate the remaining space
automatically. Use this for flexible zones that adapt to the cabinet
height.
Save your go-to designs. After configuring your
most-used cabinet, click Add to Library to save it as a preset. Your
library grows with your practice and makes every future project
faster.
Use Bulk Edit for project-wide changes. Select all
cabinets, open Edit, change a single field (e.g., depth), and Apply
— every cabinet updates while keeping its individual configuration.
Set back panel type before shallow drawers. Closed
backs reduce drawer-box depth by the back-panel thickness. On
shallow cabinets, choose the back construction before finalising
drawer layouts.
Do not compensate for the 90 cm handle threshold.
Door handles automatically switch from top-edge placement below
90 cm to bottom-edge placement at or above 90 cm from the floor.
Use offsets only for fine tuning.
Use per-item material overrides deliberately.
Cabinet-level material changes do not replace item-level overrides.
Use overrides for intentional exceptions, not for every opening.
Nine-part panels prevent distortion. Decorative
door and drawer panels should use fixed corners, one-axis edge
stretchers, and a two-axis centre fill so moulded details keep
their proportions when resized.
Place profile axes carefully. Profile presets
should use the front-bottom-centre origin, with axes aligned exactly
as described in the Profile Presets section.
Enable Fixed Size for real appliances.
Manufacturer-specified appliances should not stretch with the
cabinet; save them with Fixed Size enabled.
 Cabinets
Buy a license
Cabinets
Buy a license