 CabinetsStart a free trial
Your first cabinet.
From an idea to your model.
Start with a simple base cabinet. Set its size, choose the storage and finishes, then place it in SketchUp. You can return to the design and refine it later.
Install the extension.
Download the RBZ for your edition from Gumroad. In desktop SketchUp, open Extension Manager, choose Install Extension and select the downloaded RBZ. Follow the download’s activation instructions and make sure Dynamic Components is enabled.
The current Full listing supports SketchUp 2024 and later on Windows and macOS. Check your edition’s product page for its download, included library and license details.
Choose a base cabinet and its dimensions.
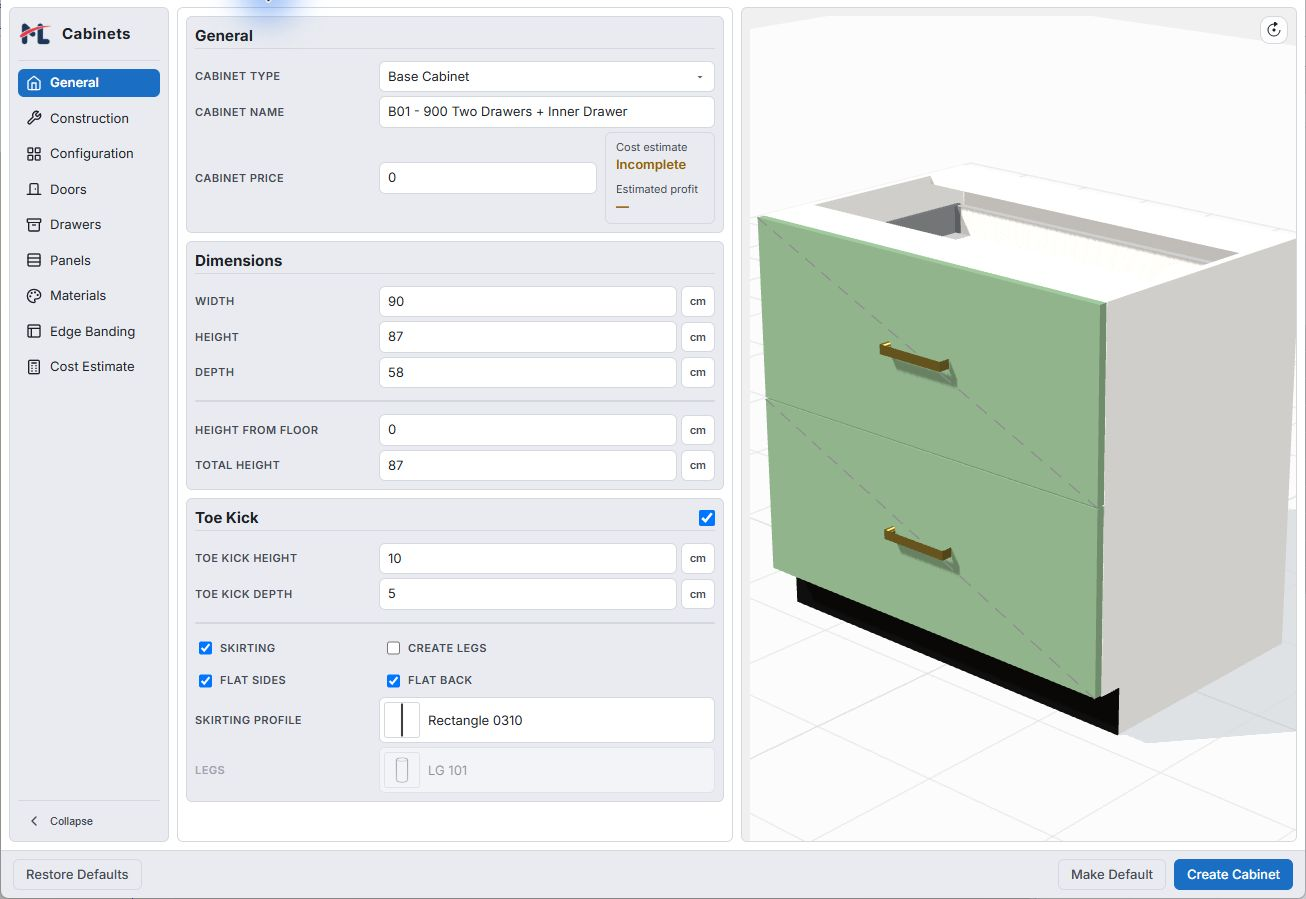
Open New Cabinet from the ML Cabinets toolbar or Extensions menu. In General, choose Base Cabinet. For this example, use a width of 90 cm, a height of 87 cm and a depth of 58 cm. Review the toe kick and skirting settings in the same tab.
 Enlarge
Choose your openings and storage.
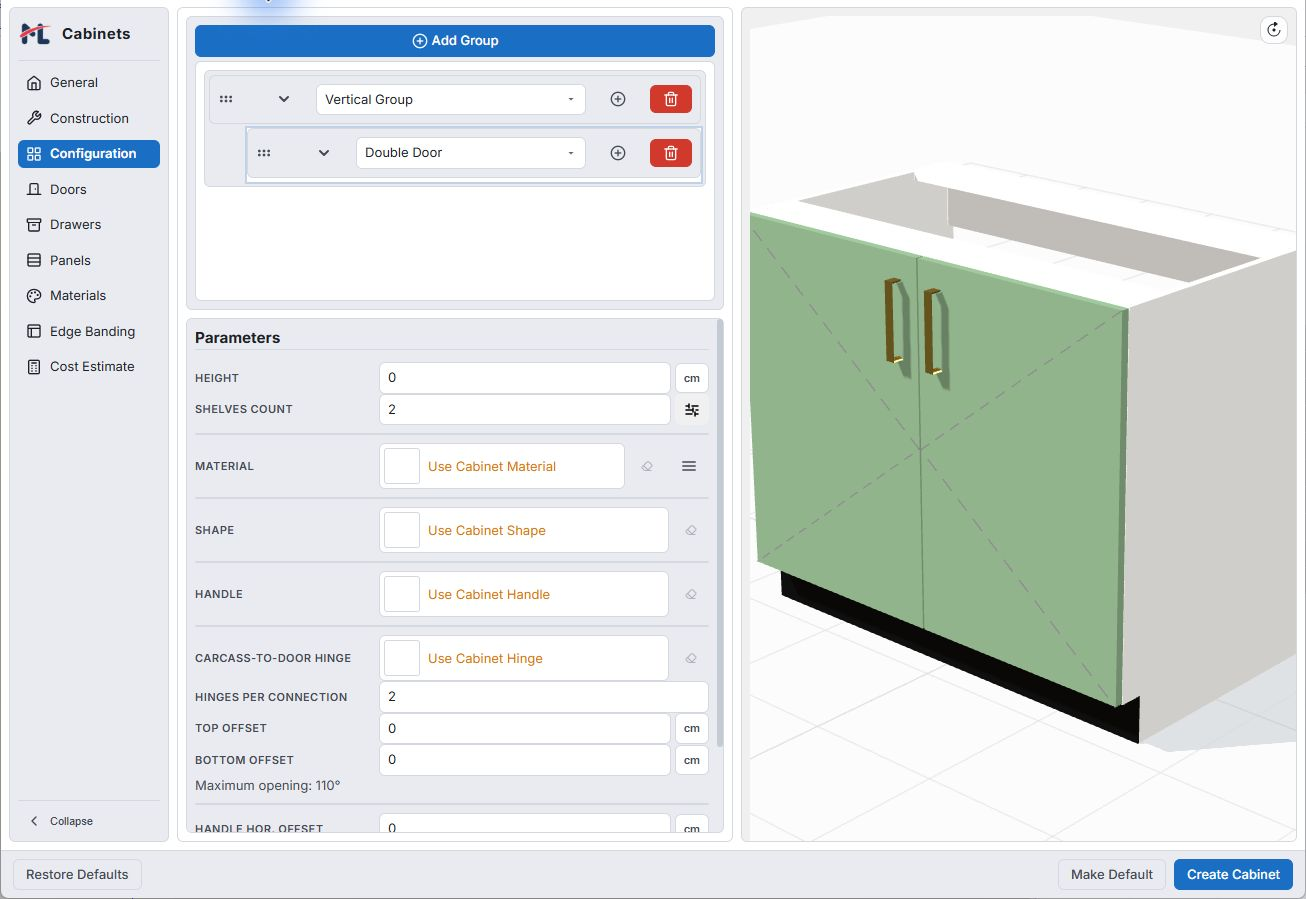
In Configuration, add or select a group and choose its items. Use drawers for a drawer cabinet, or a double door with shelves. Select an item’s row to see its parameters. The example below shows a double-door opening in a separate 100 cm cabinet.
Set the shelf count and open Adjust Shelf Spacing to choose equal or custom clearances. Inner drawers can be configured within an opening when your design needs them.
 Enlarge
Choose construction and finishes.
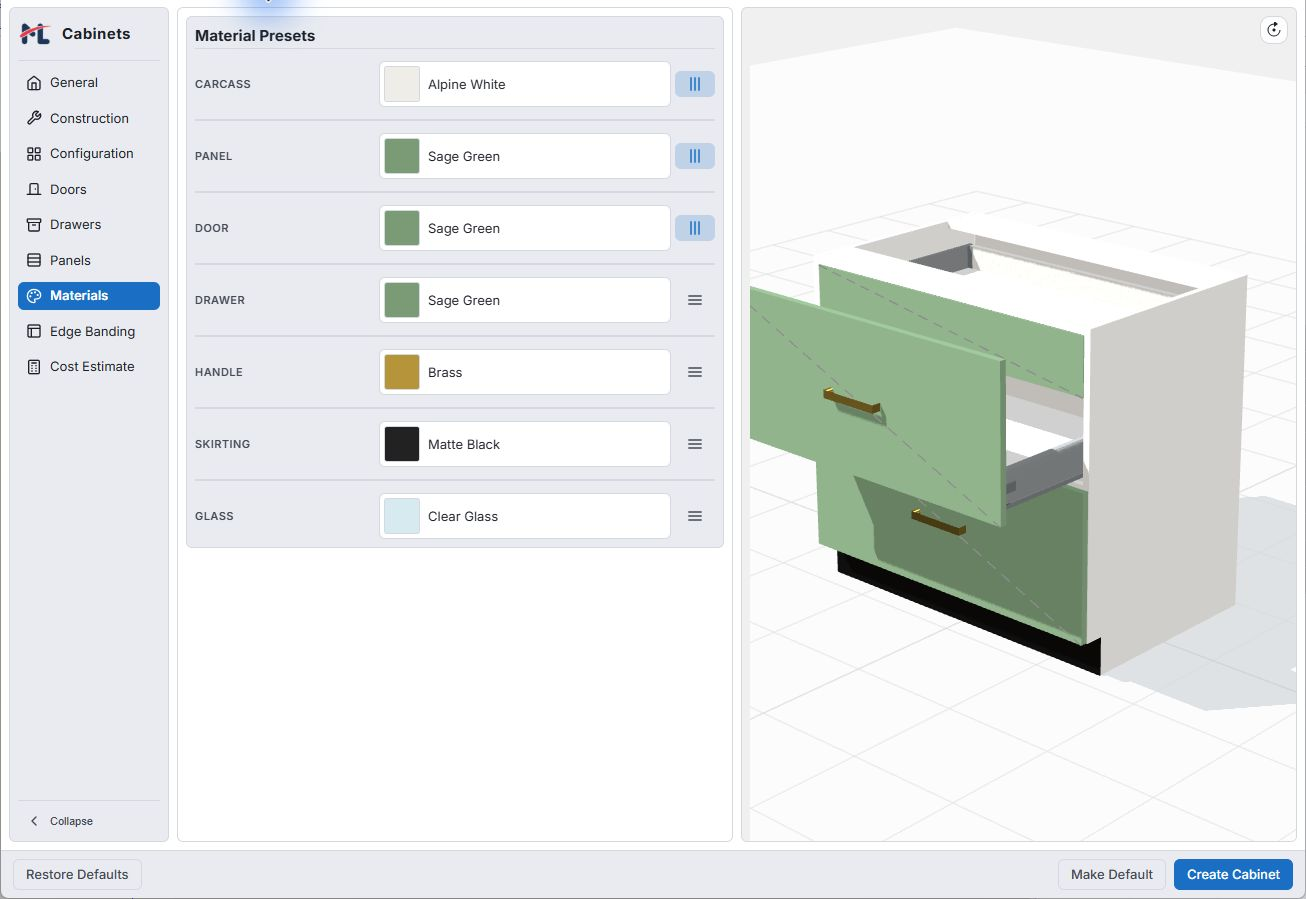
Review Construction for the panel and back arrangement. In Materials, choose separate carcass and front finishes. Then review handles, drawer systems and edge bands as needed. Your available assets depend on the edition and your personal library.
 Enlarge
Preview, then place the cabinet.
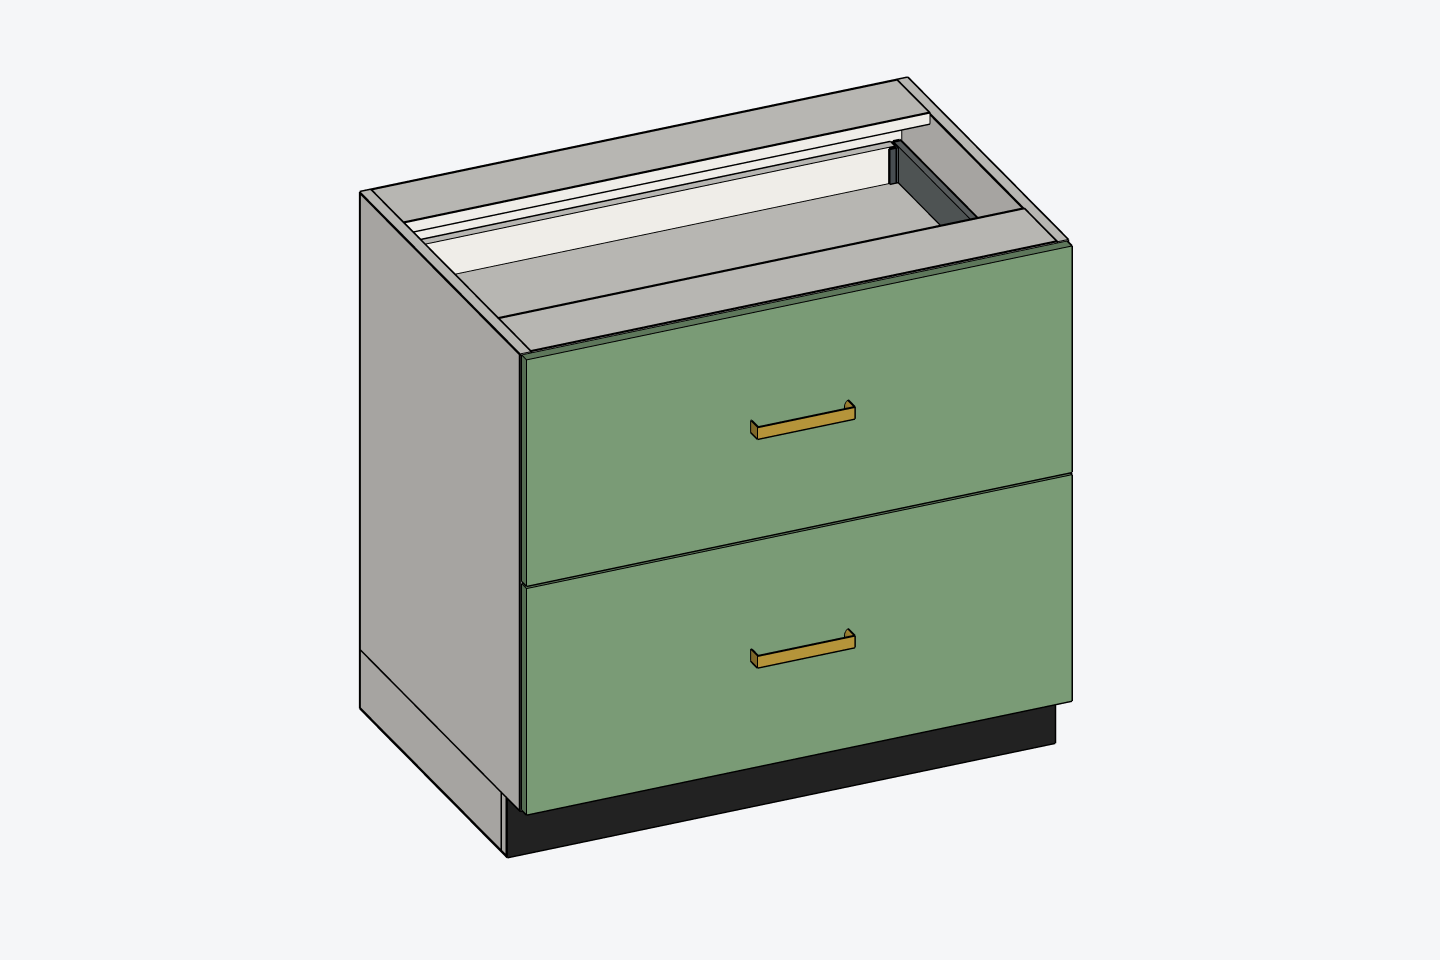
Check the live 3D preview. Click Create Cabinet, then click in the SketchUp viewport to place it. Select the placed cabinet and use Edit Cabinet to return to its controls. Use the Open / Close tool to explore supported openings.
 Enlarge
Read the placement instructions · Learn how to edit it later
Review the estimate and the project.
Open Cost Estimate to review quantities, rates and any items needing a price. An incomplete estimate needs attention before it can support a project decision. The Schedule Manager brings cabinet and project information together; quotations use customer selling prices separately from internal estimated costs.